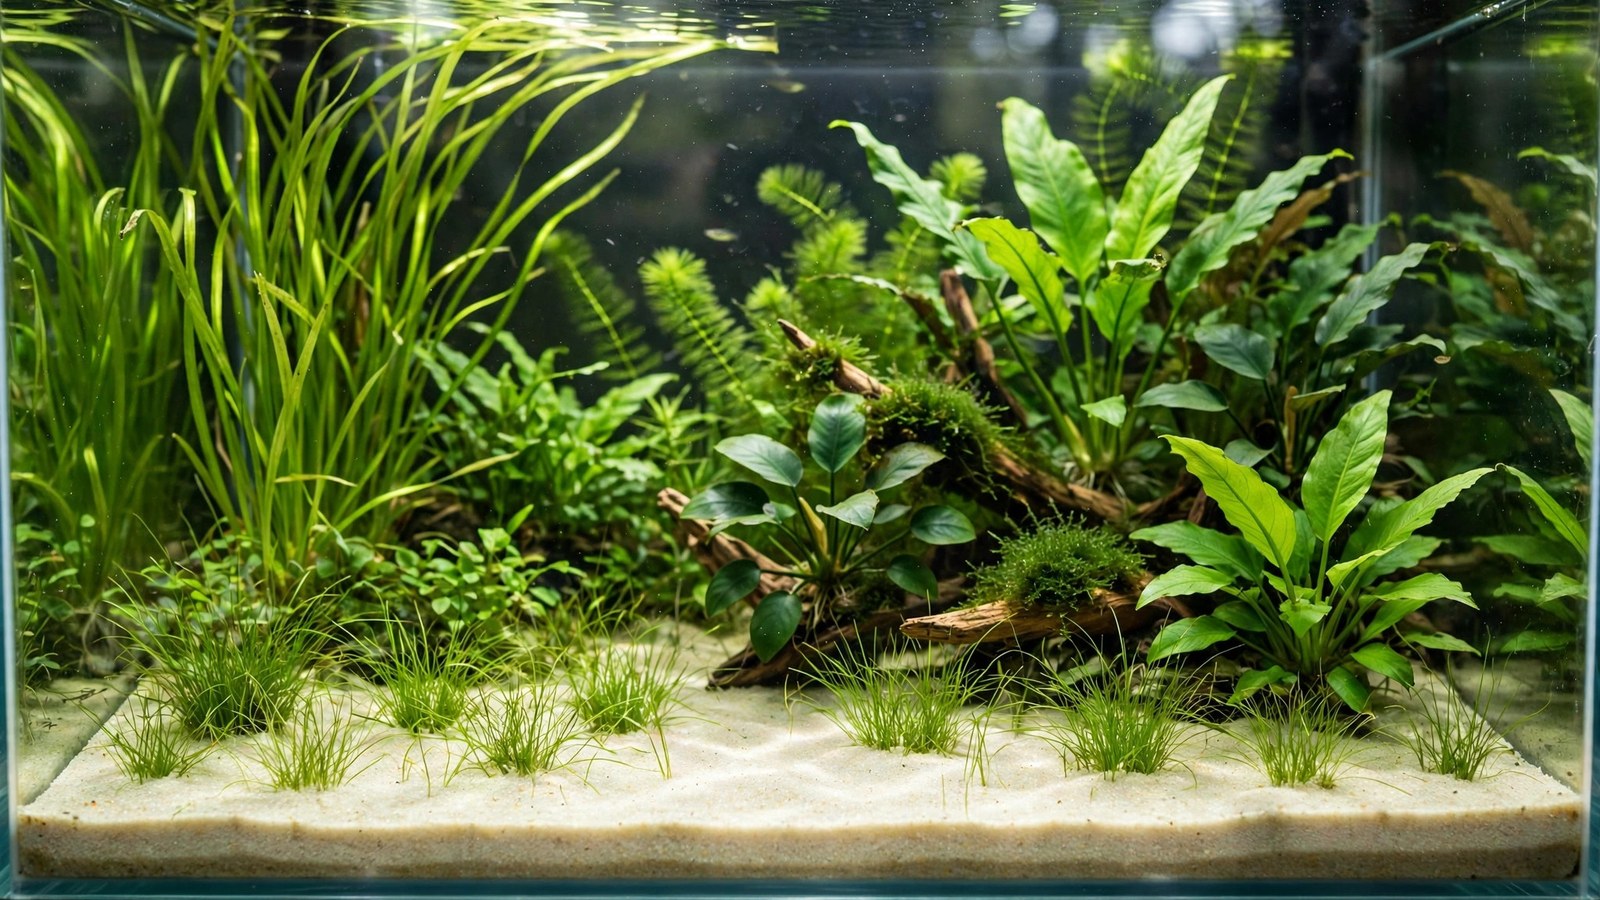
If there's one substrate the experienced hobby quietly agrees on, it's pool filter sand: a 50-lb bag for the price of a pizza, uniform grains that plant beautifully, pre-washed clean, and completely inert. It's the default recommendation for budget planted tanks, corydoras colonies, and anyone who wants a natural look without a premium price. This guide covers how to buy it, prepare it, plant in it, and get the most out of the cheapest good substrate in the hobby.
What Pool Filter Sand Is (and Why It's Perfect)
Pool filter sand is graded silica sand manufactured for swimming pool filters — typically 20-grade, ~0.45–0.55 mm uniform grains. The pool industry needs sand that filters consistently without channeling, which means the grains are unusually uniform in size and pre-washed. Those same properties make it an excellent aquarium substrate:
- Uniform grains — no powder-fine dust fraction to cause compaction, unlike play sand.
- Pre-washed — far cleaner out of the bag than any other bulk sand (though you still rinse).
- Chemically inert silica — no effect on pH, KH, or GH. What your tap makes is what you get.
- Smooth, rounded grains — gentle on corydoras barbels, loach bellies, and stingray discs.
- Natural tan/cream color — looks like a riverbed, brightens the tank, and shows off dark fish beautifully.
Buy it at pool supply stores, hardware stores, or home centers — a 50-lb bag typically costs less than a single small bag of branded aquarium sand. Any brand is fine; it's a commodity. Avoid "filter sand" blends with added clarifiers or antimicrobial treatments (rare, but check the label — you want 100% silica sand).
Preparation: The 10-Minute Rinse
Pool filter sand is the cleanest bulk substrate you'll buy, but rinse it anyway. Work in 5–10 lb batches in a bucket: fill with water, churn with your hand, pour off the cloudy water, repeat 3–5 times until the runoff is nearly clear. Compared to the 10+ rinses blasting sand needs, this is quick.
One thing not to do: don't boil it, don't bleach it, don't bake it. It's clean mineral sand — a rinse is all it needs. Chemical treatments add risk for zero benefit.
Planting in Pool Filter Sand
Pool filter sand is genuinely pleasant to plant in: stems push in with light pressure, and the uniform grains settle back around the stem base and grip it. Technique notes:
- Use planting tweezers for stems and carpets — push the plant in at a slight angle, then release and let the sand collapse around it. Straight-down planting in any sand tends to pop back out.
- It's inert — this is the big one. Sand feeds plants nothing. Heavy root feeders (swords, crypts, vallisneria) need root tabs in a grid from day one; stem plants and epiphytes need liquid fertilizer in the water column. Follow our inert substrate feeding system and your sand tank will grow indistinguishably from an aquasoil tank.
- Carpets love it. Dwarf hairgrass, Monte Carlo, and Marsilea spread readily through uniform sand — arguably easier than through coarse gravel. HC Cuba works too with CO2.
- Depth: 2–3 inches (deeper in back for heavy root feeders). Uniform grains resist compaction well, but don't exceed 3 inches in the front — see our depth guide.
The Compaction Question
"Does sand compact and kill roots?" — the hobby's perennial sand anxiety. The honest answer: uniform pool filter sand compacts far less than people fear. The horror stories come from play sand (wide grain-size distribution — fines fill every gap) or very deep beds. With 20-grade uniform sand at sensible depth:
- Water circulates adequately through the bed for root health.
- Malaysian trumpet snails — the hobby's classic solution — burrow through the top inch nightly, gently turning it. A colony of MTS is the best insurance for any sand bed and they're beneficial in every way.
- Plant roots themselves keep the bed open — a densely planted sand bed is a healthy sand bed. It's the bare, plant-free expanses that compact.
- If you're still nervous, a 0.5-inch base layer of coarse gravel under the sand improves drainage (though most keepers find this unnecessary).
Maintenance: Vacuuming Sand
You can't jam a siphon into sand the way you can with gravel — you'll suck up the bed. Instead, hover the siphon 0.5–1 inch above the sand surface and let the suction lift detritus off while the heavier sand grains fall back. It takes a slightly slower hand than gravel vacuuming, but it's effective, and the light color makes detritus easy to spot.
Stir the top half-inch gently with your fingers monthly in unplanted areas to prevent any surface crusting. In planted zones, leave the roots alone — they're doing the work. Full routine in our substrate cleaning guide.
Pool Filter Sand vs The Alternatives
| Substrate | Cost | Cleanliness | Bottom-dweller safety | Compaction risk |
|---|---|---|---|---|
| Pool filter sand | Very cheap | Excellent | Excellent | Low |
| Play sand | Cheapest | Poor (very dusty) | Good | High |
| Black blasting sand | Very cheap | Poor (needs heavy rinsing) | Good | Low |
| Branded aquarium sand | Expensive | Excellent | Excellent | Low |
Play sand is the only real competitor on price, and it's a false economy: the dust requires endless rinsing, the fines compact badly, and you end up fighting the substrate for the life of the tank. Pool filter sand costs only slightly more and eliminates every one of play sand's problems. For the dark-substrate look instead, see our black blasting sand guide; for the whole field, our best sand roundup.
What Pool Filter Sand Can't Do
Honesty requires the limits:
- No nutrients, no buffering. If you want soft acidic water for caridina shrimp, sand won't make it — you need a buffering substrate or RO water.
- Shows everything. The light color that looks so natural also shows every speck of detritus and every strand of algae. You'll vacuum more visibly-often than on black substrate (though the actual waste load is identical).
- Poor slope holder. Rounded uniform grains avalanche on steep slopes. For dramatic hills, use terraces and retaining walls, or choose a more angular substrate.
- Can look "flat" in photos. Uniform tan sand is honest but plain — aquascapers often mix in a darker gravel or add river rocks for visual texture.
Where to Buy and What to Avoid
Pool filter sand is a commodity — but not every bag labeled "sand" at the hardware store is the right product:
- Right: bags labeled "pool filter sand," typically 20-grade silica, from pool supply stores, Home Depot/Lowe's, or hardware stores. Brands (HTH, AquaQuartz, ZeoSand alternatives) don't matter much — it's graded silica.
- Wrong: play sand (too fine, too dusty), paver sand (often contains additives), "all-purpose sand" (ungraded, variable), sandblasting sand other than the specific coal-slag product (wrong grades are sharp), and anything with added clarifiers, antimicrobials, or fragrances.
- The label test: you want "100% silica sand" or "quartz sand" with a grade number (20-grade / 0.45–0.55 mm). If the bag won't tell you what it is, don't put it in your tank.
- Price anchor: a 50-lb bag should cost roughly what you'd pay for a large pizza. If someone's charging aquarium-substrate prices for pool filter sand, walk away — the whole point is the value.
Aquascaping With Light Sand
Light sand photographs differently than dark substrate — plan for it:
- It brightens everything. Light sand reflects light up into the tank, which makes the whole scape feel airy and makes fish colors glow. It's the classic choice for bright, natural riverbed and biotope styles.
- Contrast is your friend. Pair light sand with dark driftwood and rocks — the dark hardscape anchors the composition the way dark substrate would. An all-pale tank (light sand + light rocks) washes out.
- Path and beach effects. Aquascapers often use pool filter sand as "sand paths" or foreground beaches against darker planted areas — its natural color reads as a riverbank. Our nano hardscape guide shows small-scale applications.
- Photography tip: light sand blows out under strong tank lighting in photos — dial exposure down slightly or shoot at an angle to keep texture.
Frequently Asked Questions
Will pool filter sand affect my pH?
No. It's pure silica — completely inert. It won't lower pH like aquasoil or raise it like limestone. Your water parameters are determined entirely by your source water, which makes sand the predictable, no-surprises choice.
Can I grow demanding plants like carpeting species in pool filter sand?
Yes. Carpeting plants care about light, CO2, and nutrients — not about the substrate's brand. Dwarf hairgrass and Monte Carlo carpet readily in pool filter sand with CO2 injection, root tabs beneath, and liquid fertilizer above. The substrate is just the anchor; you're the nutrition.
How deep should pool filter sand be?
2–3 inches across most of the tank, sloping to 3–4 inches in back where heavy root feeders live. Under 2 inches, large swords and crypts can't anchor properly; over 3–4 inches in front, you invite compaction for no benefit.
Do I need a gravel base layer under the sand?
No. It's an optional refinement some keepers use for drainage, but uniform pool filter sand at sensible depth with MTS snails and plant roots does fine on its own. Skip the extra complexity unless you're running an unusually deep bed.
My sand turned brown/green on top. What is it?
Diatoms (brown, common in new tanks, fades in weeks) or film algae (green, indicates excess light/nutrients relative to plant uptake). It's growing on the sand, not from it — the sand is innocent. Reduce photoperiod, ensure plants are growing well, and siphon the surface. Otocinclus and nerite snails graze it happily.
The Bottom Line
Pool filter sand is the rare product that's both the cheapest option and one of the best: clean, safe, plantable, and permanent. Its only real demand is that you feed your plants yourself — root tabs below, liquid fertilizer above — instead of outsourcing nutrition to the substrate. Accept that deal, and a $15 bag of sand will underpin a planted tank every bit as lush as tanks running substrates costing twenty times more.
Tissue-culture plants are the exception — they’re grown in sterile gel and adapt with minimal melting, which is part of what you’re paying for. Plants bought submersed from another hobbyist’s tank also transition with little melt, since they’re already in the right form.
Which Plants Melt Most (and Least)
Heavy melters (expect significant leaf loss)
- Cryptocorynes — infamous for “crypt melt,” sometimes dropping every leaf after any disturbance. They almost always recover from the roots within weeks.
- Stem plants grown emersed — rotala, ludwigia, and hygrophila often shed lower emersed leaves while the growing tips transition.
- Amazon swords — emersed-grown swords typically lose their broad oval aerial leaves and replace them with longer submersed ribbon leaves.
Light melters
- Anubias, java fern, bucephalandra — slow-growing rhizome plants transition gradually; occasional old-leaf melt but rarely dramatic.
- Vallisneria — usually transitions well, though it dislikes the move itself and may sulk for a week.
- Floating plants — minimal melt since their leaves were already at the air-water interface.
The Acclimation Protocol
Step 1: Quarantine or dip first
Before acclimating to your tank’s conditions, make sure you’re not acclimating pests along with the plant. Run new arrivals through our quarantine and dip protocol — it adds days upfront but prevents months of regret.
Step 2: Float to temperature-match (30 minutes)
Float the bag or container in your tank for 20–30 minutes to equalize temperature. Plants are less temperature-sensitive than fish, but a 10°F shock on top of transplant stress is an avoidable insult.
Step 3: Trim before planting
Remove any leaves that are already damaged, yellowing, or heavily algae-covered — they won’t recover and they’ll rot in your tank, feeding algae. For stem plants, trim off the bottom inch and any emersed leaves that look unlikely to adapt; the plant wastes energy maintaining leaves it’s going to shed anyway. Keep the healthy growing tips — that’s where recovery starts.
Step 4: Plant correctly the first time
Follow our planting guide — right depth, crown exposed on rosettes, rhizomes unburied on epiphytes. Every uprooting and replanting restarts the acclimation clock, so get placement right on the first attempt. Decide where each plant goes before it goes in the water.
Step 5: Run a gentle first week
For the first 7 days after planting:
- Moderate light — run your normal photoperiod but consider dropping intensity 20–30% if your light is dimmable. Blast-level light on a melting plant grows algae on the dying leaves, not recovery.
- Stable CO2 — if you inject CO2, keep it consistent. Fluctuating CO2 during acclimation is a melt accelerator. If you’re low-tech, this doesn’t apply — see growing without CO2.
- Half-strength fertilizer — new plants with damaged leaves can’t use full dosing, and the excess feeds algae. Ramp to full strength over 2–3 weeks per our fertilizer schedule.
- No disturbance — don’t move, trim, or “check on” new plants for at least two weeks. Every touch resets root establishment. This is especially critical for crypts.
Step 6: Remove melt, keep the base
As emersed leaves melt, remove the mushy material promptly — decaying leaves release ammonia and grow fungus that can spread to healthy tissue. But never discard the plant while the crown, rhizome, or roots are firm and alive. A crypt that’s lost every leaf but has firm roots is a plant that’s about to recover, not a dead plant. Give it 3–4 weeks before judging.
Telling Normal Melt From Real Problems
Normal transition melt:
- Affects oldest/emersed leaves first, newest growth last
- New submersed leaves emerge even as old ones dissolve
- Roots and crown stay firm and white/green
- Timeline: 1–4 weeks, then obvious new growth
Concerning melt (see our full melting diagnosis guide):
- New growth also melts or emerges deformed
- Rhizome or crown turns mushy and brown — this is rot, not transition
- Entire plant dissolves within days with no new growth after 4+ weeks
- Melting spreads to established plants that weren’t recently moved
Buying Tips to Minimize Melt
- Buy submersed-grown when available — hobbyist-grown cuttings transition with almost no melt.
- Choose tissue culture for sensitive species — crypts and delicate stems establish far more reliably from sterile cups.
- Avoid plants already melting in the store tank — some melt is normal, but a plant that’s mostly mush at purchase has less energy for recovery.
- Transport carefully — keep plants damp and out of direct sun/heat. A plant that dries out or cooks in a hot car melts far worse than one transported properly.
The First-Month Timeline: What to Expect Week by Week
Knowing what’s normal when removes most acclimation anxiety. Here’s the typical timeline for a healthy plant adapting to a new tank:
Week 1: The quiet week
Almost nothing visible happens. The plant is growing roots you can’t see and assessing its new environment. Some species (vallisneria, stem plants) may start shedding their lowest leaves. This is normal. Resist the urge to “help” — no moving, no extra fertilizer, no light changes. The most common beginner mistake is intervening during a week when the correct action is nothing.
Week 2: Melt peaks
This is when emersed leaves give up in earnest. Crypts may drop everything; swords shed their broad aerial leaves; stem plants lose lower foliage. It looks catastrophic and it’s usually fine. Keep removing mushy material, keep conditions stable, and watch the crown and growing tips — if those are firm and green, recovery is already underway.
Week 3: The turn
New submersed-adapted leaves emerge — smaller, thinner, often a slightly different shade of green than the emersed foliage. Stem plant tips start growing visibly; crypts push tiny curled leaves from the crown; swords unfurl narrow ribbon leaves. This is the moment most beginners exhale for the first time.
Week 4+: Established
New growth outpaces melt, and the plant is functionally yours. You can resume full-strength fertilizer, normal trimming, and stop treating it as fragile. Some slow growers (anubias, bucephalandra) take 6–8 weeks to show obvious progress — that’s their normal speed, not a problem.
Acclimating Different Plant Formats
Tissue-culture cups
Sterile, pest-free, and already adapted to high-humidity (not emersed) growth — tissue cultures melt the least of any format. Rinse the agar gel off gently (leftover gel rots and feeds fungus), split the portion into small plantlets, and plant per our planting guide. They establish slowly for the first two weeks, then accelerate. No dip needed, minimal acclimation stress — this is the premium experience you’re paying for.
Potted plants
Remove the pot and strip away the rockwool completely — leftover rockwool traps debris and rots. Tease the root mass apart gently; if it’s a dense mat, splitting it into 2–3 smaller portions actually establishes faster than planting one big clump (more growing points, better water flow around roots). Potted plants are usually emersed-grown, so expect the standard 2–4 week melt cycle.
Bare-root / bunched stems
Typically sold as weighted bunches. Remove any bands, foam, or weights, strip the lower leaves, and plant stems individually or in small groups. Bunched stems from the store are often already transitioning — check for new submersed growth at the tips, which tells you the plant is mid-adaptation and will settle quickly.
Hobbyist cuttings
Already submersed-grown and the fastest to establish — often showing new growth within days. The main acclimation factor is water-parameter difference between the two tanks. Float to temperature-match, plant promptly, and they’ll usually take off with minimal melt. This is why experienced hobbyists prefer trading cuttings over buying potted plants.
Frequently Asked Questions
Should I use a “plant starter” or transplant fertilizer?
Products marketed for transplant shock are mostly B-vitamins and mild hormones. They don’t hurt, but there’s no strong evidence they help aquarium plants specifically. Stable conditions and patience outperform any bottle. Save the money for more plants.
My new plant melted completely — bare crown, no leaves. Is it dead?
Probably not, if the crown or rhizome is firm. Crypts and swords routinely lose 100% of their leaves and regrow from the base within a month. The test is firmness: firm and pale/green means alive; mushy and brown/black means rot. Give firm-but-leafless plants a full 4 weeks before declaring them dead.
Can I speed up acclimation with extra light or CO2?
No — and trying usually backfires. A melting plant can’t use extra light; the excess just grows algae on its dying leaves. Keep light moderate and CO2 stable (not boosted) during acclimation. Growth speed comes from the plant’s own adaptation timeline, which you can’t rush, only avoid delaying.
Should new plants go straight into my main display tank?
After quarantine/dipping, yes — there’s no benefit to a separate “growing-in” tank for most plants. They acclimate to your water fastest in the tank they’ll live in. The exception is very delicate species going into a tank with boisterous fish; give those a few weeks in a calm corner or breeder box first.
The Patience Rule
The single most important acclimation skill is restraint: plant it right, set gentle conditions, remove decay, and then leave it alone for a month. The hobbyists with the best plant growth aren’t doing something clever in week one — they’re simply not interfering in weeks two through four while the plants do what they’ve evolved to do. Melt looks like failure and feels like failure, but in most cases it’s the visible part of a plant successfully becoming yours.