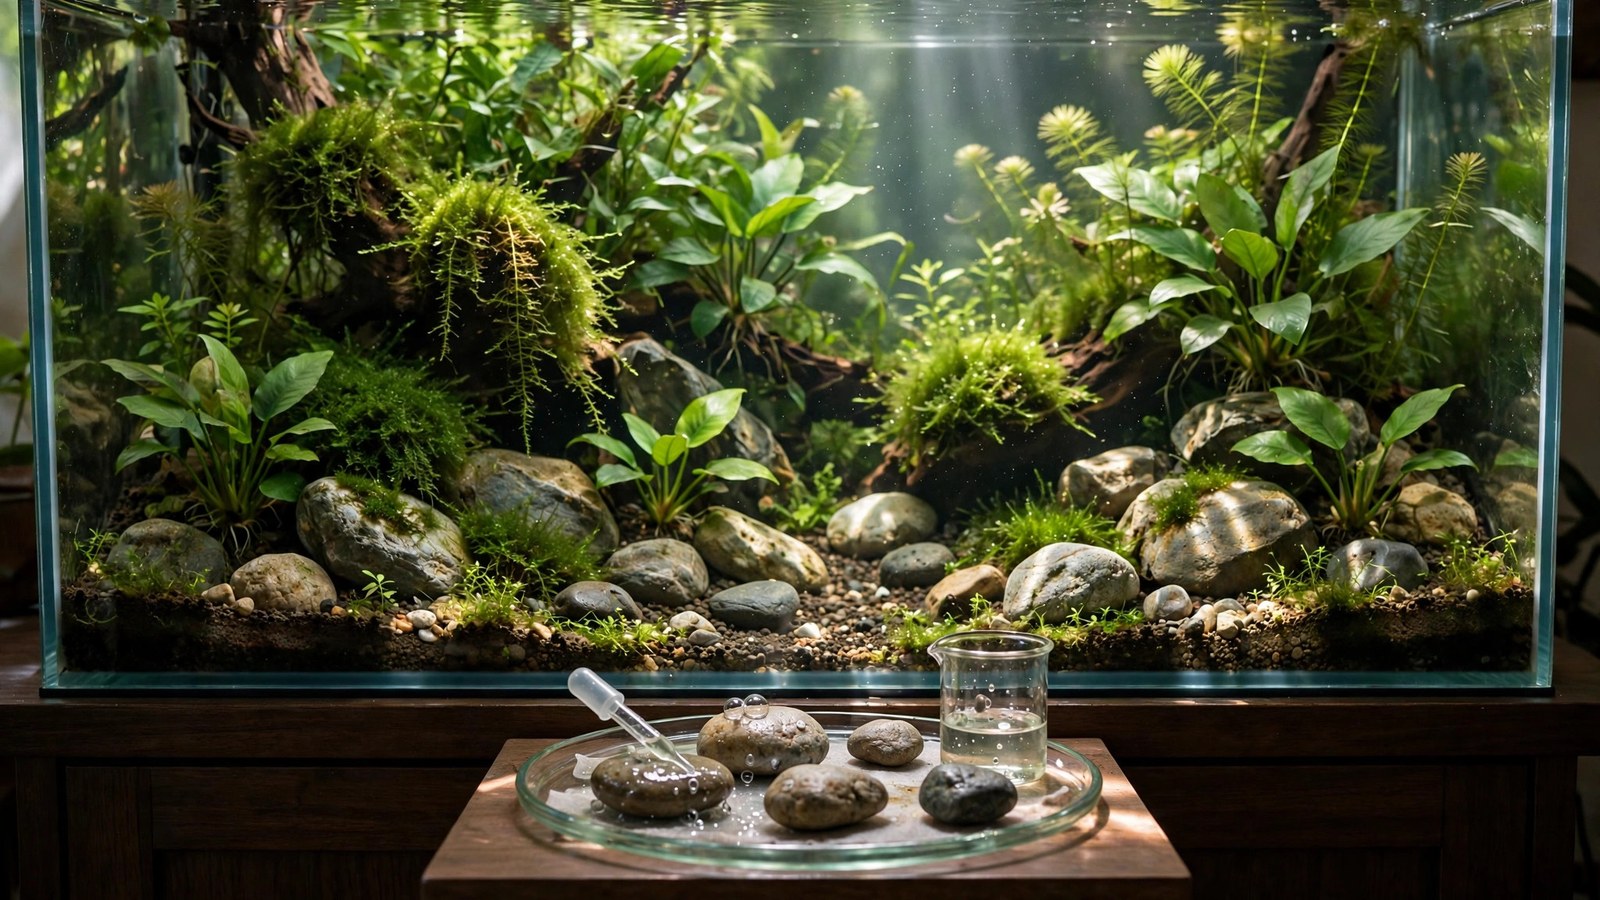
The most natural-looking stones in the hobby don't come from fish stores — they come from riverbanks, lakeshores, and hiking trails. River rocks are free, beautiful, and wildly variable — which is exactly why you need to know how to find safe ones and test them. This guide covers where to collect, how to test for aquarium safety, preparation, and how to aquascape with found stone.
Why River Rocks?
- Free. The obvious one — a bucket of river rock costs a walk, not $8/lb.
- Naturally weathered. Water-worn stones have the smooth, organic shapes that take tumblers and time to replicate — they look right in a tank instantly.
- Unique. No two collected stones match; your scape literally can't be duplicated.
- Local character. Stones from your region's geology give biotope tanks an authenticity store-bought rock can't match.
The trade-off: you are the quality control. No supplier has screened these for carbonates, metals, or contaminants. The testing below is non-optional.
Where to Collect (Legally and Ethically)
- Legal first: collecting is prohibited in national/state parks, nature reserves, and many protected waterways. Private land needs the owner's permission. Public riverbanks, lakeshores, and waterways generally allow casual hand-collection of small amounts — but check local regulations; they vary enormously.
- Take little. A bucket for your tank is collecting; stripping a streambed is vandalism. Take scattered loose stones, never pry embedded ones (they're habitat and erosion control).
- Best spots: gravel bars on river bends (water sorts stones by size — you'll find consistent grades), lakeshore wave zones, creek beds in summer low water, and construction/road-cut exposures (fresh rock faces show you the unweathered composition).
- What to look for: hard, dense stones that ring when tapped — granite, basalt, quartzite, slate, and hard sandstone. Avoid anything crumbly, flaky, or that powders under your thumbnail.
The Safety Tests
Every collected stone gets tested. No exceptions, no "it looks fine."
Test 1: The acid fizz test (carbonates)
Put a few drops of white vinegar (or stronger: pH-down solution / muriatic acid diluted) on a fresh surface — scratch the stone first to expose unweathered rock. Fizzing or bubbling = carbonates present = the stone will raise KH/pH like Seiryu stone. That's not automatically disqualifying — limestone is fine for hard-water tanks and African cichlids — but you must know, so you can match the stone to the livestock. Our rocks-and-pH guide details the chemistry.
Test 2: The bucket test (leaching)
Place cleaned stones in a bucket of your tap water (aged 24h), test KH/GH/pH, wait 7 days, test again. Any significant shift reveals slow leaching the acid test missed. This is the definitive test — do it for every batch going into a sensitive tank (shrimp, soft-water species).
Test 3: Visual inspection (metals and nasties)
- Metallic veins or rust streaks: iron staining is usually harmless (it's just iron oxide), but brassy/gold metallic cubes (pyrite) or green/blue staining (copper minerals) mean reject the stone — metal leaching kills invertebrates.
- Oily sheen or chemical smell: reject — petroleum or industrial contamination.
- Paint, tar, or concrete: urban-collected stones sometimes carry these. Concrete chunks raise pH significantly (they're basically limestone + cement).
Stones to always reject
- Anything that crumbles, flakes, or powders — it'll disintegrate in your tank.
- Sandstone that's soft — hard quartzite is fine; soft sandstone sheds grit forever.
- Stones with visible metal ores (pyrite, chalcopyrite, galena).
- Stones from mine drainage areas, industrial sites, or roadsides (salt, oil, heavy metals).
- Lava-looking slag near industrial areas — could be actual slag with who-knows-what in it.
Preparation
- Scrub hard — stiff brush, hot water. River stones carry algae, biofilm, and sediment in every pit.
- Boil 20–30 minutes (if they fit) — kills algae, parasites, and hitchhiking organisms. Never boil stones with trapped water or air pockets — thermal expansion can crack or (rarely) explosively fracture porous stones. Dense river rock is generally safe; if a stone has visible cavities, soak in hot (not boiling) water instead.
- Alternative: bleach soak — 1:20 bleach:water for 24h, then soak in dechlorinated water with extra dechlorinator for 48h, then air-dry completely. For stones too big to boil.
- Final inspection — after cleaning, re-examine: cleaning reveals cracks, soft spots, and mineral veins that dirt hid.
Aquascaping With Found Stone
River rocks' smooth, water-worn character suits natural riverbed and lakeshore scapes — which happen to be among the easiest beautiful styles:
- Sort by size into 3 grades (large feature stones, medium fillers, small pebbles) — graded stone arranges itself; mixed jumbles look accidental.
- Bury one-third of each feature stone — collected stones look "placed" until they're bedded into the substrate.
- Match your substrate: river rocks over pool filter sand with a few driftwood pieces is the timeless riverbank formula.
- Odd numbers and one dominant stone — the composition rules from our rocks roundup apply to found stone too.
- Consider a biotope: local stone + local-style planting + appropriate fish = a biotope with genuine provenance. A fraction of the cost of a "real" biotope build.
Common Local Stone Types (and Their Verdicts)
| Stone | Identification | Aquarium verdict |
|---|---|---|
| Granite | Speckled black/white/gray, very hard | Excellent — inert, permanent |
| Basalt | Dark gray/black, fine-grained, heavy | Excellent — inert |
| Quartzite | Glassy, very hard, often white/gray/pink | Excellent — inert, beautiful |
| Slate | Flat layers, splits into sheets | Good — test for carbonates (see our slate guide) |
| Limestone | Fizzes with acid, often fossil-bearing | Use knowingly — raises KH/pH |
| Sandstone (hard) | Grainy but solid, doesn't shed | Good if truly hard |
| Shale | Flaky layers, splits easily | Reject — disintegrates |
Quarantine Procedure for Wild Stones
Even after cleaning, cautious keepers quarantine wild-collected stones before they go near a stocked display tank:
- Clean as described above (scrub, boil or bleach-soak, rinse).
- Bucket-soak for 2 weeks with an airstone — no livestock, just water and the stones. Test KH/GH/pH at day 1, 7, and 14.
- Watch for: pH/KH drift (carbonates), oily films on the surface (contamination), unusual smells, or any color leaching into the water.
- Introduce to the tank only after 14 clean days. For irreplaceable livestock (expensive shrimp colonies, rare fish), extend to 4 weeks — paranoia is cheap, livestock isn't.
This sounds excessive until the first time a bucket test catches a stone that would have crashed a shrimp tank's pH. The two weeks cost nothing; the colony costs real money.
Building a Stone Collection
Once you start collecting, you'll accumulate more stone than any one tank needs — which is actually ideal:
- Sort and store by type and size — labeled buckets or bins. A sorted collection means your next scape starts with materials on hand, not a shopping trip.
- Photograph candidates in the field — wet the stone (water reveals true color; dry stone lies) and photograph from multiple angles before deciding to carry it home. Your back will thank you for leaving the mediocre ones.
- Trade with other hobbyists — local club members collect from different geologies; trading gives everyone variety. A granite-region keeper trading with a quartzite-region keeper both win.
- Keep a "hospital" bin — stones that failed tests but are beautiful (limestone with fossils, for example) get labeled with their chemistry and saved for appropriate future tanks rather than discarded.
Frequently Asked Questions
Can I use rocks from the ocean/beach?
Yes, with extra prep: ocean rocks carry salt deep in their pores — soak for 1–2 weeks with daily water changes until a TDS meter (or taste test of the soak water... use TDS) shows no salt. Also check local laws — many coastlines prohibit collection. Avoid coral rock/shells unless you want the KH/pH rise (they're calcium carbonate).
How do I know if a rock is "hard enough"?
The thumbnail test: if your thumbnail scratches or powders it, it's too soft. The hammer test: a sharp tap should ring or chip cleanly, not crumble. And the bucket test over a month: soft rocks visibly degrade. When in doubt, leave it on the riverbank.
Will river rocks introduce diseases or parasites?
Boiling or bleach-soaking eliminates this risk for all practical purposes. The concern is real but manageable — it's why preparation is mandatory, not optional. Never place uncleaned wild rock directly in a stocked tank.
My "granite" fizzed with vinegar. What is it?
Probably not granite — possibly a carbonate-cemented sandstone or a limestone misidentified. Trust the test over your identification: fizz means carbonates, whatever the rock's name. Either use it knowingly in a hard-water setup or pick another stone.
Is it legal to take rocks from rivers?
Depends entirely on location: generally permitted in small quantities on public land in many places, prohibited in parks/reserves/protected waterways everywhere, and requiring permission on private land always. Check your local regulations before collecting — "everyone does it" isn't a legal defense, and fines exist.
Free Stone, Real Responsibility
River rocks are the hobby's best value — genuinely free, naturally beautiful, and full of character. The price is diligence: test every stone, prepare every stone, and respect collection laws and limits. Do that, and the stones you carried home in a bucket will anchor aquascapes every bit as striking as tanks built on $200 of imported rock. The river did the tumbling; you do the testing; the tank gets the beauty.
Tissue-culture plants are the exception — they’re grown in sterile gel and adapt with minimal melting, which is part of what you’re paying for. Plants bought submersed from another hobbyist’s tank also transition with little melt, since they’re already in the right form.
Which Plants Melt Most (and Least)
Heavy melters (expect significant leaf loss)
- Cryptocorynes — infamous for “crypt melt,” sometimes dropping every leaf after any disturbance. They almost always recover from the roots within weeks.
- Stem plants grown emersed — rotala, ludwigia, and hygrophila often shed lower emersed leaves while the growing tips transition.
- Amazon swords — emersed-grown swords typically lose their broad oval aerial leaves and replace them with longer submersed ribbon leaves.
Light melters
- Anubias, java fern, bucephalandra — slow-growing rhizome plants transition gradually; occasional old-leaf melt but rarely dramatic.
- Vallisneria — usually transitions well, though it dislikes the move itself and may sulk for a week.
- Floating plants — minimal melt since their leaves were already at the air-water interface.
The Acclimation Protocol
Step 1: Quarantine or dip first
Before acclimating to your tank’s conditions, make sure you’re not acclimating pests along with the plant. Run new arrivals through our quarantine and dip protocol — it adds days upfront but prevents months of regret.
Step 2: Float to temperature-match (30 minutes)
Float the bag or container in your tank for 20–30 minutes to equalize temperature. Plants are less temperature-sensitive than fish, but a 10°F shock on top of transplant stress is an avoidable insult.
Step 3: Trim before planting
Remove any leaves that are already damaged, yellowing, or heavily algae-covered — they won’t recover and they’ll rot in your tank, feeding algae. For stem plants, trim off the bottom inch and any emersed leaves that look unlikely to adapt; the plant wastes energy maintaining leaves it’s going to shed anyway. Keep the healthy growing tips — that’s where recovery starts.
Step 4: Plant correctly the first time
Follow our planting guide — right depth, crown exposed on rosettes, rhizomes unburied on epiphytes. Every uprooting and replanting restarts the acclimation clock, so get placement right on the first attempt. Decide where each plant goes before it goes in the water.
Step 5: Run a gentle first week
For the first 7 days after planting:
- Moderate light — run your normal photoperiod but consider dropping intensity 20–30% if your light is dimmable. Blast-level light on a melting plant grows algae on the dying leaves, not recovery.
- Stable CO2 — if you inject CO2, keep it consistent. Fluctuating CO2 during acclimation is a melt accelerator. If you’re low-tech, this doesn’t apply — see growing without CO2.
- Half-strength fertilizer — new plants with damaged leaves can’t use full dosing, and the excess feeds algae. Ramp to full strength over 2–3 weeks per our fertilizer schedule.
- No disturbance — don’t move, trim, or “check on” new plants for at least two weeks. Every touch resets root establishment. This is especially critical for crypts.
Step 6: Remove melt, keep the base
As emersed leaves melt, remove the mushy material promptly — decaying leaves release ammonia and grow fungus that can spread to healthy tissue. But never discard the plant while the crown, rhizome, or roots are firm and alive. A crypt that’s lost every leaf but has firm roots is a plant that’s about to recover, not a dead plant. Give it 3–4 weeks before judging.
Telling Normal Melt From Real Problems
Normal transition melt:
- Affects oldest/emersed leaves first, newest growth last
- New submersed leaves emerge even as old ones dissolve
- Roots and crown stay firm and white/green
- Timeline: 1–4 weeks, then obvious new growth
Concerning melt (see our full melting diagnosis guide):
- New growth also melts or emerges deformed
- Rhizome or crown turns mushy and brown — this is rot, not transition
- Entire plant dissolves within days with no new growth after 4+ weeks
- Melting spreads to established plants that weren’t recently moved
Buying Tips to Minimize Melt
- Buy submersed-grown when available — hobbyist-grown cuttings transition with almost no melt.
- Choose tissue culture for sensitive species — crypts and delicate stems establish far more reliably from sterile cups.
- Avoid plants already melting in the store tank — some melt is normal, but a plant that’s mostly mush at purchase has less energy for recovery.
- Transport carefully — keep plants damp and out of direct sun/heat. A plant that dries out or cooks in a hot car melts far worse than one transported properly.
The First-Month Timeline: What to Expect Week by Week
Knowing what’s normal when removes most acclimation anxiety. Here’s the typical timeline for a healthy plant adapting to a new tank:
Week 1: The quiet week
Almost nothing visible happens. The plant is growing roots you can’t see and assessing its new environment. Some species (vallisneria, stem plants) may start shedding their lowest leaves. This is normal. Resist the urge to “help” — no moving, no extra fertilizer, no light changes. The most common beginner mistake is intervening during a week when the correct action is nothing.
Week 2: Melt peaks
This is when emersed leaves give up in earnest. Crypts may drop everything; swords shed their broad aerial leaves; stem plants lose lower foliage. It looks catastrophic and it’s usually fine. Keep removing mushy material, keep conditions stable, and watch the crown and growing tips — if those are firm and green, recovery is already underway.
Week 3: The turn
New submersed-adapted leaves emerge — smaller, thinner, often a slightly different shade of green than the emersed foliage. Stem plant tips start growing visibly; crypts push tiny curled leaves from the crown; swords unfurl narrow ribbon leaves. This is the moment most beginners exhale for the first time.
Week 4+: Established
New growth outpaces melt, and the plant is functionally yours. You can resume full-strength fertilizer, normal trimming, and stop treating it as fragile. Some slow growers (anubias, bucephalandra) take 6–8 weeks to show obvious progress — that’s their normal speed, not a problem.
Acclimating Different Plant Formats
Tissue-culture cups
Sterile, pest-free, and already adapted to high-humidity (not emersed) growth — tissue cultures melt the least of any format. Rinse the agar gel off gently (leftover gel rots and feeds fungus), split the portion into small plantlets, and plant per our planting guide. They establish slowly for the first two weeks, then accelerate. No dip needed, minimal acclimation stress — this is the premium experience you’re paying for.
Potted plants
Remove the pot and strip away the rockwool completely — leftover rockwool traps debris and rots. Tease the root mass apart gently; if it’s a dense mat, splitting it into 2–3 smaller portions actually establishes faster than planting one big clump (more growing points, better water flow around roots). Potted plants are usually emersed-grown, so expect the standard 2–4 week melt cycle.
Bare-root / bunched stems
Typically sold as weighted bunches. Remove any bands, foam, or weights, strip the lower leaves, and plant stems individually or in small groups. Bunched stems from the store are often already transitioning — check for new submersed growth at the tips, which tells you the plant is mid-adaptation and will settle quickly.
Hobbyist cuttings
Already submersed-grown and the fastest to establish — often showing new growth within days. The main acclimation factor is water-parameter difference between the two tanks. Float to temperature-match, plant promptly, and they’ll usually take off with minimal melt. This is why experienced hobbyists prefer trading cuttings over buying potted plants.
Frequently Asked Questions
Should I use a “plant starter” or transplant fertilizer?
Products marketed for transplant shock are mostly B-vitamins and mild hormones. They don’t hurt, but there’s no strong evidence they help aquarium plants specifically. Stable conditions and patience outperform any bottle. Save the money for more plants.
My new plant melted completely — bare crown, no leaves. Is it dead?
Probably not, if the crown or rhizome is firm. Crypts and swords routinely lose 100% of their leaves and regrow from the base within a month. The test is firmness: firm and pale/green means alive; mushy and brown/black means rot. Give firm-but-leafless plants a full 4 weeks before declaring them dead.
Can I speed up acclimation with extra light or CO2?
No — and trying usually backfires. A melting plant can’t use extra light; the excess just grows algae on its dying leaves. Keep light moderate and CO2 stable (not boosted) during acclimation. Growth speed comes from the plant’s own adaptation timeline, which you can’t rush, only avoid delaying.
Should new plants go straight into my main display tank?
After quarantine/dipping, yes — there’s no benefit to a separate “growing-in” tank for most plants. They acclimate to your water fastest in the tank they’ll live in. The exception is very delicate species going into a tank with boisterous fish; give those a few weeks in a calm corner or breeder box first.
The Patience Rule
The single most important acclimation skill is restraint: plant it right, set gentle conditions, remove decay, and then leave it alone for a month. The hobbyists with the best plant growth aren’t doing something clever in week one — they’re simply not interfering in weeks two through four while the plants do what they’ve evolved to do. Melt looks like failure and feels like failure, but in most cases it’s the visible part of a plant successfully becoming yours.