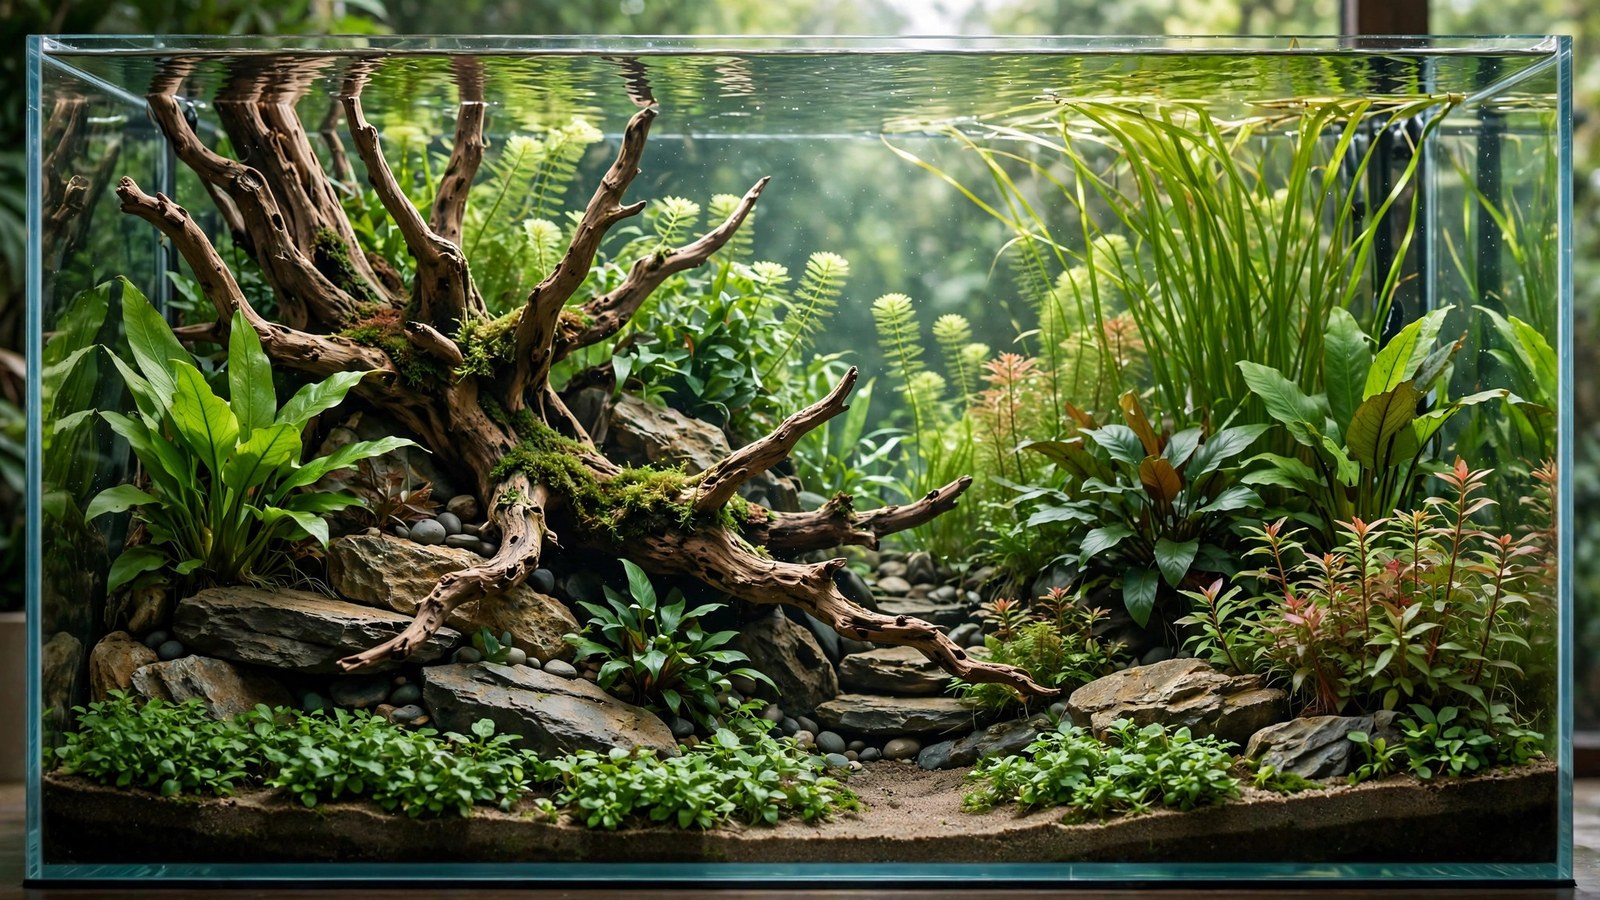
Big tanks — 75 gallons and up — are a different art form. Everything that works in a 60cm nano-aquascape breaks at 120cm: stones that looked monumental become pebbles, plant masses that read as forests become shrubs, and compositions that felt balanced become lost in empty water. Aquascaping large tanks demands thinking in scale: bigger hardscape, bolder masses, stronger geometry, and the humility to accept that large water volumes forgive chemistry but punish design timidity. Here's how the rules change when the glass gets big.
Rule One: Scale Everything Up (More Than You Think)
The beginner's large-tank error is linear thinking: "my 60cm used a 20cm stone, so my 120cm needs a 40cm stone." Wrong — visual mass scales faster than linear dimensions because the viewing distance increases. A good heuristic: hardscape elements should be 2.5–3× the size you'd use in a 60cm for a 120cm tank, not 2×. That hero stone isn't 40cm — it's 50–60cm, a genuine boulder. That driftwood centerpiece isn't a 40cm branch — it's a 70–90cm root mass.
Practical consequences:
- Buy hardscape in person, and bring measurements. Online "large" stones disappoint in large tanks. Visit the shop with your tank's dimensions and a tape measure; choose pieces that look almost absurdly big in the store — they'll look right in the tank.
- Budget for hardscape accordingly. Showpiece stone and wood for a 120cm+ tank can cost $200–500. This is the large tank's hidden expense — our budget guide has workarounds (field-collected stone, fewer premium pieces), but don't expect nano prices.
- Plant in masses, not specimens. A single pot of Cryptocoryne is invisible in 100 gallons. Think in tissue-culture multipacks and potted-plant dozens: 20–30 pots for a 120cm background, 10+ cups for the carpet. The planting bill for a large high-tech tank routinely hits $200–400.
Composition at Scale: Bolder Geometry
Subtle compositions die in big tanks. The techniques still apply — triangles, concave valleys, diagonals — but executed bigger and simpler:
- Fewer, larger masses. Where a 60cm uses 7–9 plant groups, a 120cm uses 4–6 — each one enormous. A Rotala mass 40cm wide and 30cm tall. A crypt colony the size of a dinner table. Restraint at scale means huge simplicity.
- Stronger focal points. The focal point in a large tank must be unmissable from 3 meters away — a 60cm boulder, a meter-wide wood mass, a dramatic red plant block. Timid focal points vanish.
- Exaggerated topography. Substrate slopes need to be dramatic — 15–25cm of elevation change — to read across a large tank. Build hills on lava-rock-bag cores; pure-soil hills this size are impractical and unstable.
- Repeat with rhythm. Large tanks suit repeated elements: a rhythm of three stone groups receding into the distance, or a repeated wood-and-plant module. Repetition creates the grandeur that single compositions can't sustain across 150cm.
- Mind the middle distance. Big tanks have a "dead zone" problem: foreground detail near the glass, background wall at the back, and a void between. Fill it with midground architecture — secondary stone groups, mid-size wood, billowing midground plants — so the eye travels through depth, not across emptiness.
Technical Systems for Large Tanks
Lighting
Even coverage across 120–180cm is the challenge. Options: multiple pendants (2–3 units spaced evenly — the premium look, with shimmer), long LED bars (1–2 full-length fixtures — even, economical), or T5/LED hybrids. Whatever you choose, verify PAR at the substrate in multiple spots — large tanks develop dim zones at the ends and corners that grow algae while the center thrives. Budget $300–800 for lighting a 120cm high-tech tank; it's the single biggest equipment line.
CO2
Large tanks need serious CO2: a 5–10 lb cylinder (paintball is a joke at this scale — you'd refill monthly), dual diffusers or an in-line reactor on the canister, and distribution thought through — CO2 mist must reach the far end. Place diffusers at both ends or use a reactor + spray bar spanning the back. Expect 2–4 bubbles/second total, tuned by drop checkers at both ends of the tank. Cylinder refills: every 2–4 months for a 120cm.
Filtration and flow
Turnover target: 5–10× tank volume per hour. For a 120cm/110-gallon tank, that's a large canister (or two medium canisters — redundancy is wise at this investment level) plus circulation pumps to eliminate dead zones. Flow pattern matters more than raw turnover: spray bars along the back pushing gently forward, or opposing powerheads creating a gyre. Dead spots in big tanks become algae farms and detritus sinks — walk around the tank and watch food flakes to map your actual flow.
Heating
Two smaller heaters beat one big one (redundancy + even distribution) — 2× 200W for a 120cm, placed at opposite ends near filter outflows. An external controller is cheap insurance when a stuck-on heater could cook $1,000 of livestock.
Water changes
50% weekly on 100+ gallons is 50+ gallons — plan the logistics before the tank arrives. A Python-style water changer (tap-connected siphon/fill) isn't optional; it's the difference between maintenance happening and not. Pre-mix and temperature-match in a brute trash can for RO-based setups. Budget 60–90 minutes for the weekly change on a large high-tech tank.
Hardscape Logistics: The Unsexy Reality
- Weight: a 60cm boulder can weigh 30–50 lbs. Place a foam or egg-crate mat under heavy stone to distribute load and protect the glass. Never drop stone into a filled tank — place hardscape dry, then fill.
- Two-person rule: anything you can't lift safely alone needs a partner. Back injuries end hobbies.
- Pre-arrange outside the tank: mock up the hardscape on the floor in the tank's footprint (tape the dimensions) — rearranging 40-lb stones inside the glass is miserable.
- Secure tall structures: towering stone stacks in big tanks can topple (livestock bump them, substrate shifts). Drill and pin with acrylic rods, or mortar with aquarium-safe epoxy. A collapsed rock tower in 100 gallons is a disaster, not an inconvenience.
Stocking Large Tanks: Schools That Earn the Space
Large tanks finally allow real schools — and they need them, because a dozen tetras in 120 gallons look lost:
- Showcase schools (40–80 fish): cardinal tetras, rummy-nose tetras, harlequin rasboras, Congo tetras. A hundred cardinals moving as one organism through a valley is the large tank's signature spectacle.
- Centerpiece groups: 6–8 angelfish, a group of discus (dedicated setup), 4–6 pearl gouramis. Large tanks let centerpiece fish behave naturally instead of pacing.
- Bottom crews at scale: 15–20 Corydoras (a proper shoal — magical to watch), 3–4 bristlenose plecos, a squad of otos.
- Shrimp colonies: Neocaridina in the hundreds — see our shrimp scaping guide; large tanks grow legendary colonies.
Quarantine at this scale is critical — introducing disease to 80 cardinals is a financial and emotional catastrophe. A 20-gallon quarantine tank is cheap insurance for a 120-gallon display.
Layout Ideas That Shine Big
- The grand valley: our concave technique at full scale — 50cm stone walls, a carpeted valley floor 60cm wide, a hundred tetras. This is the large tank's natural masterpiece.
- Forest: multiple large wood masses planted as a Nature Aquarium forest — only achievable with real lateral room; the canopy needs 100cm+ to read as forest rather than bush.
- Ryuboku (wood-and-stone): the ADA large-tank signature — massive driftwood intertwined with stone, planted densely. Demands the finest large wood you can source.
- Biotope river: a 150cm+ tank can replicate a genuine river stretch — our biotope guide's ideas with room for accurate zones (riffle, pool, bank).
- Dutch at scale: Dutch streets 30cm wide, plant groups the size of throw pillows — the formal garden as landscape architecture.
Maintenance: The Weekly Commitment
Large high-tech tanks demand 2–3 hours weekly: the big water change, glass cleaning (long magnetic cleaners; consider a step stool), trimming (long tools — 60cm scissors and tweezers are mandatory; your arm isn't reaching the back of a 60cm-deep tank), filter maintenance monthly, CO2 checks. It's real work. Many large-tank keepers automate: dosing pumps for fertilizer, auto-top-off for evaporation, timers for everything. Automation isn't laziness at this scale — it's sustainability. A system you can maintain for years beats a perfect system you burn out on in six months.
Trimming technique at scale: work in sections (one plant mass per session if needed), remove cuttings promptly (decaying trimmings in a big tank spike nutrients fast), and replant tops to keep masses dense bottom-to-top — our trimming maintenance guide covers the methods; apply them with long tools and patience.
Frequently Asked Questions
What's the minimum tank size where "large tank rules" apply?
Around 75 gallons / 120cm length — below that, standard aquascaping scales fine with modest upsizing. The 120cm mark is where viewing distance, hardscape mass, and system logistics all shift simultaneously. A 90cm tank is "big standard"; 120cm is "small large."
How much does it cost to aquascape a 120cm tank properly?
Honestly: $1,500–$3,500 for a high-tech build (tank+stand $500–1,000, light $300–800, CO2 $200–300, filtration $200–400, hardscape $200–500, plants $200–400, substrate $100–150). Low-tech halves it. It's a serious investment — which is why planning (and this guide) matters. Our budget guide has large-tank savings strategies.
Can one person maintain a 120-gallon aquascape?
Yes, with the right logistics: Python water changer, long tools, automated dosing, and a realistic weekly 2-hour block. The water change is the crux — without tap-connected fill/drain, 50% changes on 120 gallons simply won't happen consistently, and inconsistency is what kills large tanks.
Do I need two filters on a large tank?
Strongly recommended: two canisters (or one large + circulation pumps) give redundancy — if one fails, the tank survives — and better flow distribution across the length. Clean them on alternating schedules so you never strip all biological filtration at once.
How do I photograph a 6-foot tank?
Our photography guide covers this, but large-tank specifics: shoot in a dark room, use a tripod, step back far enough that the lens doesn't distort the ends (a 35–50mm equivalent works), and take overlapping shots to stitch a panorama if one frame can't capture it without distortion.
Is a large tank harder or easier than a nano?
Chemically easier (huge stability buffer), logistically harder (water changes, cost, physical labor), and design-wise harder (composition at scale is unforgiving). Nanos punish mistakes fast but forgive cheaply; large tanks forgive mistakes slowly but punish expensively. Pick your poison honestly.
Think Big, Commit Fully
Large-tank aquascaping rewards boldness: boulders not pebbles, masses not specimens, rhythms not accents. The investment — money, time, physical effort — is real, but so is the payoff: a living landscape with genuine grandeur, schools moving like weather, and a presence in the room that small tanks can't match. Plan the logistics first (water changes, hardscape weight, system redundancy), compose boldly, and maintain sustainably. When it's mature, enter it — our competitions guide explains how large tanks fare in contests (spoiler: impressively, when the composition earns the scale).
Tissue-culture plants are the exception — they’re grown in sterile gel and adapt with minimal melting, which is part of what you’re paying for. Plants bought submersed from another hobbyist’s tank also transition with little melt, since they’re already in the right form.
Which Plants Melt Most (and Least)
Heavy melters (expect significant leaf loss)
- Cryptocorynes — infamous for “crypt melt,” sometimes dropping every leaf after any disturbance. They almost always recover from the roots within weeks.
- Stem plants grown emersed — rotala, ludwigia, and hygrophila often shed lower emersed leaves while the growing tips transition.
- Amazon swords — emersed-grown swords typically lose their broad oval aerial leaves and replace them with longer submersed ribbon leaves.
Light melters
- Anubias, java fern, bucephalandra — slow-growing rhizome plants transition gradually; occasional old-leaf melt but rarely dramatic.
- Vallisneria — usually transitions well, though it dislikes the move itself and may sulk for a week.
- Floating plants — minimal melt since their leaves were already at the air-water interface.
The Acclimation Protocol
Step 1: Quarantine or dip first
Before acclimating to your tank’s conditions, make sure you’re not acclimating pests along with the plant. Run new arrivals through our quarantine and dip protocol — it adds days upfront but prevents months of regret.
Step 2: Float to temperature-match (30 minutes)
Float the bag or container in your tank for 20–30 minutes to equalize temperature. Plants are less temperature-sensitive than fish, but a 10°F shock on top of transplant stress is an avoidable insult.
Step 3: Trim before planting
Remove any leaves that are already damaged, yellowing, or heavily algae-covered — they won’t recover and they’ll rot in your tank, feeding algae. For stem plants, trim off the bottom inch and any emersed leaves that look unlikely to adapt; the plant wastes energy maintaining leaves it’s going to shed anyway. Keep the healthy growing tips — that’s where recovery starts.
Step 4: Plant correctly the first time
Follow our planting guide — right depth, crown exposed on rosettes, rhizomes unburied on epiphytes. Every uprooting and replanting restarts the acclimation clock, so get placement right on the first attempt. Decide where each plant goes before it goes in the water.
Step 5: Run a gentle first week
For the first 7 days after planting:
- Moderate light — run your normal photoperiod but consider dropping intensity 20–30% if your light is dimmable. Blast-level light on a melting plant grows algae on the dying leaves, not recovery.
- Stable CO2 — if you inject CO2, keep it consistent. Fluctuating CO2 during acclimation is a melt accelerator. If you’re low-tech, this doesn’t apply — see growing without CO2.
- Half-strength fertilizer — new plants with damaged leaves can’t use full dosing, and the excess feeds algae. Ramp to full strength over 2–3 weeks per our fertilizer schedule.
- No disturbance — don’t move, trim, or “check on” new plants for at least two weeks. Every touch resets root establishment. This is especially critical for crypts.
Step 6: Remove melt, keep the base
As emersed leaves melt, remove the mushy material promptly — decaying leaves release ammonia and grow fungus that can spread to healthy tissue. But never discard the plant while the crown, rhizome, or roots are firm and alive. A crypt that’s lost every leaf but has firm roots is a plant that’s about to recover, not a dead plant. Give it 3–4 weeks before judging.
Telling Normal Melt From Real Problems
Normal transition melt:
- Affects oldest/emersed leaves first, newest growth last
- New submersed leaves emerge even as old ones dissolve
- Roots and crown stay firm and white/green
- Timeline: 1–4 weeks, then obvious new growth
Concerning melt (see our full melting diagnosis guide):
- New growth also melts or emerges deformed
- Rhizome or crown turns mushy and brown — this is rot, not transition
- Entire plant dissolves within days with no new growth after 4+ weeks
- Melting spreads to established plants that weren’t recently moved
Buying Tips to Minimize Melt
- Buy submersed-grown when available — hobbyist-grown cuttings transition with almost no melt.
- Choose tissue culture for sensitive species — crypts and delicate stems establish far more reliably from sterile cups.
- Avoid plants already melting in the store tank — some melt is normal, but a plant that’s mostly mush at purchase has less energy for recovery.
- Transport carefully — keep plants damp and out of direct sun/heat. A plant that dries out or cooks in a hot car melts far worse than one transported properly.
The First-Month Timeline: What to Expect Week by Week
Knowing what’s normal when removes most acclimation anxiety. Here’s the typical timeline for a healthy plant adapting to a new tank:
Week 1: The quiet week
Almost nothing visible happens. The plant is growing roots you can’t see and assessing its new environment. Some species (vallisneria, stem plants) may start shedding their lowest leaves. This is normal. Resist the urge to “help” — no moving, no extra fertilizer, no light changes. The most common beginner mistake is intervening during a week when the correct action is nothing.
Week 2: Melt peaks
This is when emersed leaves give up in earnest. Crypts may drop everything; swords shed their broad aerial leaves; stem plants lose lower foliage. It looks catastrophic and it’s usually fine. Keep removing mushy material, keep conditions stable, and watch the crown and growing tips — if those are firm and green, recovery is already underway.
Week 3: The turn
New submersed-adapted leaves emerge — smaller, thinner, often a slightly different shade of green than the emersed foliage. Stem plant tips start growing visibly; crypts push tiny curled leaves from the crown; swords unfurl narrow ribbon leaves. This is the moment most beginners exhale for the first time.
Week 4+: Established
New growth outpaces melt, and the plant is functionally yours. You can resume full-strength fertilizer, normal trimming, and stop treating it as fragile. Some slow growers (anubias, bucephalandra) take 6–8 weeks to show obvious progress — that’s their normal speed, not a problem.
Acclimating Different Plant Formats
Tissue-culture cups
Sterile, pest-free, and already adapted to high-humidity (not emersed) growth — tissue cultures melt the least of any format. Rinse the agar gel off gently (leftover gel rots and feeds fungus), split the portion into small plantlets, and plant per our planting guide. They establish slowly for the first two weeks, then accelerate. No dip needed, minimal acclimation stress — this is the premium experience you’re paying for.
Potted plants
Remove the pot and strip away the rockwool completely — leftover rockwool traps debris and rots. Tease the root mass apart gently; if it’s a dense mat, splitting it into 2–3 smaller portions actually establishes faster than planting one big clump (more growing points, better water flow around roots). Potted plants are usually emersed-grown, so expect the standard 2–4 week melt cycle.
Bare-root / bunched stems
Typically sold as weighted bunches. Remove any bands, foam, or weights, strip the lower leaves, and plant stems individually or in small groups. Bunched stems from the store are often already transitioning — check for new submersed growth at the tips, which tells you the plant is mid-adaptation and will settle quickly.
Hobbyist cuttings
Already submersed-grown and the fastest to establish — often showing new growth within days. The main acclimation factor is water-parameter difference between the two tanks. Float to temperature-match, plant promptly, and they’ll usually take off with minimal melt. This is why experienced hobbyists prefer trading cuttings over buying potted plants.
Frequently Asked Questions
Should I use a “plant starter” or transplant fertilizer?
Products marketed for transplant shock are mostly B-vitamins and mild hormones. They don’t hurt, but there’s no strong evidence they help aquarium plants specifically. Stable conditions and patience outperform any bottle. Save the money for more plants.
My new plant melted completely — bare crown, no leaves. Is it dead?
Probably not, if the crown or rhizome is firm. Crypts and swords routinely lose 100% of their leaves and regrow from the base within a month. The test is firmness: firm and pale/green means alive; mushy and brown/black means rot. Give firm-but-leafless plants a full 4 weeks before declaring them dead.
Can I speed up acclimation with extra light or CO2?
No — and trying usually backfires. A melting plant can’t use extra light; the excess just grows algae on its dying leaves. Keep light moderate and CO2 stable (not boosted) during acclimation. Growth speed comes from the plant’s own adaptation timeline, which you can’t rush, only avoid delaying.
Should new plants go straight into my main display tank?
After quarantine/dipping, yes — there’s no benefit to a separate “growing-in” tank for most plants. They acclimate to your water fastest in the tank they’ll live in. The exception is very delicate species going into a tank with boisterous fish; give those a few weeks in a calm corner or breeder box first.
The Patience Rule
The single most important acclimation skill is restraint: plant it right, set gentle conditions, remove decay, and then leave it alone for a month. The hobbyists with the best plant growth aren’t doing something clever in week one — they’re simply not interfering in weeks two through four while the plants do what they’ve evolved to do. Melt looks like failure and feels like failure, but in most cases it’s the visible part of a plant successfully becoming yours.