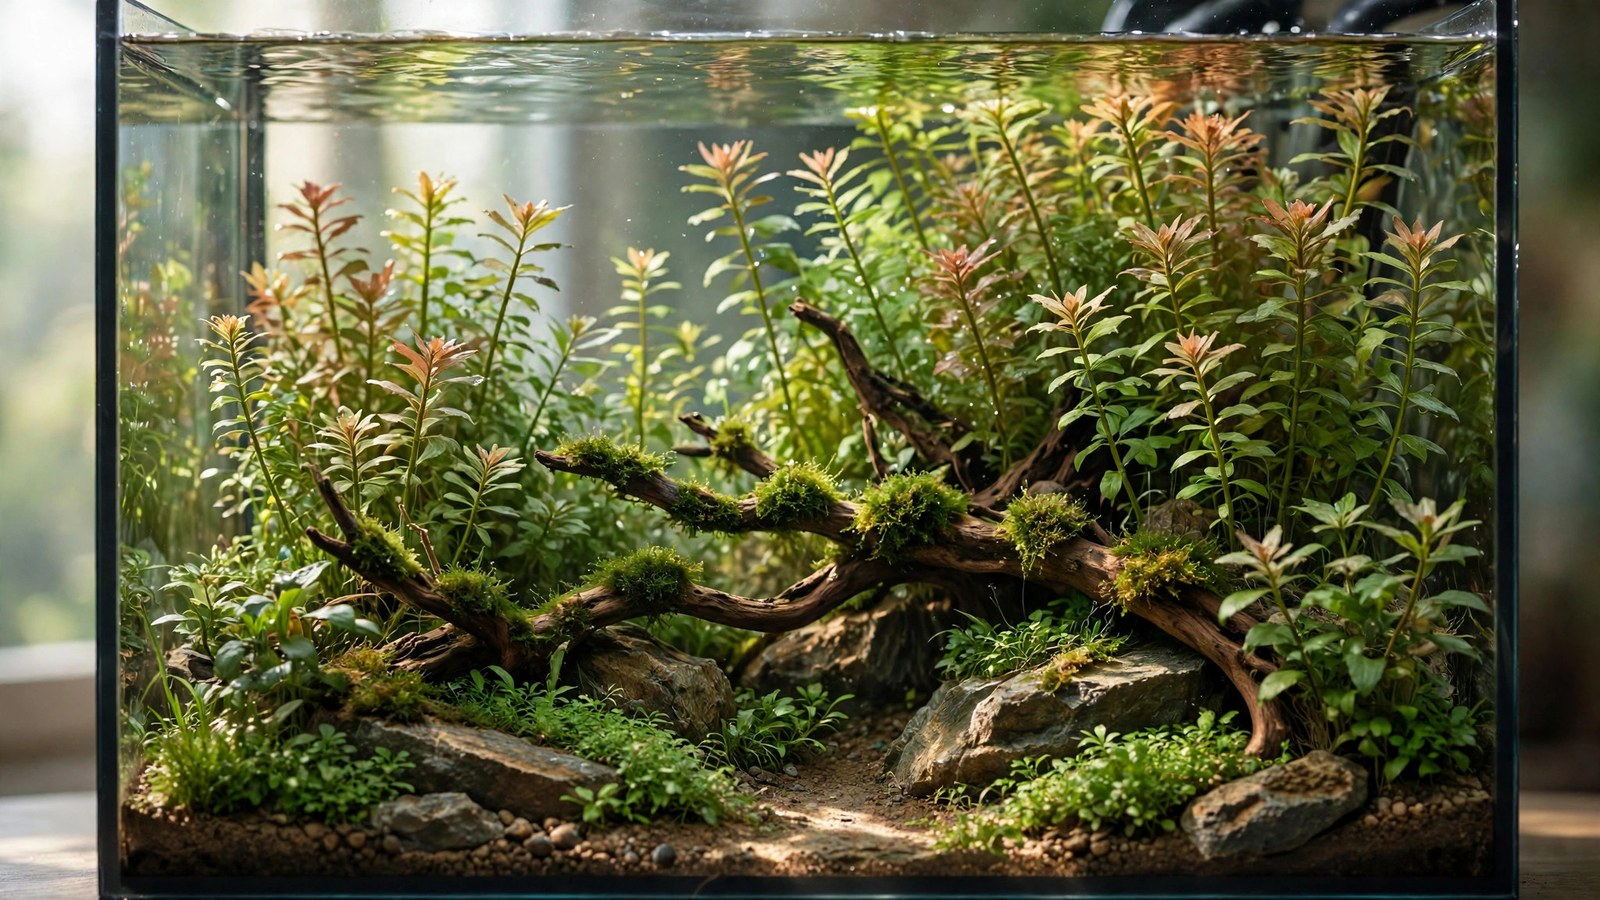
You can spend four months growing a masterpiece and ruin it in one bad photo — blown highlights, green color cast, a reflection of your living room across the glass. Photographing your aquascape well isn't vanity; it's documentation, it's contest entry, and it's how the hobby shares ideas. The good news: aquarium photography is a solved problem. A dark room, a tripod, the right settings, and ten minutes of patience produce images that do your tank justice — with any modern camera, including phones.
The Setup: Room, Tripod, Timing
- Dark room: turn off every light except the tank's. Room light reflecting on glass is the #1 killer of aquarium photos — it creates haze, reflections, and washed-out contrast. Shoot at night or black out windows; even a dim lamp across the room shows up.
- Tripod: non-negotiable for sharp shots. Aquarium photography uses slow shutter speeds (fish move, but the scape doesn't — and you're often shooting the scape). A tripod also lets you frame precisely and shoot repeatedly without reframing. For phones, a $15 mini tripod works.
- Clean the glass — inside and out: every speck, water spot, and algae dot is visible at full resolution. Scrape the inside, wipe the outside with glass cleaner, and check by shining a flashlight at an angle (reveals smudges invisible head-on).
- Timing: shoot mid-photoperiod (2–4 hours after lights-on) — plants are pearling, fish are active, colors are at peak. Avoid the first/last hour when some species' colors are muted.
- Water level: top off before shooting — a visible waterline gap at the top reads as neglect in photos. (Or shoot slightly cropped to hide it.)
Camera Settings: The Recipe
DSLR / mirrorless
- Mode: manual. Auto modes get confused by the bright tank in a dark room.
- ISO: as low as possible — 100–400. Low ISO = clean, noise-free images; the tripod makes slow shutters viable.
- Aperture: f/8–f/11 for full-tank shots (deep depth of field — front glass to back glass sharp). Open up to f/2.8–f/4 for artistic shallow-focus detail shots.
- Shutter: whatever the meter demands at your ISO/aperture — often 1/15s to 1/60s for the scape. For freezing fish motion, you'll need 1/125s+ and higher ISO — accept some noise for sharp fish, or shoot the scape slow and the fish fast as separate frames.
- White balance: custom or 6500–7500K to match your light; auto white balance often casts aquarium photos green or magenta. Shoot RAW so you can fix it perfectly in post.
- Focus: manual focus, magnified live view, focused on the focal point (your hero stone/wood). Autofocus hunts on glass.
- Timer/remote: 2-second self-timer or remote release — eliminates camera shake from pressing the shutter.
Phone cameras
Modern phones shoot excellent aquarium photos with the right technique:
- Use the main (1×) lens — it has the best sensor; avoid digital zoom (crop later instead).
- Lock exposure and focus: tap-and-hold on the tank's midground to lock AE/AF, then slide exposure down slightly — phones overexpose bright tanks.
- Night mode off (it over-processes); use standard photo mode on the tripod.
- Shoot in the phone's RAW/Pro mode if available — dramatically better white-balance control.
- Lens against glass for detail shots eliminates reflections entirely — the "lens-on-glass" trick is the phone photographer's superpower.
Framing: Composition for the Photo
- Straight-on, centered, level: the standard contest framing — camera at the tank's vertical midpoint, lens perpendicular to the front glass, frame edges parallel to the tank edges. Crooked framing is the most common amateur tell; use a bubble level or the camera's grid.
- Fill the frame: the tank's edges should nearly touch the frame's edges — dead space around the tank wastes resolution and looks tentative. Leave a hair of margin for straightening in post.
- Include the full height: don't crop the substrate or the waterline (unless hiding equipment) — the composition needs its floor and ceiling.
- Detail shots: after the full-tank hero shot, shoot vignettes — the mossy branch, the schooling fish mid-valley, the carpet texture. These tell the layout's story and make great contest supporting material and social posts.
- Top-down: for carpets and wabi-kusa, shoot straight down — reveals patterns invisible from the front.
Fish: Catching Them at Their Best
- Feed lightly 30 minutes before: active, alert fish — not the post-feeding torpor, just enough to get them moving and colored up.
- Burst mode: hold the shutter and shoot 20–50 frames; pick the one where the school forms perfectly. Fish photography is a numbers game — professionals shoot hundreds of frames per session.
- Patience over chasing: set up the shot, then wait. Schooling fish eventually cross the perfect spot; chasing them with the camera guarantees bad angles and stressed fish.
- Fast shutter for fish portraits: 1/250s+, ISO as needed. Freeze the motion, accept the noise — a sharp noisy fish beats a blurry clean one.
- Best behavior windows: many species school tightest when slightly alert — after a water change, when a new object appears near the tank, or at "dawn" when lights first ramp up.
Common Problems and Fixes
- Reflections: dark room + lens close to glass + black cloth draped over you and the camera (the pro's "black tent" trick). Polarizing filters help with angled shots.
- Green/magenta cast: custom white balance or RAW correction. If the whole image is green, your WB is set for daylight while the tank runs warm LEDs — adjust toward 7000K+.
- Blown highlights: pale sand and light stone blow out easily — expose for the highlights (slight underexposure), then lift shadows in post. Blown highlights are unrecoverable; dark shadows are fixable.
- Soft/blurry images: tripod + timer + manual focus solves 95%. If fish are blurry but the scape is sharp, that's motion — faster shutter, not a focus problem.
- Glass distortion: shoot perpendicular to the glass; angled shots through thick glass distort and reflect. For very thick (low-iron) glass, perpendicular matters even more.
- Blackwater/tinted water: increase exposure slightly (+0.5–1 stop) — meters underexpose dark water; correct the brown cast gently in post without removing the mood. Don't "fix" tannin tint into blue — the tint is the scape.
Post-Processing: Honest Enhancement
Basic editing is expected (and contest-legal within limits — see our competitions guide for rules):
- Crop and straighten: perfect the framing — level horizons, tight edges.
- White balance: neutralize color casts; the greens should look like the plants, not like the lighting.
- Exposure/contrast: gentle S-curve for depth; recover highlights, open shadows slightly.
- Spot removal: clone out the stray bubble, the bit of algae on the glass edge, the equipment reflection you missed.
- Don't: add/remove elements, composite fish from other shots (contest fraud), oversaturate into neon unreality, or blur the background artificially. Honest enhancement shows the tank at its best; manipulation shows a tank that doesn't exist.
Frequently Asked Questions
Can I take contest-quality photos with a phone?
Yes — modern flagship phones on a tripod, in a dark room, shooting RAW, produce images that place in contests. The phone's limitations (small sensor noise in low light, no true optical zoom range) matter less than technique: dark room, tripod, clean glass, locked exposure, and patience outweigh sensor size. Plenty of ranked entries were shot on phones.
Why do my photos look washed out compared to what I see?
Almost always room-light reflection on the glass — your eyes ignore it, the camera doesn't. Total darkness except the tank light is the fix. Second cause: exposure — the camera meters the bright tank and overexposes; dial exposure compensation to -0.5 or -1 and watch the contrast return.
How do I photograph fish without blur?
Fast shutter (1/250s+), higher ISO (800–3200 as needed), burst mode, and good timing — or a flash/strobe (diffused, off-camera) which freezes motion regardless of shutter speed. Note: some fish stress at flash; observe your livestock and use it sparingly. For scape-only shots, slow shutter on tripod is sharper than any fast handheld frame.
What's the best background for photography?
For the photo session, a temporary black poster board behind the tank (outside, not in the water) gives maximum contrast and hides room clutter — even if your permanent background is frosted white. Black makes greens glow and fish colors ignite. Remove it after; it's a photo tool, not a decor choice.
Should I remove equipment before shooting?
Yes — temporarily pull the heater, thermometer, and any visible intake guards just for the photo session (minutes, not hours — watch temperature). Lily pipes and diffusers: reposition out of frame if possible. Every visible equipment bit costs realism. Put it all back immediately after.
How many photos should I take?
Hundreds. Full-tank hero shots: 30–50 frames across the session (light and fish vary minute to minute). Detail shots: as many as interest you. Storage is free; the perfect frame is rare. Cull ruthlessly afterward — keep the best 5–10, archive the rest, share the best 1–3.
Shoot What You Grew
Photography is the final aquascaping skill — the one that shares your work with the world, enters it in contests, and preserves it after the inevitable rescape. The formula never changes: dark room, tripod, clean glass, locked settings, hundreds of frames, honest editing. Master it once and every tank you ever build gets the documentation it deserves — including the large showpiece and the nano jewel box alike.
Tissue-culture plants are the exception — they’re grown in sterile gel and adapt with minimal melting, which is part of what you’re paying for. Plants bought submersed from another hobbyist’s tank also transition with little melt, since they’re already in the right form.
Which Plants Melt Most (and Least)
Heavy melters (expect significant leaf loss)
- Cryptocorynes — infamous for “crypt melt,” sometimes dropping every leaf after any disturbance. They almost always recover from the roots within weeks.
- Stem plants grown emersed — rotala, ludwigia, and hygrophila often shed lower emersed leaves while the growing tips transition.
- Amazon swords — emersed-grown swords typically lose their broad oval aerial leaves and replace them with longer submersed ribbon leaves.
Light melters
- Anubias, java fern, bucephalandra — slow-growing rhizome plants transition gradually; occasional old-leaf melt but rarely dramatic.
- Vallisneria — usually transitions well, though it dislikes the move itself and may sulk for a week.
- Floating plants — minimal melt since their leaves were already at the air-water interface.
The Acclimation Protocol
Step 1: Quarantine or dip first
Before acclimating to your tank’s conditions, make sure you’re not acclimating pests along with the plant. Run new arrivals through our quarantine and dip protocol — it adds days upfront but prevents months of regret.
Step 2: Float to temperature-match (30 minutes)
Float the bag or container in your tank for 20–30 minutes to equalize temperature. Plants are less temperature-sensitive than fish, but a 10°F shock on top of transplant stress is an avoidable insult.
Step 3: Trim before planting
Remove any leaves that are already damaged, yellowing, or heavily algae-covered — they won’t recover and they’ll rot in your tank, feeding algae. For stem plants, trim off the bottom inch and any emersed leaves that look unlikely to adapt; the plant wastes energy maintaining leaves it’s going to shed anyway. Keep the healthy growing tips — that’s where recovery starts.
Step 4: Plant correctly the first time
Follow our planting guide — right depth, crown exposed on rosettes, rhizomes unburied on epiphytes. Every uprooting and replanting restarts the acclimation clock, so get placement right on the first attempt. Decide where each plant goes before it goes in the water.
Step 5: Run a gentle first week
For the first 7 days after planting:
- Moderate light — run your normal photoperiod but consider dropping intensity 20–30% if your light is dimmable. Blast-level light on a melting plant grows algae on the dying leaves, not recovery.
- Stable CO2 — if you inject CO2, keep it consistent. Fluctuating CO2 during acclimation is a melt accelerator. If you’re low-tech, this doesn’t apply — see growing without CO2.
- Half-strength fertilizer — new plants with damaged leaves can’t use full dosing, and the excess feeds algae. Ramp to full strength over 2–3 weeks per our fertilizer schedule.
- No disturbance — don’t move, trim, or “check on” new plants for at least two weeks. Every touch resets root establishment. This is especially critical for crypts.
Step 6: Remove melt, keep the base
As emersed leaves melt, remove the mushy material promptly — decaying leaves release ammonia and grow fungus that can spread to healthy tissue. But never discard the plant while the crown, rhizome, or roots are firm and alive. A crypt that’s lost every leaf but has firm roots is a plant that’s about to recover, not a dead plant. Give it 3–4 weeks before judging.
Telling Normal Melt From Real Problems
Normal transition melt:
- Affects oldest/emersed leaves first, newest growth last
- New submersed leaves emerge even as old ones dissolve
- Roots and crown stay firm and white/green
- Timeline: 1–4 weeks, then obvious new growth
Concerning melt (see our full melting diagnosis guide):
- New growth also melts or emerges deformed
- Rhizome or crown turns mushy and brown — this is rot, not transition
- Entire plant dissolves within days with no new growth after 4+ weeks
- Melting spreads to established plants that weren’t recently moved
Buying Tips to Minimize Melt
- Buy submersed-grown when available — hobbyist-grown cuttings transition with almost no melt.
- Choose tissue culture for sensitive species — crypts and delicate stems establish far more reliably from sterile cups.
- Avoid plants already melting in the store tank — some melt is normal, but a plant that’s mostly mush at purchase has less energy for recovery.
- Transport carefully — keep plants damp and out of direct sun/heat. A plant that dries out or cooks in a hot car melts far worse than one transported properly.
The First-Month Timeline: What to Expect Week by Week
Knowing what’s normal when removes most acclimation anxiety. Here’s the typical timeline for a healthy plant adapting to a new tank:
Week 1: The quiet week
Almost nothing visible happens. The plant is growing roots you can’t see and assessing its new environment. Some species (vallisneria, stem plants) may start shedding their lowest leaves. This is normal. Resist the urge to “help” — no moving, no extra fertilizer, no light changes. The most common beginner mistake is intervening during a week when the correct action is nothing.
Week 2: Melt peaks
This is when emersed leaves give up in earnest. Crypts may drop everything; swords shed their broad aerial leaves; stem plants lose lower foliage. It looks catastrophic and it’s usually fine. Keep removing mushy material, keep conditions stable, and watch the crown and growing tips — if those are firm and green, recovery is already underway.
Week 3: The turn
New submersed-adapted leaves emerge — smaller, thinner, often a slightly different shade of green than the emersed foliage. Stem plant tips start growing visibly; crypts push tiny curled leaves from the crown; swords unfurl narrow ribbon leaves. This is the moment most beginners exhale for the first time.
Week 4+: Established
New growth outpaces melt, and the plant is functionally yours. You can resume full-strength fertilizer, normal trimming, and stop treating it as fragile. Some slow growers (anubias, bucephalandra) take 6–8 weeks to show obvious progress — that’s their normal speed, not a problem.
Acclimating Different Plant Formats
Tissue-culture cups
Sterile, pest-free, and already adapted to high-humidity (not emersed) growth — tissue cultures melt the least of any format. Rinse the agar gel off gently (leftover gel rots and feeds fungus), split the portion into small plantlets, and plant per our planting guide. They establish slowly for the first two weeks, then accelerate. No dip needed, minimal acclimation stress — this is the premium experience you’re paying for.
Potted plants
Remove the pot and strip away the rockwool completely — leftover rockwool traps debris and rots. Tease the root mass apart gently; if it’s a dense mat, splitting it into 2–3 smaller portions actually establishes faster than planting one big clump (more growing points, better water flow around roots). Potted plants are usually emersed-grown, so expect the standard 2–4 week melt cycle.
Bare-root / bunched stems
Typically sold as weighted bunches. Remove any bands, foam, or weights, strip the lower leaves, and plant stems individually or in small groups. Bunched stems from the store are often already transitioning — check for new submersed growth at the tips, which tells you the plant is mid-adaptation and will settle quickly.
Hobbyist cuttings
Already submersed-grown and the fastest to establish — often showing new growth within days. The main acclimation factor is water-parameter difference between the two tanks. Float to temperature-match, plant promptly, and they’ll usually take off with minimal melt. This is why experienced hobbyists prefer trading cuttings over buying potted plants.
Frequently Asked Questions
Should I use a “plant starter” or transplant fertilizer?
Products marketed for transplant shock are mostly B-vitamins and mild hormones. They don’t hurt, but there’s no strong evidence they help aquarium plants specifically. Stable conditions and patience outperform any bottle. Save the money for more plants.
My new plant melted completely — bare crown, no leaves. Is it dead?
Probably not, if the crown or rhizome is firm. Crypts and swords routinely lose 100% of their leaves and regrow from the base within a month. The test is firmness: firm and pale/green means alive; mushy and brown/black means rot. Give firm-but-leafless plants a full 4 weeks before declaring them dead.
Can I speed up acclimation with extra light or CO2?
No — and trying usually backfires. A melting plant can’t use extra light; the excess just grows algae on its dying leaves. Keep light moderate and CO2 stable (not boosted) during acclimation. Growth speed comes from the plant’s own adaptation timeline, which you can’t rush, only avoid delaying.
Should new plants go straight into my main display tank?
After quarantine/dipping, yes — there’s no benefit to a separate “growing-in” tank for most plants. They acclimate to your water fastest in the tank they’ll live in. The exception is very delicate species going into a tank with boisterous fish; give those a few weeks in a calm corner or breeder box first.
The Patience Rule
The single most important acclimation skill is restraint: plant it right, set gentle conditions, remove decay, and then leave it alone for a month. The hobbyists with the best plant growth aren’t doing something clever in week one — they’re simply not interfering in weeks two through four while the plants do what they’ve evolved to do. Melt looks like failure and feels like failure, but in most cases it’s the visible part of a plant successfully becoming yours.