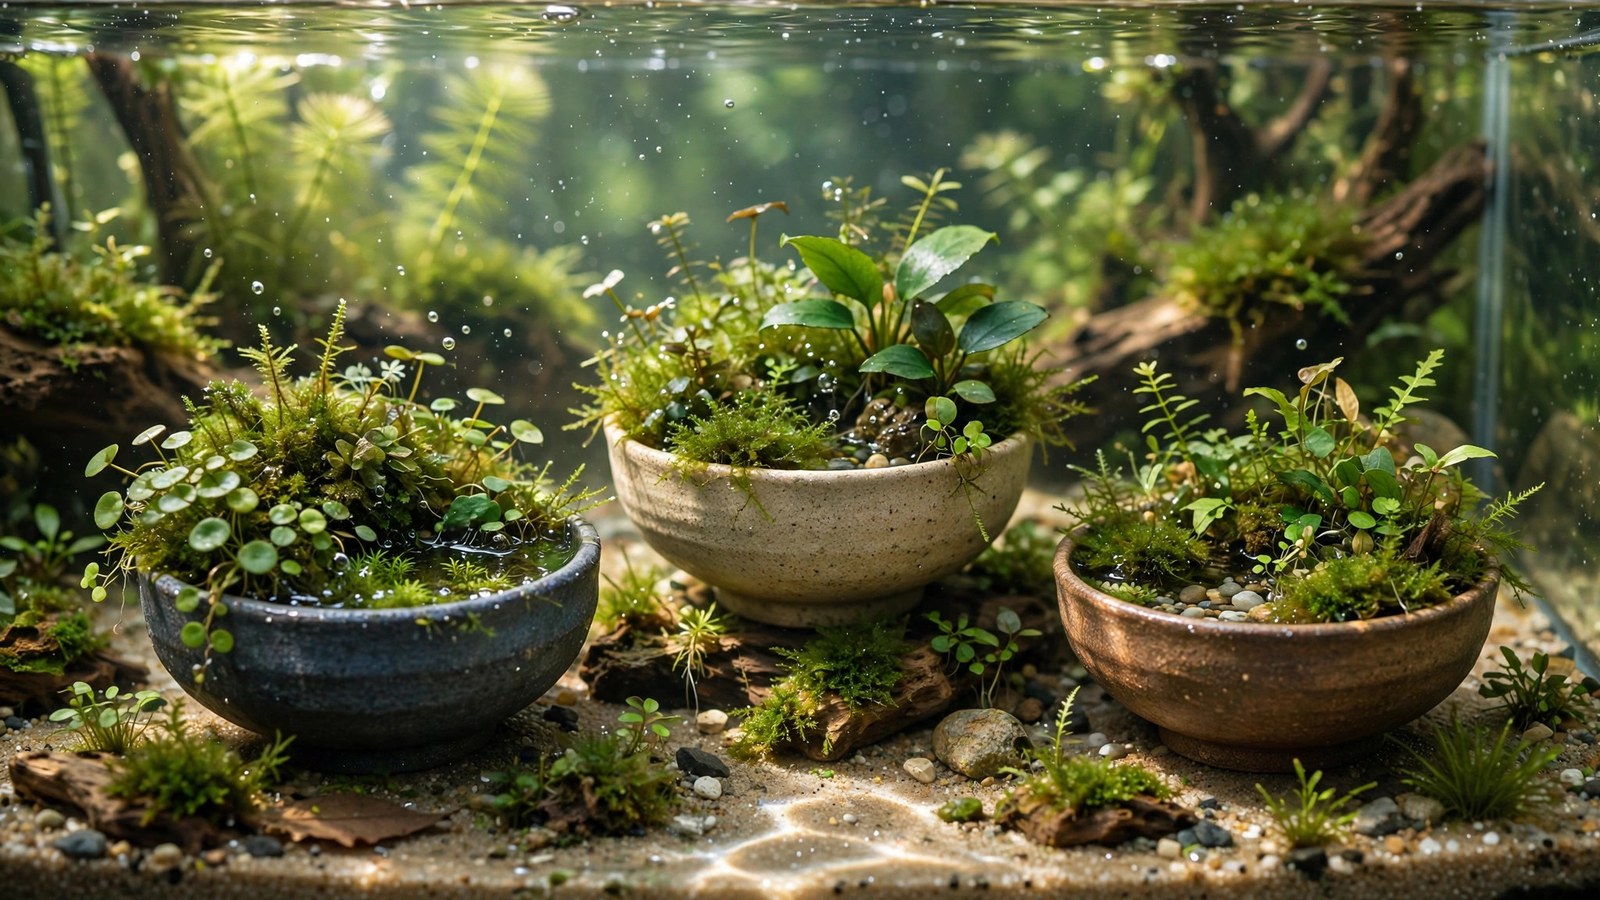
Wabi-kusa is aquascaping stripped to its essence: a ball of substrate, a handful of plants, a glass bowl — and a miniature wetland that grows wilder and more beautiful the less you fuss over it. Invented by Takashi Amano as the emersed cousin of the Nature Aquarium, wabi-kusa (literally "beautiful imperfection") lets you grow aquatic plants in their emersed form on a desk, a windowsill, or a shelf, no aquarium required. It's the cheapest, smallest, most forgiving entry point into the planted-tank world — and a legitimate art form in its own right.
What Wabi-Kusa Is (and Isn't)
A wabi-kusa is a ball of nutrient-rich substrate (traditionally ADA Aqua Soil) planted with aquatic and marsh plants, placed in a shallow glass vessel with a little water at the base. The plants grow emersed — roots in the wet substrate ball, foliage in humid air — exactly as many aquarium plants grow in nature during the dry season. There's no filter, no CO2, no water changes in the aquarium sense. You mist it, top up the water, trim occasionally, and watch a tiny ecosystem develop.
What it isn't: a terrarium (too wet, no drainage layer needed — the substrate ball is the medium), a houseplant pot (the plants are aquatic species in emersed form), or a toy that dies in a month. A well-made wabi-kusa lasts years, going through seasonal cycles of explosive growth, flowering, and rest. Amano's original wabi-kusa installations at the Sumida Aquarium ran indefinitely with basic care.
The philosophy is pure wabi-sabi: imperfection as beauty. The ball is lumpy, the planting is naturalistic rather than geometric, and the arrangement is meant to look like a clump of vegetation pulled from a riverbank — because that's literally what it mimics.
What You Need
- A glass vessel: shallow bowls, apothecary jars, or purpose-made wabi-kusa glasses. Wide and shallow beats tall and narrow — surface area for planting matters more than depth. Anything from a 4-inch bowl to a 12-inch dish works.
- Substrate: aquasoil (ADA Amazonia or equivalent) is traditional — nutrient-rich and holds a ball shape when moist. You'll need enough to form a ball roughly 1/3 the vessel's diameter.
- Ball binder (optional): a thin layer of sphagnum moss wrapped around the ball before planting helps it hold together and stay moist. Traditional method; recommended for beginners.
- Plants: 3–6 species (see list below). Tissue-culture cups are ideal — pest-free, and the small plantlets suit the scale.
- Water: dechlorinated tap or RO; just enough to cover the bottom of the vessel (5–15mm). The ball wicks moisture up.
- Light: a small LED or a bright windowsill (no direct midday sun — it cooks the bowl). 8–10 hours daily.
- Mister: a spray bottle. Your most-used tool.
Total startup cost: easily under $30 if you already own a bowl and a light. Compare that to a high-tech aquascape and you see why wabi-kusa is the hobby's best gateway.
Making the Substrate Ball: Step by Step
- Moisten the aquasoil until it's damp enough to clump — like wet sand for a sandcastle, not soup. Too dry and it crumbles; too wet and it's mud.
- Form a ball or dome roughly the size of an orange (scale to your vessel). Pack it firmly. A slightly flattened bottom helps it sit stable.
- Wrap in sphagnum moss (optional but recommended): lay damp long-fiber sphagnum in a sheet, place the ball in the center, and gather the moss around it like wrapping a dumpling. This skin holds moisture and gives roots and moss something to grip.
- Set the ball in the vessel and add water to just below the ball's "equator" — the bottom sits wet, the top stays merely damp. The wicking action keeps the whole ball moist.
- Plant immediately: poke holes with a chopstick or tweezers and insert plantlets. Plant densely — wabi-kusa should look full from day one, not sparse.
- Mist thoroughly, cover loosely with cling film for the first week (with air holes), and place in bright indirect light. The cover maintains near-100% humidity while plants establish; remove it gradually over week two.
Plant Selection: The Emersed All-Stars
The best wabi-kusa plants are aquarium species with strong emersed forms. Mix heights and textures — one tall accent, two midground fillers, one carpeting/creeping species:
- Hygrophila (difformis, corymbosa 'Compact'): the classic wabi-kusa backbone — fast, bushy, flowers readily emersed with delicate purple blooms.
- Ludwigia repens / palustris: emersed leaves turn olive-green to reddish; produces small yellow flowers. Great midground mass.
- Cryptocoryne parva / wendtii: slow, tidy rosettes for the ball's lower slopes; emersed crypts may produce their extraordinary spathe flowers.
- Anubias nana 'Petite': mount small pieces on the ball's surface or on a tiny wood accent — deep green contrast against softer foliage.
- Staurogyne repens: creeps over the ball's surface like a groundcover, rooting as it goes.
- Micranthemum 'Monte Carlo' / Hemianthus: carpet the ball's top and cascade over the edges.
- Acorus gramineus (dwarf sweet flag): grass-like vertical accent — the "reeds" of your miniature wetland.
- Mosses (java, Christmas, Riccia): press onto the ball between plants; they'll colonize every gap into a seamless green skin.
- Hydrocotyle tripartita: clover-like creeper that drapes beautifully over the ball's edge.
One accent stone or tiny driftwood piece elevates the composition enormously — a single miniature Seiryu fragment or a twig of spider wood gives the planting something to grow around. This is where our one-rock minimalist principles scale down to bowl size: one hardscape element, placed off-center, changes everything.
Daily and Weekly Care
Wabi-kusa care is minimal but consistent:
- Mist daily (twice daily in dry climates or heated rooms) — the foliage should glisten, never dry out. This is the single most important habit.
- Top up water as it evaporates — every few days. Keep the base level constant; don't flood the ball.
- Light 8–10 hours daily. A timer removes the guesswork.
- Trim every 2–4 weeks: emersed growth with unlimited atmospheric CO2 is vigorous. Pinch back Hygrophila and Ludwigia before they shade everything; thin creepers spilling too far. Our trimming maintenance principles apply at miniature scale — shape, don't hack.
- Fertilize lightly: the aquasoil feeds the ball for 6–12 months. After that, a monthly misting with heavily diluted liquid fertilizer (1/4 strength) keeps growth lush. Over-fertilizing burns emersed leaves — less is more.
- Change the base water monthly: tip out the old water and replace it — prevents stagnation and mineral buildup.
Common Problems and Fixes
- Mold on the ball (first weeks): normal. Increase airflow slightly, mist a little less, and it passes as plants establish. Springtails help if it persists.
- Melting plantlets: tissue-culture and submerged-grown plants often melt their old leaves while growing emersed replacements — the same transplant melt aquarium plants show, just in reverse. Don't discard; wait 2–3 weeks for new growth.
- Leggy, pale growth: not enough light. Move closer to the light source or increase duration — but watch for algae on the ball's wet surface, the sign you've overshot.
- Ball falling apart: usually from flooding (water level too high) or handling. Keep water below the equator, don't squeeze the ball, and let roots bind it — after two months the root mass holds everything together.
- One species taking over: Hygrophila will try. Trim the bully ruthlessly; wabi-kusa is gardening, and the gardener decides.
Beyond the Bowl: Wabi-Kusa Variations
Once you've mastered the basic ball, the form has delightful variations:
- Wabi-kusa in an aquarium: place the ball in a shallow tank with a few centimeters of water — it becomes an island scape. Shrimp graze the submerged portion; the emersed top flowers. Our island-style aquascape guide is the big-tank version of this idea.
- Hanging kokedama-style: wrap the ball in moss and string and hang it — same plants, vertical presentation.
- Seasonal displays: replant the ball 2–3 times a year with different species for spring/summer/autumn looks — a practice straight from Japanese horticulture.
- Wabi-kusa walls: multiple balls in a large shallow tray create a miniature wetland landscape — essentially a Nature Aquarium without the aquarium.
Frequently Asked Questions
How long does a wabi-kusa last?
Years, with basic care. The aquasoil's nutrients deplete after 6–12 months, but light fertilization extends its life indefinitely, and the ball becomes a self-sustaining root mass. Many hobbyists keep the same ball for 2–3 years, replanting sections seasonally. When growth finally stalls despite fertilizing, rebuild the ball with fresh soil — a 20-minute job.
Can I use regular potting soil instead of aquasoil?
You can, but aquasoil is better: it holds the ball shape, doesn't compact into anaerobic mud, and releases nutrients slowly. If using potting soil, choose organic soil with no perlite or added fertilizers, cap it with a sphagnum wrap, and expect a messier, shorter-lived ball. Mineralized topsoil is the best DIY alternative.
Do I need a lid or cover?
Only for the first 1–2 weeks while plants establish — cling film with air holes maintains the humidity that prevents transplant shock. After that, open air is fine as long as you mist daily. Permanent covers invite mold and block the airflow that keeps the planting healthy.
Why are my plants flowering? Is that normal?
Completely normal and a sign of success — many aquarium plants flower readily in emersed form (Hygrophila, Ludwigia, Cryptocoryne, Anubias) because they're getting full light and unlimited CO2. Emersed flowering is one of wabi-kusa's great pleasures; submerged aquarium plants almost never bloom. Enjoy it, and let seed heads develop if you're curious.
Can wabi-kusa grow fully submerged in a tank?
The ball can sit in an aquarium as an island feature, but the emersed-grown foliage will melt when submerged long-term — the plants must transition back to submerged form. It works as a temporary display or a transition method (grow emersed, then flood — essentially the dry start method in miniature), not as a permanent underwater arrangement.
Is wabi-kusa good for beginners?
It's the best beginner project in the planted hobby: under $30, no filter or CO2 to tune, mistakes cost a replanting rather than a crashed tank, and it teaches emersed growth, trimming, and composition. Many aquascapers started with a bowl on a desk. If the bowl thrives for three months, you're ready for a real aquascape.
The Smallest Landscape
Wabi-kusa distills everything beautiful about planted tanks — living plants, natural composition, seasonal change — into something that fits on a bookshelf and asks for five minutes a day. Build one ball, plant it densely, mist it faithfully, and in two months you'll have a flowering wetland the size of a grapefruit. It's also the perfect low-stakes laboratory: test plant combinations, practice trimming, and develop your eye for composition before committing to a full 10-gallon aquascape or larger build. The bowl teaches; the tank is just a bigger bowl.
Tissue-culture plants are the exception — they’re grown in sterile gel and adapt with minimal melting, which is part of what you’re paying for. Plants bought submersed from another hobbyist’s tank also transition with little melt, since they’re already in the right form.
Which Plants Melt Most (and Least)
Heavy melters (expect significant leaf loss)
- Cryptocorynes — infamous for “crypt melt,” sometimes dropping every leaf after any disturbance. They almost always recover from the roots within weeks.
- Stem plants grown emersed — rotala, ludwigia, and hygrophila often shed lower emersed leaves while the growing tips transition.
- Amazon swords — emersed-grown swords typically lose their broad oval aerial leaves and replace them with longer submersed ribbon leaves.
Light melters
- Anubias, java fern, bucephalandra — slow-growing rhizome plants transition gradually; occasional old-leaf melt but rarely dramatic.
- Vallisneria — usually transitions well, though it dislikes the move itself and may sulk for a week.
- Floating plants — minimal melt since their leaves were already at the air-water interface.
The Acclimation Protocol
Step 1: Quarantine or dip first
Before acclimating to your tank’s conditions, make sure you’re not acclimating pests along with the plant. Run new arrivals through our quarantine and dip protocol — it adds days upfront but prevents months of regret.
Step 2: Float to temperature-match (30 minutes)
Float the bag or container in your tank for 20–30 minutes to equalize temperature. Plants are less temperature-sensitive than fish, but a 10°F shock on top of transplant stress is an avoidable insult.
Step 3: Trim before planting
Remove any leaves that are already damaged, yellowing, or heavily algae-covered — they won’t recover and they’ll rot in your tank, feeding algae. For stem plants, trim off the bottom inch and any emersed leaves that look unlikely to adapt; the plant wastes energy maintaining leaves it’s going to shed anyway. Keep the healthy growing tips — that’s where recovery starts.
Step 4: Plant correctly the first time
Follow our planting guide — right depth, crown exposed on rosettes, rhizomes unburied on epiphytes. Every uprooting and replanting restarts the acclimation clock, so get placement right on the first attempt. Decide where each plant goes before it goes in the water.
Step 5: Run a gentle first week
For the first 7 days after planting:
- Moderate light — run your normal photoperiod but consider dropping intensity 20–30% if your light is dimmable. Blast-level light on a melting plant grows algae on the dying leaves, not recovery.
- Stable CO2 — if you inject CO2, keep it consistent. Fluctuating CO2 during acclimation is a melt accelerator. If you’re low-tech, this doesn’t apply — see growing without CO2.
- Half-strength fertilizer — new plants with damaged leaves can’t use full dosing, and the excess feeds algae. Ramp to full strength over 2–3 weeks per our fertilizer schedule.
- No disturbance — don’t move, trim, or “check on” new plants for at least two weeks. Every touch resets root establishment. This is especially critical for crypts.
Step 6: Remove melt, keep the base
As emersed leaves melt, remove the mushy material promptly — decaying leaves release ammonia and grow fungus that can spread to healthy tissue. But never discard the plant while the crown, rhizome, or roots are firm and alive. A crypt that’s lost every leaf but has firm roots is a plant that’s about to recover, not a dead plant. Give it 3–4 weeks before judging.
Telling Normal Melt From Real Problems
Normal transition melt:
- Affects oldest/emersed leaves first, newest growth last
- New submersed leaves emerge even as old ones dissolve
- Roots and crown stay firm and white/green
- Timeline: 1–4 weeks, then obvious new growth
Concerning melt (see our full melting diagnosis guide):
- New growth also melts or emerges deformed
- Rhizome or crown turns mushy and brown — this is rot, not transition
- Entire plant dissolves within days with no new growth after 4+ weeks
- Melting spreads to established plants that weren’t recently moved
Buying Tips to Minimize Melt
- Buy submersed-grown when available — hobbyist-grown cuttings transition with almost no melt.
- Choose tissue culture for sensitive species — crypts and delicate stems establish far more reliably from sterile cups.
- Avoid plants already melting in the store tank — some melt is normal, but a plant that’s mostly mush at purchase has less energy for recovery.
- Transport carefully — keep plants damp and out of direct sun/heat. A plant that dries out or cooks in a hot car melts far worse than one transported properly.
The First-Month Timeline: What to Expect Week by Week
Knowing what’s normal when removes most acclimation anxiety. Here’s the typical timeline for a healthy plant adapting to a new tank:
Week 1: The quiet week
Almost nothing visible happens. The plant is growing roots you can’t see and assessing its new environment. Some species (vallisneria, stem plants) may start shedding their lowest leaves. This is normal. Resist the urge to “help” — no moving, no extra fertilizer, no light changes. The most common beginner mistake is intervening during a week when the correct action is nothing.
Week 2: Melt peaks
This is when emersed leaves give up in earnest. Crypts may drop everything; swords shed their broad aerial leaves; stem plants lose lower foliage. It looks catastrophic and it’s usually fine. Keep removing mushy material, keep conditions stable, and watch the crown and growing tips — if those are firm and green, recovery is already underway.
Week 3: The turn
New submersed-adapted leaves emerge — smaller, thinner, often a slightly different shade of green than the emersed foliage. Stem plant tips start growing visibly; crypts push tiny curled leaves from the crown; swords unfurl narrow ribbon leaves. This is the moment most beginners exhale for the first time.
Week 4+: Established
New growth outpaces melt, and the plant is functionally yours. You can resume full-strength fertilizer, normal trimming, and stop treating it as fragile. Some slow growers (anubias, bucephalandra) take 6–8 weeks to show obvious progress — that’s their normal speed, not a problem.
Acclimating Different Plant Formats
Tissue-culture cups
Sterile, pest-free, and already adapted to high-humidity (not emersed) growth — tissue cultures melt the least of any format. Rinse the agar gel off gently (leftover gel rots and feeds fungus), split the portion into small plantlets, and plant per our planting guide. They establish slowly for the first two weeks, then accelerate. No dip needed, minimal acclimation stress — this is the premium experience you’re paying for.
Potted plants
Remove the pot and strip away the rockwool completely — leftover rockwool traps debris and rots. Tease the root mass apart gently; if it’s a dense mat, splitting it into 2–3 smaller portions actually establishes faster than planting one big clump (more growing points, better water flow around roots). Potted plants are usually emersed-grown, so expect the standard 2–4 week melt cycle.
Bare-root / bunched stems
Typically sold as weighted bunches. Remove any bands, foam, or weights, strip the lower leaves, and plant stems individually or in small groups. Bunched stems from the store are often already transitioning — check for new submersed growth at the tips, which tells you the plant is mid-adaptation and will settle quickly.
Hobbyist cuttings
Already submersed-grown and the fastest to establish — often showing new growth within days. The main acclimation factor is water-parameter difference between the two tanks. Float to temperature-match, plant promptly, and they’ll usually take off with minimal melt. This is why experienced hobbyists prefer trading cuttings over buying potted plants.
Frequently Asked Questions
Should I use a “plant starter” or transplant fertilizer?
Products marketed for transplant shock are mostly B-vitamins and mild hormones. They don’t hurt, but there’s no strong evidence they help aquarium plants specifically. Stable conditions and patience outperform any bottle. Save the money for more plants.
My new plant melted completely — bare crown, no leaves. Is it dead?
Probably not, if the crown or rhizome is firm. Crypts and swords routinely lose 100% of their leaves and regrow from the base within a month. The test is firmness: firm and pale/green means alive; mushy and brown/black means rot. Give firm-but-leafless plants a full 4 weeks before declaring them dead.
Can I speed up acclimation with extra light or CO2?
No — and trying usually backfires. A melting plant can’t use extra light; the excess just grows algae on its dying leaves. Keep light moderate and CO2 stable (not boosted) during acclimation. Growth speed comes from the plant’s own adaptation timeline, which you can’t rush, only avoid delaying.
Should new plants go straight into my main display tank?
After quarantine/dipping, yes — there’s no benefit to a separate “growing-in” tank for most plants. They acclimate to your water fastest in the tank they’ll live in. The exception is very delicate species going into a tank with boisterous fish; give those a few weeks in a calm corner or breeder box first.
The Patience Rule
The single most important acclimation skill is restraint: plant it right, set gentle conditions, remove decay, and then leave it alone for a month. The hobbyists with the best plant growth aren’t doing something clever in week one — they’re simply not interfering in weeks two through four while the plants do what they’ve evolved to do. Melt looks like failure and feels like failure, but in most cases it’s the visible part of a plant successfully becoming yours.