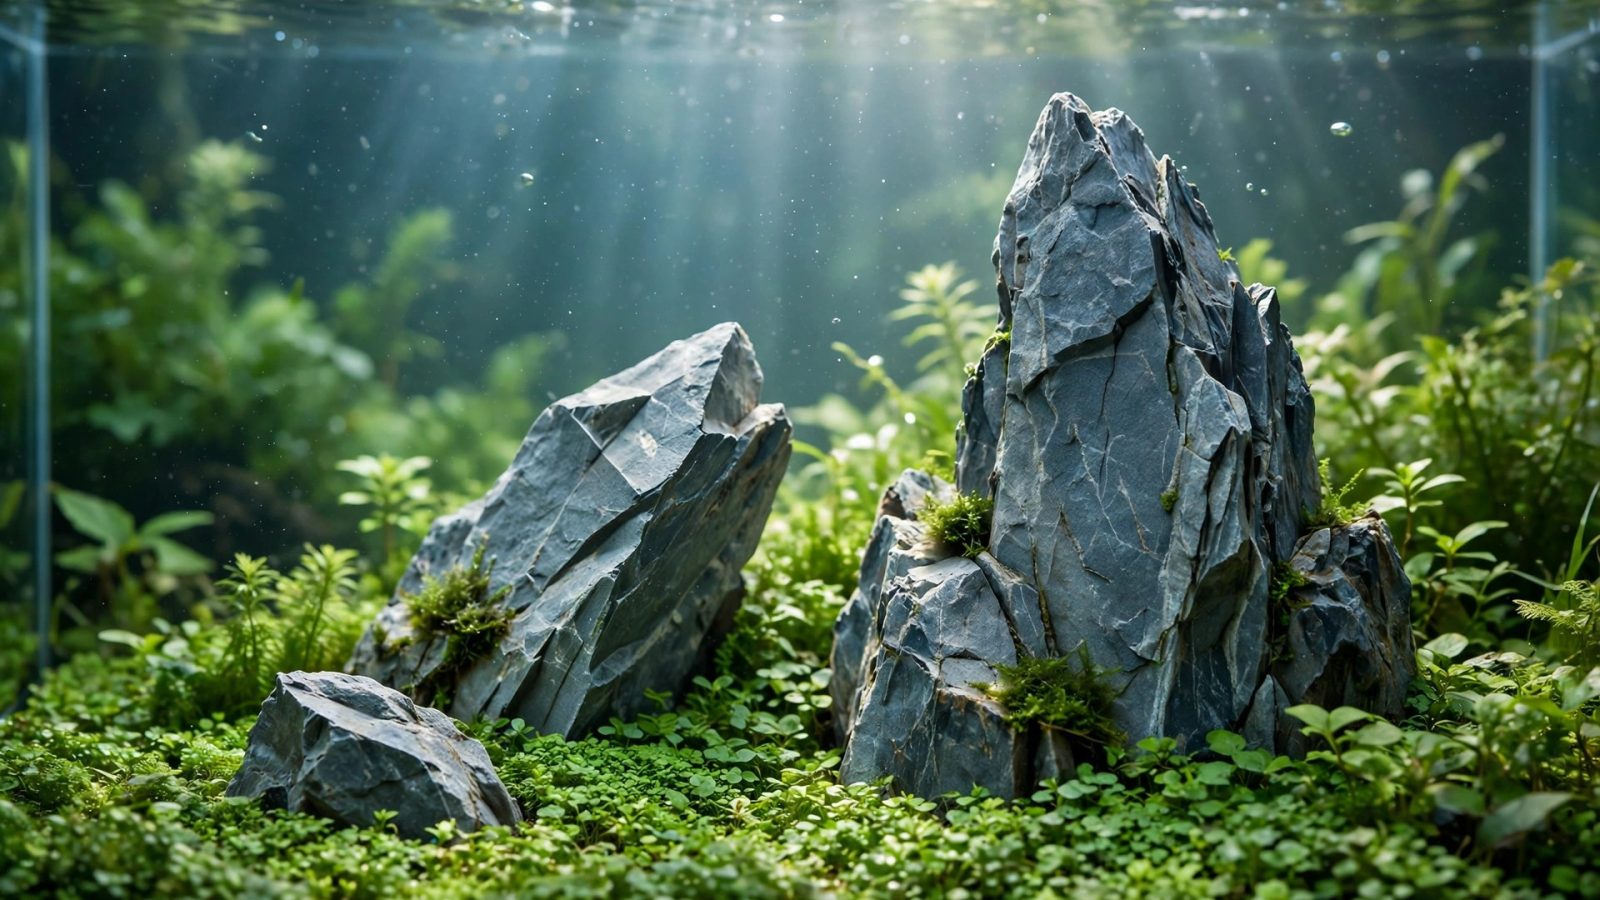
An iwagumi aquascape is the minimalist rock-and-carpet layout that made Takashi Amano’s Nature Aquarium style famous worldwide: a few carefully placed stones rising from a single carpet of low-growing plants, with wide-open negative space doing most of the visual work. It looks simple — and that’s exactly why it’s one of the hardest layouts to get right. Every stone shows, every gap in the carpet shows, and there is nowhere for sloppy placement to hide.
This guide walks you through the complete iwagumi aquascape process: the rock-placement rules that define the style, how to choose and arrange your stones, which plants actually work, substrate and hardscape prep, planting technique, and the maintenance routine that keeps a carpet dense and algae-free. Whether this is your first scape or your tenth, follow these principles and you’ll end up with a layout that reads as calm, deliberate, and unmistakably iwagumi.
What Makes an Aquascape “Iwagumi”?
The word iwagumi literally means “rock formation” in Japanese, and the style comes from the Japanese rock-garden tradition — the same aesthetic behind dry zen gardens. In an aquarium, iwagumi means:
- Stone is the only hardscape. No driftwood, no mixed materials. One rock type, full stop.
- An odd number of stones — traditionally 3, 5, or 7 — arranged with one dominant “master” stone.
- A single carpeting plant covering the substrate, usually one species for maximum unity.
- Open negative space around the stones — the empty areas are part of the composition, not wasted space.
- No tall background plants in the classic form; the layout reads as a windswept plain or mountain ridge.
The classic iwagumi is deliberately sparse. If you’re coming from a lush jungle-style tank, the restraint will feel uncomfortable at first. Trust the process: the style works because every element earns its place.
The Odd-Number Principle (and Why It Matters)
Iwagumi layouts use 3, 5, or 7 stones — never an even number. This isn’t superstition; it’s how human vision works. With an even number of objects, the eye pairs them off and the arrangement reads as static and symmetrical. Odd numbers force the brain to keep moving between elements, which creates the sense of natural, unposed composition.
For your first iwagumi, use three stones. Three is the easiest number to compose well, the cheapest to buy, and the most forgiving. Five- and seven-stone layouts look more natural and complex, but each additional stone multiplies the placement decisions — and the chances of getting it wrong.
The Four Stone Roles: Oyaishi, Fukuishi, Soeishi, Suteishi
Traditional iwagumi assigns each stone a role. Learn these four terms and rock placement stops being guesswork:
Oyaishi — the master stone
The oyaishi is the single largest, most characterful stone in the layout. It is the focal point everything else supports. Choose it first and build around it:
- It should be roughly two-thirds of the tank’s height — tall enough to dominate, short enough to leave headroom.
- Pick the stone with the most interesting texture, strata lines, or shape. This is your showpiece; don’t settle.
- Place it slightly off-center, following the golden ratio or rule of thirds — never dead-center.
- Tilt it very slightly toward the viewer and in the direction of the “flow” you want the layout to suggest.
Fukuishi — the second stone
The fukuishi is the oyaishi’s deputy: smaller (about two-thirds the oyaishi’s size), placed to one side, and leaning subtly toward the master stone as if in deference to it. This leaning relationship is what makes an iwagumi feel like a composed scene rather than a pile of rocks.
Soeishi — the supporting stones
Soeishi are smaller accent stones that echo the main pair. In a three-stone layout there is one soeishi; in five- and seven-stone layouts there are more. They should:
- Decrease in size as they move away from the oyaishi, creating a sense of receding distance.
- Share the same tilt direction and character as the main stones — same rock, same “family.”
- Sit partially buried (about one-third of each stone below the substrate line) so they look naturally embedded, not perched.
Suteishi — the “sacrificial” stones
Suteishi are tiny pebbles of the same rock, scattered sparsely near the main arrangement. Their job is to make the big stones look like they belong — as if the large rocks shed fragments over time. Use them sparingly: three to five small fragments is plenty. More than that and the layout starts looking cluttered.
Choosing the Right Rock
Use one rock type only. Mixing rock types is the fastest way to break an iwagumi. The classic choices:
- Seiryu stone — the traditional iwagumi rock. Blue-grey with white calcite veining and sharp, craggy texture. Note: it leaches carbonates and raises GH/KH/pH, so it’s a poor choice for soft-water species or shrimp. Test your water after adding it.
- Dragon stone (Ohko) — warm brown, full of holes and crevices, pH-neutral. Very forgiving for beginners and widely available.
- Grey mountain stone / elephant skin stone — smooth, layered grey rock with a calm, muted look. pH-neutral and easy to compose.
- Black lava rock — dramatic dark contrast against a bright green carpet; lightweight and cheap, though the porous texture reads less “refined” than the classics.
Buy more rock than you think you need — roughly twice the volume you expect to use. You’ll discard half of it while auditioning stones. When selecting your oyaishi, look at each candidate from multiple angles; a stone that looks great face-on can look flat from the side.
Wash all rock thoroughly before it goes in the tank. Scrub with a stiff brush under running water — no soap, ever. For seiryu and other hard stones, a diluted vinegar test (fizzing means carbonate content) tells you whether it will shift your water chemistry.
Substrate and Tank Preparation
Iwagumi layouts live or die on the carpet, and the carpet lives or dies on the substrate. Use a nutrient-rich aquasoil — it’s the single biggest factor in getting a dense, fast-spreading carpet. Inert sand or gravel can work, but you’ll be fighting uphill with root tabs and slower growth from day one.
Building the substrate slope
A flat substrate makes a tank look flat. Iwagumi compositions almost always use a gentle slope — deeper at the back, shallower at the front — to create the illusion of depth:
- Aim for roughly 2–3 cm at the front glass rising to 8–12 cm at the back in a standard 60 cm tank.
- Build the slope before placing stones, then bury each stone’s base into it — stones should look anchored, with substrate mounded naturally against them.
- Use substrate supports (cut-to-fit filter foam, lava rock rubble in mesh bags) under the back slope so it doesn’t slowly flatten over months. This is the step beginners skip and regret a year later.
- Mist the aquasoil with dechlorinated water as you sculpt so it holds its shape.
If you’re planning a low-tech carpet without CO2, a deep, rich aquasoil bed matters even more — it’s doing the heavy lifting that injected CO2 would otherwise handle.
Choosing Your Carpet Plant (Pick One)
Classic iwagumi uses a single carpet species. Mixing carpets muddies the minimalist look. The proven choices:
- Dwarf hairgrass (Eleocharis acicularis / parvula) — the classic iwagumi carpet. Fine, grass-like blades; E. parvula stays shorter (3–5 cm) and is better for nano and standard iwagumi. Spreads by runners once established.
- Monte Carlo (Micranthemum tweediei) — small round leaves, bright green, carpets readily even without CO2. Slightly larger leaf texture than hairgrass; great beginner choice.
- Dwarf baby tears (Hemianthus callitrichoides / HC Cuba) — the smallest leaves and the most “refined” look, but demanding: needs strong light, CO2, and consistent nutrients. Not a beginner plant.
- Glossostigma elatinoides — fast, aggressive spreader with oval leaves; needs frequent trimming or it piles up and shades itself.
For your first iwagumi, choose Monte Carlo or dwarf hairgrass (parvula). Both forgive beginner mistakes that would melt HC Cuba. Buy tissue-culture cups — they’re pest-free, and the small plantlets are actually easier to plant in a fine grid than potted clumps.
Step-by-Step: Building the Layout
Step 1 — Dry layout on the table
Before water or substrate goes in, arrange your stones on a table or in the empty tank. Photograph each arrangement from the front and slightly above. Live with the photos for a day if you can — placement mistakes are obvious in photos in a way they aren’t in person. You’re looking for: a clear oyaishi, a fukuishi leaning toward it, soeishi receding in size, and pleasing negative space.
Step 2 — Substrate in, slope sculpted
Add aquasoil and sculpt the front-to-back slope. Mist as you go. Place any slope supports first, then soil over them.
Step 3 — Place the stones
Set each stone into the substrate, burying roughly a third of its height. Start with the oyaishi at your chosen focal point (off-center, per the focal-point rules), then the fukuishi leaning toward it, then soeishi in descending size order. Step back and check from the front, both sides, and above. Adjust until it looks inevitable — like the stones couldn’t be anywhere else.
Step 4 — Fill water partially (or dry-start)
You have two paths: flood the tank and plant submerged, or dry-start the carpet first. Dry-starting (keeping the tank humid but unflooded for 3–6 weeks) grows a dense, rooted carpet with zero algae risk, and it’s the most reliable way to get a competition-grade carpet. The trade-off is patience. If you flood immediately, expect a slower start and an early algae phase to manage.
Step 5 — Plant the carpet in a grid
Divide tissue-culture portions into small clumps (5–10 plantlets) and plant in a grid roughly 2–3 cm apart using fine aquascaping tweezers. Push each clump in at a slight angle so the roots anchor; the crown should sit just at the substrate surface. Denser initial planting = faster full coverage = less time for algae to colonize bare soil. This is not the place to economize on plant quantity.
Step 6 — Flood slowly, filter on
When flooding, lay plastic wrap or a plate on the substrate and pour onto it to avoid cratering your slope. Fill to the top, start the filter, and begin your lighting and CO2 schedule from day one.
Lighting, CO2, and Fertilizer for Iwagumi
Carpets are light-hungry. An iwagumi needs medium-high light — roughly 40–60 PAR at the substrate — on a consistent 6–8 hour photoperiod with a timer. Too little light and the carpet grows upward, leggy and sparse, instead of spreading outward. Too much light without balanced CO2 and nutrients and you’ll grow algae instead of plants. For the full breakdown, see our lighting and CO2 guides.
CO2 injection is the honest recommendation for a classic iwagumi. Pressurized CO2 roughly doubles carpeting speed and density versus a low-tech setup. It is possible to run iwagumi low-tech — Monte Carlo and dwarf hairgrass both spread without injected CO2 — but expect the timeline to roughly double and the carpet to stay a little less dense. Our guide to growing aquarium plants without CO2 covers the low-tech method in detail.
Fertilization should be lean but consistent: a complete liquid fertilizer dosed 2–3 times per week, plus the nutrients already in the aquasoil. Iwagumi carpets show deficiencies fast — pale new growth usually means iron or nitrogen is low. Because there’s only one plant species, you can read its condition like a gauge.
The First 8 Weeks: What to Expect
- Weeks 1–2: The “melting and doubt” phase. Tissue-culture plants shed emersed leaves and look rough. Some diatom (brown) algae on the glass and stones is normal. Don’t panic, don’t rescape — just keep parameters stable.
- Weeks 3–4: Runners appear. Dwarf hairgrass sends out white underground runners; Monte Carlo creeps outward from each clump. Green spot algae may appear on the stones — a soft toothbrush during water changes handles it.
- Weeks 5–8: The carpet knits together. Coverage accelerates as each plantlet becomes a spreading colony. This is when the layout starts looking like the photos.
Full, dense coverage typically takes 8–12 weeks with CO2 or 4–6 months low-tech. For per-species timelines, see how long an aquascape takes to fill in.
Maintenance: Keeping an Iwagumi Sharp
Iwagumi maintenance is simple but non-negotiable — the minimalist style exposes every lapse:
- Trim the carpet every 2–3 weeks. Letting it grow tall shades the lower leaves, which then rot and lift the carpet in mats. Trim dwarf hairgrass to 3–4 cm; pinch Monte Carlo runners that climb the stones.
- Water changes: 30–50% weekly for the first two months, then 30% weekly ongoing. Iwagumi tanks are algae-prone because of the high light and exposed substrate.
- Clean the stones. Green dust algae loves rock surfaces. A soft brush during water changes keeps them crisp.
- Replant bald spots immediately. Tweezers, a spare tissue-culture cup, five minutes — small repairs beat big rescapes.
- Keep livestock light. A small school of tetras or rasboras plus a cleanup crew of Amano shrimp and otocinclus is the classic stocking. Heavy bioloads and diggers (cichlids, large loaches) will wreck a carpet.
Common Iwagumi Mistakes
- Even numbers of stones — the layout reads as artificial. Stick to 3, 5, or 7.
- Oyaishi dead-center — always offset the master stone using the rule of thirds.
- Stones sitting on top of the substrate instead of buried — they look placed, not natural. Bury a third.
- Mixed rock types — one stone family only.
- Skimpy initial planting — bare aquasoil under high light is an algae farm. Plant densely from day one.
- Adding stem plants “for interest” — background stems break the iwagumi silhouette. If you want stems, you’re building a different style (see triangle composition or island style).
- Neglecting trims — an untrimmed carpet lifts, rots underneath, and has to be replanted from scratch.
For the full rogues’ gallery of beginner errors, see 11 aquascaping mistakes beginners make.
Iwagumi Variations Worth Trying
Once you’ve built a classic three-stone iwagumi, the style has room to breathe:
- Nano iwagumi — the style scales beautifully down to 5–10 gallon tanks; use our nano aquascaping plant picks and proportionally smaller stones.
- Five- and seven-stone layouts — more natural ridgelines for tanks 60 cm and up.
- Sanzon iwagumi — the strict three-stone form, the purest expression of the style.
- Iwagumi with a “river” of sand — a pale sand path winding through the carpet adds a second texture while keeping the minimalist spirit (a footbridge to wilder styles if you later want more).
Frequently Asked Questions
How many stones do I need for iwagumi?
Three for your first layout, five or seven as you gain confidence. Always an odd number, always one rock type, with one clear master stone (oyaishi).
Can I do iwagumi without CO2?
Yes, with Monte Carlo or dwarf hairgrass and a rich aquasoil — but expect roughly double the time to full carpet and slightly less density. Pressurized CO2 is the single biggest upgrade you can make to an iwagumi.
What is the best carpet plant for iwagumi beginners?
Monte Carlo: it carpets reliably, tolerates a range of conditions, and recovers well from trimming mistakes. Dwarf hairgrass (E. parvula) is the more traditional look and a close second.
Why is my iwagumi carpet growing upward instead of spreading?
Almost always insufficient light at the substrate. Increase intensity (or lower the fixture), keep the photoperiod at 7–8 hours, and trim tall growth to encourage horizontal runners.
How long until an iwagumi looks finished?
Plan on 2–3 months with CO2 from planting day, 4–6 months low-tech — assuming dense initial planting and consistent maintenance.
Five- and Seven-Stone Layouts: Going Beyond Three
Once you’ve built a successful three-stone iwagumi, five- and seven-stone arrangements offer a more natural, complex ridgeline — better suited to tanks 60 cm and up, where three stones can look sparse.
The five-stone arrangement
Add two more soeishi to the classic trio. The composition becomes: oyaishi (master), fukuishi (deputy), and three supporting stones stepping down in size. Arrange them as a ridgeline — imagine a mountain range seen from the side, with the oyaishi as the main peak. The two new stones extend the range in the direction away from the fukuishi, each smaller and lower than the last. The overall silhouette should rise to the oyaishi and fall away on both sides, never forming a flat plateau.
The seven-stone arrangement
Seven stones allow a full valley-and-ridge composition: the oyaishi peak, a secondary rise on the opposite side (smaller than the master — never a rival), and supporting stones filling the transitions. The key discipline at seven stones is subordination: every stone except the oyaishi must clearly defer in size, height, or position. If two stones compete for dominance, remove one. Seven stones done well look like a landscape; seven stones done poorly look like a rock collection.
Spacing rules for multi-stone layouts
- Vary the gaps. Even spacing reads as artificial. Cluster two stones closer, leave a wider gap elsewhere — natural rock formations have rhythm, not meter.
- Overlap in plan view. Stones that slightly overlap when viewed from above create layered depth; stones in a neat row look like fence posts.
- Bury consistently. Every stone sits one-third buried. A stone perched on the surface next to buried ones breaks the illusion that they share geology.
- Keep the family resemblance. All stones one rock type, similar coloration and texture. One odd-colored stone ruins the unity.
Photographing Your Iwagumi
Iwagumi layouts are the most photogenic style in the hobby — minimalism photographs well. A few techniques:
- Clean the glass inside and out before shooting. Every speck shows against the clean composition.
- Turn off room lights and shoot in a darkened room — the tank becomes the only light source, eliminating reflections.
- Use a tripod and timer. Even slight camera shake softens the crisp stone edges that define the style.
- Shoot slightly above center. A lens position at or just above the tank’s vertical midpoint captures both the carpet texture and the stone presence.
- Time it post-trim. Photograph 3–5 days after trimming the carpet — fresh, even growth at its most uniform.
- Remove equipment. Filter intakes, heaters, and thermometers out of frame (temporarily) for the shot.
Iwagumi Livestock: Less Is More
The classic iwagumi stocking is restrained — the layout is the star, fish are accents:
- Schooling tetras/rasboras: 10–20 ember tetras, chili rasboras, or neon tetras. Small, schooling, colorful against the green carpet.
- Amano shrimp (5–10): the essential cleanup crew — relentless algae eaters that don’t disturb the carpet.
- Otocinclus (3–6): gentle algae grazers for glass and stone surfaces.
- One centerpiece (optional): a single betta or pair of dwarf gouramis — but only in tanks where temperament suits tankmates.
Avoid: diggers (corydoras will uproot carpet edges — if you keep them, choose pygmy species), large waste producers, and anything that eats shrimp if you’ve invested in a colony. Stock lightly for the first two months; the developing carpet is fragile and excess bioload feeds algae.