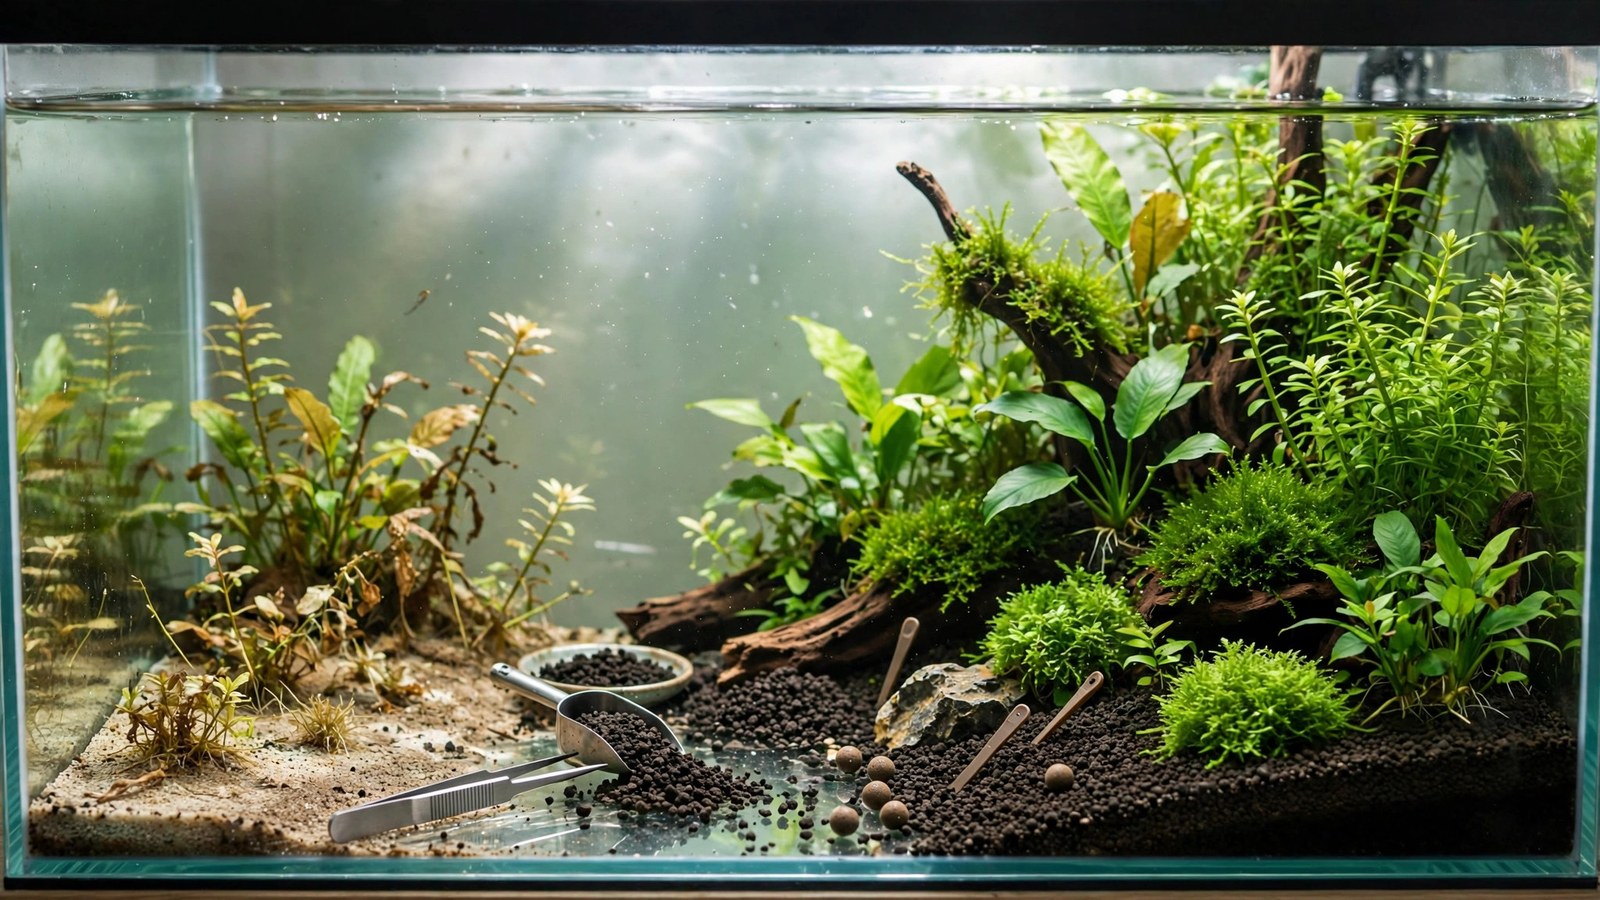
Every aquasoil has an expiration date. The rich, crumbly pellets that launched your carpet into explosive growth will, sooner or later, turn into exhausted, compacted mud that starves your plants and traps detritus. Aquasoil exhaustion is the slow decline nobody warns you about when you're admiring a fresh scape — but recognizing it early and knowing whether to recharge or replace saves you from months of mysterious plant decline.
This guide covers how to tell when your aquasoil is spent, the difference between nutrient exhaustion and physical breakdown, what recharging can and can't fix, and how to replace a substrate without tearing down a tank you love.
The Two Ways Aquasoil Dies
People say "my soil is exhausted" to mean two different things, and the fix depends on which one you have:
- Nutrient exhaustion: the granules still look and feel fine, but the stored nitrogen, phosphorus, and trace elements are used up. Plants slow down, old leaves yellow, and growth stalls even though light and CO2 haven't changed. This is the common, fixable one.
- Physical breakdown: the granules have softened and crumbled into fine mud. The bed compacts, water stops flowing through it, anaerobic pockets form, and replanting becomes impossible because stems won't stay put in soup. This one is not fixable — it's replacement time.
Both happen on overlapping timelines. A rich soil like ADA Amazonia typically feeds heavily for 12–18 months and holds granule structure for 1–3 years; leaner soils exhaust nutritionally sooner. Our Fluval Stratum vs ADA Amazonia comparison breaks down the per-product timelines in detail.
Signs Your Aquasoil Is Exhausted
Nutrient exhaustion signs
- Growth stalls despite unchanged light/CO2/dosing — the classic symptom. The tank was thriving, you changed nothing, and plants gradually slow over weeks.
- Heavy root feeders suffer first — swords, crypts, and lotus show yellowing old leaves and smaller new growth while stem plants (fed from the water column) look relatively fine. This pattern points at the substrate, not the water.
- Carpets thin out — Monte Carlo, dwarf hairgrass, and HC Cuba lose density and stop spreading, even with CO2.
- Increasing fertilizer demand — you find yourself dosing more and more liquid fertilizer to maintain the same growth. The substrate used to carry part of that load; now the water column carries all of it.
Physical breakdown signs
- Granules crush easily between your fingers into smooth mud instead of holding their pellet shape.
- Replanted stems won't stay down — they pop up because there's no granular structure to grip them.
- Cloudiness whenever you disturb the bed — fine particles billow up and take hours to settle.
- Bubbles or foul smell when you poke the substrate — hydrogen sulfide from anaerobic compaction (also see our guide on cleaning substrate in planted tanks).
- The bed has visibly compressed — what was 3 inches is now 1.5, dense and dark.
Recharging Aquasoil: What Works
Here's the good news: nutrient exhaustion is reversible. The granule structure of aquasoil is essentially a high-CEC (cation exchange capacity) sponge — it can absorb and re-release nutrients even after its factory load is spent. Recharging means reloading that sponge.
Root tabs: the standard recharge
Pushing root tabs deep into the bed every 4–6 inches is the most practical recharge method. The old granules absorb the released nutrients and redistribute them. This works best on soils whose structure is still intact — you're essentially converting an exhausted aquasoil into a high-CEC inert substrate, which is a perfectly good thing to be. Expect a visible growth response within 2–3 weeks.
Clay-based amendments
Some keepers mix powdered montmorillonite clay or laterite into the top layer of old soil during a rescape, boosting iron and trace capacity. Our laterite guide covers this old-school iron source. It's a partial refresh, not a full recharge, but it's cheap and helps heavy root feeders.
What recharging can't fix
No tab or additive restores granule structure or buffering capacity. Once pellets have crumbled to mud, the bed's porosity is gone — water can't flow through it, roots suffocate, and anaerobic zones spread. And exhausted buffering (the soil no longer holds pH down) can't be recharged by fertilizer; that chemistry is spent. If your soil is structurally broken down or your pH has crept up and won't come back down, replacement is the honest answer.
Extending Aquasoil Life: Prevention
You can't stop exhaustion, but you can slow it:
- Don't deep-vacuum aquasoil. Gravel-vacuuming churns granules and accelerates breakdown. Lightly hover the siphon over the surface to lift detritus — that's all an aquasoil bed needs. Details in our substrate cleaning guide.
- Minimize uprooting and replanting. Every time you yank stems out, you crush granules and stir fines into the bed. Plan layouts to reduce churn.
- Start water-column dosing before the crash. Don't wait for deficiency signs — begin light liquid fertilization around month 6–8 so the transition from soil-fed to water-fed is seamless.
- Keep the bed aerobic. Malaysian trumpet snails gently turn the upper substrate, preventing compaction. A healthy root network does the same.
- Don't boil, bake, or "recharge" old soil outside the tank. Internet recipes for oven-recharging aquasoil destroy what's left of the granule binders and accomplish nothing fertilizer can't do in place.
Replacing Aquasoil: The Full Process
When the bed is structurally spent — mud, compaction, anaerobic smell — it's time for new soil. You don't have to tear down the whole tank.
Option 1: Section-by-section replacement
Replace the substrate in quarters over 4–6 weeks. Siphon or scoop out one section down to the glass, pour in new soil, and let the tank stabilize before doing the next. This preserves most of your bacterial colony and avoids a full cycle crash. It's slow but it's the safest method for stocked tanks.
Option 2: Full replacement in one session
Move livestock to a holding container with tank water, filter, and heater. Remove plants (keep roots wet in damp newspaper or a bucket), scoop out all old substrate, add new soil, replant, refill, and return livestock once temperature matches. Expect a mini-cycle — new aquasoil leaches ammonia (see our ammonia leach cycling guide), so test daily and do water changes for the first week or two. Keep the old filter media running throughout — it's most of your biofiltration.
What to do with old aquasoil
Don't throw it away. Exhausted aquasoil is excellent garden and houseplant soil amendment — it's still porous volcanic material with residual nutrients. Rinse it and mix it into potting soil. Some keepers also use it as a base layer under new aquasoil, though we recommend against this: the old mud layer compacts under the new soil and recreates the anaerobic problem you're trying to escape.
Should You Switch Products When Replacing?
Replacement is a natural moment to reconsider. If your last soil exhausted faster than you liked, or the startup ammonia was miserable, switching is reasonable. Common moves:
- Amazonia → Amazonia: you loved the growth, you accept the startup routine. The devil you know.
- Amazonia → leaner soil: you want less startup drama or run lower-tech now.
- Any aquasoil → inert + root tabs: you're tired of the 2-year replacement cycle entirely. Our inert substrates guide covers this philosophy — inert substrates never "exhaust" because they never had nutrients to lose.
If you're replacing because of breakdown rather than just nutrient loss, also reconsider your substrate depth — excessively deep beds break down and go anaerobic faster.
Frequently Asked Questions
How long does aquasoil last before it needs replacing?
Nutrient-wise, rich soils feed heavily for 12–18 months and leaner ones for 6–12 months — but with root tabs and liquid fertilizer, a structurally sound bed can serve for years. Structurally, expect 1–3 years before granules break down significantly. The honest answer: recharge nutrients as needed, and replace when the physical structure fails.
Can I just add a new layer of aquasoil on top of the old?
You can top up a bed that's merely low (add an inch of fresh soil), but layering new soil over broken-down mud traps the anaerobic layer underneath. If the old bed is compacted and foul, remove it rather than burying it — capping problems doesn't fix them. A thin sand cap over intact-but-tired soil is a different story; see our guide on capping aquasoil with sand.
Will root tabs really recharge old aquasoil?
Yes, for nutrient purposes. Aquasoil granules have high cation exchange capacity, so they absorb nutrients from root tabs and release them to roots over time — functionally similar to fresh soil's slow release. What tabs can't restore is granule structure, porosity, or pH buffering. Think of it as refueling the tank, not rebuilding the engine.
How do I know if it's exhaustion or something else?
The signature of exhaustion is selective decline: heavy root feeders and carpets suffer while water-column-fed stem plants look okay, and nothing about light, CO2, or dosing changed. If everything declines at once including stems, suspect light, CO2, or a water chemistry shift first. If new growth is deformed, that's more likely a specific deficiency than general exhaustion.
Does exhausted aquasoil release anything harmful?
Not typically — exhausted just means empty. The risk from old soil is physical, not chemical: compaction creates anaerobic zones that can produce hydrogen sulfide, which is toxic in quantity. That's a breakdown problem, and the fix is aerating or replacing the bed, not anything the soil leaches.
Keeping Soil Productive for Years
Think of aquasoil as a battery: it ships fully charged, drains over 1–2 years, and can be recharged with root tabs many times — but the casing eventually wears out and needs replacing. The keepers who get the most from their soil are the ones who start supplementing before the crash, handle the bed gently, and recognize the difference between an empty battery and a broken one. Do that, and a bag of aquasoil pays for itself several times over.
Tissue-culture plants are the exception — they’re grown in sterile gel and adapt with minimal melting, which is part of what you’re paying for. Plants bought submersed from another hobbyist’s tank also transition with little melt, since they’re already in the right form.
Which Plants Melt Most (and Least)
Heavy melters (expect significant leaf loss)
- Cryptocorynes — infamous for “crypt melt,” sometimes dropping every leaf after any disturbance. They almost always recover from the roots within weeks.
- Stem plants grown emersed — rotala, ludwigia, and hygrophila often shed lower emersed leaves while the growing tips transition.
- Amazon swords — emersed-grown swords typically lose their broad oval aerial leaves and replace them with longer submersed ribbon leaves.
Light melters
- Anubias, java fern, bucephalandra — slow-growing rhizome plants transition gradually; occasional old-leaf melt but rarely dramatic.
- Vallisneria — usually transitions well, though it dislikes the move itself and may sulk for a week.
- Floating plants — minimal melt since their leaves were already at the air-water interface.
The Acclimation Protocol
Step 1: Quarantine or dip first
Before acclimating to your tank’s conditions, make sure you’re not acclimating pests along with the plant. Run new arrivals through our quarantine and dip protocol — it adds days upfront but prevents months of regret.
Step 2: Float to temperature-match (30 minutes)
Float the bag or container in your tank for 20–30 minutes to equalize temperature. Plants are less temperature-sensitive than fish, but a 10°F shock on top of transplant stress is an avoidable insult.
Step 3: Trim before planting
Remove any leaves that are already damaged, yellowing, or heavily algae-covered — they won’t recover and they’ll rot in your tank, feeding algae. For stem plants, trim off the bottom inch and any emersed leaves that look unlikely to adapt; the plant wastes energy maintaining leaves it’s going to shed anyway. Keep the healthy growing tips — that’s where recovery starts.
Step 4: Plant correctly the first time
Follow our planting guide — right depth, crown exposed on rosettes, rhizomes unburied on epiphytes. Every uprooting and replanting restarts the acclimation clock, so get placement right on the first attempt. Decide where each plant goes before it goes in the water.
Step 5: Run a gentle first week
For the first 7 days after planting:
- Moderate light — run your normal photoperiod but consider dropping intensity 20–30% if your light is dimmable. Blast-level light on a melting plant grows algae on the dying leaves, not recovery.
- Stable CO2 — if you inject CO2, keep it consistent. Fluctuating CO2 during acclimation is a melt accelerator. If you’re low-tech, this doesn’t apply — see growing without CO2.
- Half-strength fertilizer — new plants with damaged leaves can’t use full dosing, and the excess feeds algae. Ramp to full strength over 2–3 weeks per our fertilizer schedule.
- No disturbance — don’t move, trim, or “check on” new plants for at least two weeks. Every touch resets root establishment. This is especially critical for crypts.
Step 6: Remove melt, keep the base
As emersed leaves melt, remove the mushy material promptly — decaying leaves release ammonia and grow fungus that can spread to healthy tissue. But never discard the plant while the crown, rhizome, or roots are firm and alive. A crypt that’s lost every leaf but has firm roots is a plant that’s about to recover, not a dead plant. Give it 3–4 weeks before judging.
Telling Normal Melt From Real Problems
Normal transition melt:
- Affects oldest/emersed leaves first, newest growth last
- New submersed leaves emerge even as old ones dissolve
- Roots and crown stay firm and white/green
- Timeline: 1–4 weeks, then obvious new growth
Concerning melt (see our full melting diagnosis guide):
- New growth also melts or emerges deformed
- Rhizome or crown turns mushy and brown — this is rot, not transition
- Entire plant dissolves within days with no new growth after 4+ weeks
- Melting spreads to established plants that weren’t recently moved
Buying Tips to Minimize Melt
- Buy submersed-grown when available — hobbyist-grown cuttings transition with almost no melt.
- Choose tissue culture for sensitive species — crypts and delicate stems establish far more reliably from sterile cups.
- Avoid plants already melting in the store tank — some melt is normal, but a plant that’s mostly mush at purchase has less energy for recovery.
- Transport carefully — keep plants damp and out of direct sun/heat. A plant that dries out or cooks in a hot car melts far worse than one transported properly.
The First-Month Timeline: What to Expect Week by Week
Knowing what’s normal when removes most acclimation anxiety. Here’s the typical timeline for a healthy plant adapting to a new tank:
Week 1: The quiet week
Almost nothing visible happens. The plant is growing roots you can’t see and assessing its new environment. Some species (vallisneria, stem plants) may start shedding their lowest leaves. This is normal. Resist the urge to “help” — no moving, no extra fertilizer, no light changes. The most common beginner mistake is intervening during a week when the correct action is nothing.
Week 2: Melt peaks
This is when emersed leaves give up in earnest. Crypts may drop everything; swords shed their broad aerial leaves; stem plants lose lower foliage. It looks catastrophic and it’s usually fine. Keep removing mushy material, keep conditions stable, and watch the crown and growing tips — if those are firm and green, recovery is already underway.
Week 3: The turn
New submersed-adapted leaves emerge — smaller, thinner, often a slightly different shade of green than the emersed foliage. Stem plant tips start growing visibly; crypts push tiny curled leaves from the crown; swords unfurl narrow ribbon leaves. This is the moment most beginners exhale for the first time.
Week 4+: Established
New growth outpaces melt, and the plant is functionally yours. You can resume full-strength fertilizer, normal trimming, and stop treating it as fragile. Some slow growers (anubias, bucephalandra) take 6–8 weeks to show obvious progress — that’s their normal speed, not a problem.
Acclimating Different Plant Formats
Tissue-culture cups
Sterile, pest-free, and already adapted to high-humidity (not emersed) growth — tissue cultures melt the least of any format. Rinse the agar gel off gently (leftover gel rots and feeds fungus), split the portion into small plantlets, and plant per our planting guide. They establish slowly for the first two weeks, then accelerate. No dip needed, minimal acclimation stress — this is the premium experience you’re paying for.
Potted plants
Remove the pot and strip away the rockwool completely — leftover rockwool traps debris and rots. Tease the root mass apart gently; if it’s a dense mat, splitting it into 2–3 smaller portions actually establishes faster than planting one big clump (more growing points, better water flow around roots). Potted plants are usually emersed-grown, so expect the standard 2–4 week melt cycle.
Bare-root / bunched stems
Typically sold as weighted bunches. Remove any bands, foam, or weights, strip the lower leaves, and plant stems individually or in small groups. Bunched stems from the store are often already transitioning — check for new submersed growth at the tips, which tells you the plant is mid-adaptation and will settle quickly.
Hobbyist cuttings
Already submersed-grown and the fastest to establish — often showing new growth within days. The main acclimation factor is water-parameter difference between the two tanks. Float to temperature-match, plant promptly, and they’ll usually take off with minimal melt. This is why experienced hobbyists prefer trading cuttings over buying potted plants.
Frequently Asked Questions
Should I use a “plant starter” or transplant fertilizer?
Products marketed for transplant shock are mostly B-vitamins and mild hormones. They don’t hurt, but there’s no strong evidence they help aquarium plants specifically. Stable conditions and patience outperform any bottle. Save the money for more plants.
My new plant melted completely — bare crown, no leaves. Is it dead?
Probably not, if the crown or rhizome is firm. Crypts and swords routinely lose 100% of their leaves and regrow from the base within a month. The test is firmness: firm and pale/green means alive; mushy and brown/black means rot. Give firm-but-leafless plants a full 4 weeks before declaring them dead.
Can I speed up acclimation with extra light or CO2?
No — and trying usually backfires. A melting plant can’t use extra light; the excess just grows algae on its dying leaves. Keep light moderate and CO2 stable (not boosted) during acclimation. Growth speed comes from the plant’s own adaptation timeline, which you can’t rush, only avoid delaying.
Should new plants go straight into my main display tank?
After quarantine/dipping, yes — there’s no benefit to a separate “growing-in” tank for most plants. They acclimate to your water fastest in the tank they’ll live in. The exception is very delicate species going into a tank with boisterous fish; give those a few weeks in a calm corner or breeder box first.
The Patience Rule
The single most important acclimation skill is restraint: plant it right, set gentle conditions, remove decay, and then leave it alone for a month. The hobbyists with the best plant growth aren’t doing something clever in week one — they’re simply not interfering in weeks two through four while the plants do what they’ve evolved to do. Melt looks like failure and feels like failure, but in most cases it’s the visible part of a plant successfully becoming yours.