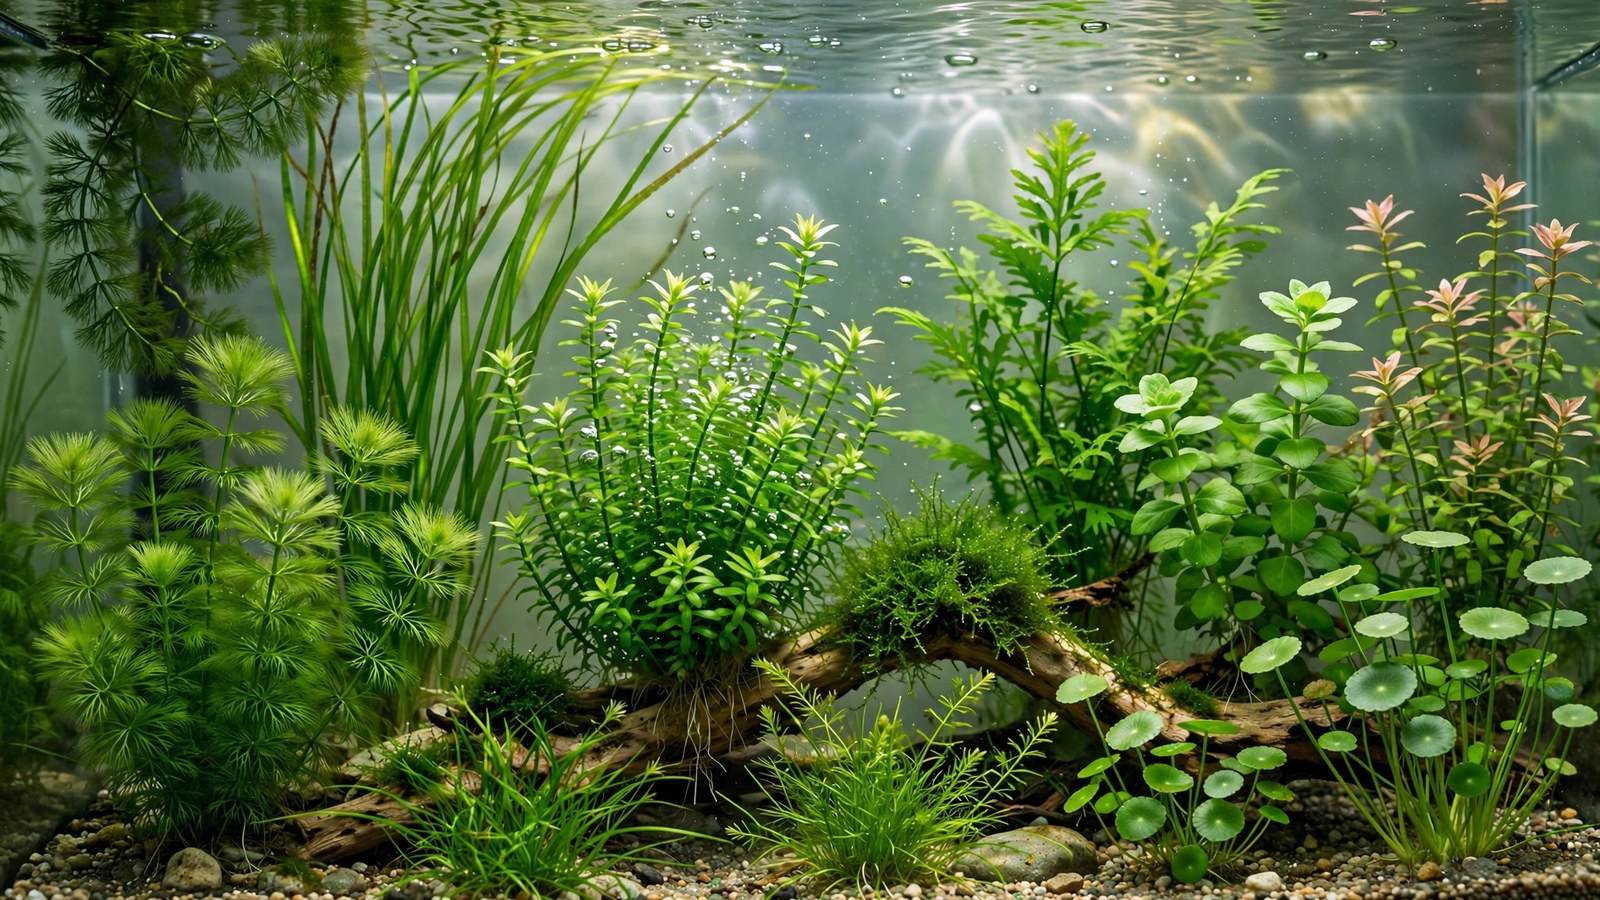
"Oxygenating plants" is one of the hobby's oldest terms — the fast-growing submerged species sold to keep pond and aquarium water oxygen-rich and clear. The science is simple: submerged plants photosynthesize underwater, releasing oxygen directly into the water during the day, while their rapid growth strips out the excess nutrients that fuel algae. These 10 plants are the best oxygenators for aquariums, with honest notes on what oxygenation actually does for your tank.
What Oxygenating Plants Actually Do
All submerged plants oxygenate — it's just photosynthesis. The "oxygenating" label traditionally goes to fast-growing species with high metabolic rates: hornwort, anacharis, vallisneria, and their kin. During lights-on hours they pump dissolved oxygen into the water; at night they consume a little (respiration), but the net daily contribution is strongly positive in a planted tank.
The realistic benefits: higher daytime dissolved oxygen (fish are more active, beneficial bacteria work faster), rapid nutrient uptake that starves algae, and excellent cover for fry and shy fish. What oxygenators don't do: replace surface agitation or filtration. Gas exchange at the surface is still your primary oxygen source — plants are the supplement, not the system. Pair them with the nutrient-sponge strategy in our nitrate-absorbing plants guide for the full water-quality picture.
Getting the Most Oxygenation
Light drives it
Oxygen production scales directly with photosynthesis, which scales with light. Oxygenators under strong light pearl visibly (oxygen bubbles streaming from leaves); under dim light they merely survive. If oxygenation is the goal, give these plants the light they need to work.
Keep them growing
A stalled plant oxygenates nothing. Fast growers need complete nutrition — nitrogen, potassium, iron, micros — to maintain the growth rates that produce oxygen. Trim regularly: fresh young growth photosynthesizes far more efficiently than old algae-coated leaves.
Don't overdo the density
A tank choked wall-to-wall with oxygenators can actually swing oxygen badly — massive daytime production followed by significant nighttime consumption in a tank with no surface agitation. Keep plant mass vigorous but not suffocating, and always maintain some surface movement for gas exchange.
The 10 Best Oxygenating Plants
1. Hornwort (Ceratophyllum demersum)
The definitive oxygenator — sold for centuries as the pond oxygenator, and the fastest oxygen producer in the aquarium trade. Hornwort's feathery foliage has enormous surface area, it grows inches per week, and it needs nothing from you. Float it or weigh it down; either way it works. The benchmark everything else is measured against.
2. Anacharis (Egeria densa)
The other classic oxygenator, and a temperate plant that works in cold and tropical tanks alike. Anacharis grows rapidly in almost any conditions, producing visible oxygen streams under good light. It's the standard "new tank" plant partly because its oxygenation and nutrient uptake stabilize cycling tanks so effectively.
3. Vallisneria spiralis
Vallisneria's long ribbon leaves provide huge photosynthetic area, and established stands are oxygen powerhouses — you'll see pearling along the leaf edges under strong light. As a bonus, vals can use bicarbonate as a carbon source, keeping photosynthesis (and oxygenation) high even in hard water where dissolved CO2 is scarce. See background plants for tall tanks for layout ideas.
4. Water Wisteria (Hygrophila difformis)
Fast stem growth plus large lacy leaves equals serious oxygen output. Wisteria's advantage is versatility — it oxygenates as a background stem, as a floating mass, or even emersed. Trim regularly to keep fresh growth coming; old leggy stems produce a fraction of what young bushy growth does.
5. Cabomba caroliniana
Cabomba's finely divided fan leaves have exceptional surface area for their volume — every square inch is photosynthesizing. It's a superb oxygenator in moderate light and provides the fine cover fry need. Keep it out of strong direct filter flow, which tangles its delicate foliage and reduces its efficiency.
6. Ambulia (Limnophila sessiliflora)
Like cabomba but tougher and faster — ambulia's feathery bright-green foliage grows explosively, making it one of the highest-output oxygenators for the effort involved. It tolerates a wide range of conditions and recovers from trimming within days. If cabomba sulks in your water, ambulia won't.
7. Guppy Grass (Najas guadalupensis)
Fine-leaved, fast, indestructible — guppy grass forms dense oxygenating thickets that double as the best fry shelter in the hobby. It grows floating or planted, in any water, at any temperature. Pull handfuls as needed; it replaces them within days. The ultimate low-effort oxygenator.
8. Dwarf Sagittaria
An oxygenator for the foreground — dwarf sag's grassy runner-spread meadow photosynthesizes across a huge area at the tank's bottom, where oxygen is often lowest. In bright light a dwarf sag lawn pearls beautifully. It proves oxygenation isn't just a background-plant job.
9. Rotala rotundifolia
Fast stem growth with dense leaf packing — a well-trimmed rotala bush is a compact oxygen factory. Its advantage over the classics is looks: it oxygenates while providing the pink-tipped aesthetics the pond weeds can't. Our beginner stem guide covers its easy care.
10. Pondweed (Potamogeton gayi)
The connoisseur's oxygenator — narrow translucent leaves on upright stems, graceful and unusual, with excellent growth rates in moderate light. Less common in stores than hornwort or anacharis, but worth seeking out for a refined-looking oxygenator that still works as hard as the classics.
Oxygenation and Your Filter
Plants and filtration complement each other: the filter provides circulation (delivering CO2 and nutrients to leaves, carrying oxygenated water through the tank) and mechanical/biological filtration, while plants add daytime oxygen and consume the nitrates bacteria produce. The healthiest tanks run both. Don't reduce filtration because you added plants — increase plant mass because you have filtration. They're partners, not substitutes.
Oxygenation for Ponds and Unfiltered Tanks
Oxygenating plants shine brightest where filtration is minimal — outdoor ponds and unfiltered Walstad-style tanks. In ponds, a 50/50 balance of submerged oxygenators and surface coverage keeps water clear and fish healthy with no equipment at all; the plants are the life-support system. Species like hornwort and anacharis are sold specifically as pond oxygenators for this reason, and our pond plant guide covers the crossover species. In unfiltered indoor tanks, oxygenators plus a soil substrate create a self-sustaining ecosystem — but go heavy on plant mass from the start, since there's no filter as backup. As a rule of thumb, unfiltered setups need roughly double the plant biomass of filtered ones to maintain the same water quality, and fast oxygenators should dominate that biomass.
Frequently Asked Questions
How many oxygenating plants do I need?
For meaningful effect, dedicate at least a third of the tank to fast-growing oxygenators — a few stems won't move the needle. Think in terms of biomass: a dense background of hornwort or anacharis plus a vallisneria stand is a working oxygenation system; three stems in the corner is decoration.
Do oxygenating plants help at night?
No — at night plants respire, consuming small amounts of oxygen. In a balanced tank this is negligible, but in an extremely over-planted tank with no surface agitation, pre-dawn oxygen can dip. The solution is simple: always maintain gentle surface movement for gas exchange, and don't let plant mass completely choke the tank.
Can I see oxygenation happening?
Yes — it's called pearling. Under strong light, fast-growing oxygenators release visible streams of tiny oxygen bubbles from their leaves. Heavy pearling means photosynthesis is running at full tilt. It's beautiful, it's a health indicator, and it's the most satisfying thing to watch in a planted tank.
Do oxygenators work in low light?
They survive, but they don't oxygenate much — photosynthesis (and thus oxygen production) scales with light. In low-light tanks, oxygenators function mainly as nutrient sponges and cover rather than oxygen sources. For real oxygenation, give them moderate to strong light.
Will oxygenating plants raise my pH?
Temporarily, during the day — photosynthesis consumes dissolved CO2, which raises pH slightly; at night respiration reverses it. In heavily planted tanks you may measure a 0.2–0.5 pH swing between morning and evening. This is normal and harmless; fish evolved with diurnal pH rhythms. Large swings indicate too much plant mass relative to buffering.
Are oxygenating plants good for goldfish tanks?
Excellent — goldfish are oxygen-hungry and produce heavy waste, and oxygenators address both. Choose tough species goldfish won't demolish: anacharis and hornwort (they'll nibble but the plants outgrow it), vallisneria, and guppy grass. See our goldfish tank plant guide for the full tough-plant list.
Do I need an air stone if I have oxygenating plants?
Not necessarily during the day, but it's wise insurance at night. Plants produce oxygen only while lit; in a heavily planted tank with no surface agitation, pre-dawn oxygen can dip. A small air stone on a nighttime timer gives you the best of both worlds — plant-powered days and guaranteed oxygenated nights. In lightly planted tanks with good filter agitation, you don't need one at all.
Breathe Easy
Oxygenating plants are the workhorses of the planted tank — unglamorous, fast-growing, and quietly doing the water-quality heavy lifting while showier plants take the credit. Plant them heavily, light them well, trim them regularly, and your tank's water will be clearer, your fish more active, and your algae problems smaller. The pond keepers who coined the term centuries ago knew what they were doing.
Tissue-culture plants are the exception — they’re grown in sterile gel and adapt with minimal melting, which is part of what you’re paying for. Plants bought submersed from another hobbyist’s tank also transition with little melt, since they’re already in the right form.
Which Plants Melt Most (and Least)
Heavy melters (expect significant leaf loss)
- Cryptocorynes — infamous for “crypt melt,” sometimes dropping every leaf after any disturbance. They almost always recover from the roots within weeks.
- Stem plants grown emersed — rotala, ludwigia, and hygrophila often shed lower emersed leaves while the growing tips transition.
- Amazon swords — emersed-grown swords typically lose their broad oval aerial leaves and replace them with longer submersed ribbon leaves.
Light melters
- Anubias, java fern, bucephalandra — slow-growing rhizome plants transition gradually; occasional old-leaf melt but rarely dramatic.
- Vallisneria — usually transitions well, though it dislikes the move itself and may sulk for a week.
- Floating plants — minimal melt since their leaves were already at the air-water interface.
The Acclimation Protocol
Step 1: Quarantine or dip first
Before acclimating to your tank’s conditions, make sure you’re not acclimating pests along with the plant. Run new arrivals through our quarantine and dip protocol — it adds days upfront but prevents months of regret.
Step 2: Float to temperature-match (30 minutes)
Float the bag or container in your tank for 20–30 minutes to equalize temperature. Plants are less temperature-sensitive than fish, but a 10°F shock on top of transplant stress is an avoidable insult.
Step 3: Trim before planting
Remove any leaves that are already damaged, yellowing, or heavily algae-covered — they won’t recover and they’ll rot in your tank, feeding algae. For stem plants, trim off the bottom inch and any emersed leaves that look unlikely to adapt; the plant wastes energy maintaining leaves it’s going to shed anyway. Keep the healthy growing tips — that’s where recovery starts.
Step 4: Plant correctly the first time
Follow our planting guide — right depth, crown exposed on rosettes, rhizomes unburied on epiphytes. Every uprooting and replanting restarts the acclimation clock, so get placement right on the first attempt. Decide where each plant goes before it goes in the water.
Step 5: Run a gentle first week
For the first 7 days after planting:
- Moderate light — run your normal photoperiod but consider dropping intensity 20–30% if your light is dimmable. Blast-level light on a melting plant grows algae on the dying leaves, not recovery.
- Stable CO2 — if you inject CO2, keep it consistent. Fluctuating CO2 during acclimation is a melt accelerator. If you’re low-tech, this doesn’t apply — see growing without CO2.
- Half-strength fertilizer — new plants with damaged leaves can’t use full dosing, and the excess feeds algae. Ramp to full strength over 2–3 weeks per our fertilizer schedule.
- No disturbance — don’t move, trim, or “check on” new plants for at least two weeks. Every touch resets root establishment. This is especially critical for crypts.
Step 6: Remove melt, keep the base
As emersed leaves melt, remove the mushy material promptly — decaying leaves release ammonia and grow fungus that can spread to healthy tissue. But never discard the plant while the crown, rhizome, or roots are firm and alive. A crypt that’s lost every leaf but has firm roots is a plant that’s about to recover, not a dead plant. Give it 3–4 weeks before judging.
Telling Normal Melt From Real Problems
Normal transition melt:
- Affects oldest/emersed leaves first, newest growth last
- New submersed leaves emerge even as old ones dissolve
- Roots and crown stay firm and white/green
- Timeline: 1–4 weeks, then obvious new growth
Concerning melt (see our full melting diagnosis guide):
- New growth also melts or emerges deformed
- Rhizome or crown turns mushy and brown — this is rot, not transition
- Entire plant dissolves within days with no new growth after 4+ weeks
- Melting spreads to established plants that weren’t recently moved
Buying Tips to Minimize Melt
- Buy submersed-grown when available — hobbyist-grown cuttings transition with almost no melt.
- Choose tissue culture for sensitive species — crypts and delicate stems establish far more reliably from sterile cups.
- Avoid plants already melting in the store tank — some melt is normal, but a plant that’s mostly mush at purchase has less energy for recovery.
- Transport carefully — keep plants damp and out of direct sun/heat. A plant that dries out or cooks in a hot car melts far worse than one transported properly.
The First-Month Timeline: What to Expect Week by Week
Knowing what’s normal when removes most acclimation anxiety. Here’s the typical timeline for a healthy plant adapting to a new tank:
Week 1: The quiet week
Almost nothing visible happens. The plant is growing roots you can’t see and assessing its new environment. Some species (vallisneria, stem plants) may start shedding their lowest leaves. This is normal. Resist the urge to “help” — no moving, no extra fertilizer, no light changes. The most common beginner mistake is intervening during a week when the correct action is nothing.
Week 2: Melt peaks
This is when emersed leaves give up in earnest. Crypts may drop everything; swords shed their broad aerial leaves; stem plants lose lower foliage. It looks catastrophic and it’s usually fine. Keep removing mushy material, keep conditions stable, and watch the crown and growing tips — if those are firm and green, recovery is already underway.
Week 3: The turn
New submersed-adapted leaves emerge — smaller, thinner, often a slightly different shade of green than the emersed foliage. Stem plant tips start growing visibly; crypts push tiny curled leaves from the crown; swords unfurl narrow ribbon leaves. This is the moment most beginners exhale for the first time.
Week 4+: Established
New growth outpaces melt, and the plant is functionally yours. You can resume full-strength fertilizer, normal trimming, and stop treating it as fragile. Some slow growers (anubias, bucephalandra) take 6–8 weeks to show obvious progress — that’s their normal speed, not a problem.
Acclimating Different Plant Formats
Tissue-culture cups
Sterile, pest-free, and already adapted to high-humidity (not emersed) growth — tissue cultures melt the least of any format. Rinse the agar gel off gently (leftover gel rots and feeds fungus), split the portion into small plantlets, and plant per our planting guide. They establish slowly for the first two weeks, then accelerate. No dip needed, minimal acclimation stress — this is the premium experience you’re paying for.
Potted plants
Remove the pot and strip away the rockwool completely — leftover rockwool traps debris and rots. Tease the root mass apart gently; if it’s a dense mat, splitting it into 2–3 smaller portions actually establishes faster than planting one big clump (more growing points, better water flow around roots). Potted plants are usually emersed-grown, so expect the standard 2–4 week melt cycle.
Bare-root / bunched stems
Typically sold as weighted bunches. Remove any bands, foam, or weights, strip the lower leaves, and plant stems individually or in small groups. Bunched stems from the store are often already transitioning — check for new submersed growth at the tips, which tells you the plant is mid-adaptation and will settle quickly.
Hobbyist cuttings
Already submersed-grown and the fastest to establish — often showing new growth within days. The main acclimation factor is water-parameter difference between the two tanks. Float to temperature-match, plant promptly, and they’ll usually take off with minimal melt. This is why experienced hobbyists prefer trading cuttings over buying potted plants.
Frequently Asked Questions
Should I use a “plant starter” or transplant fertilizer?
Products marketed for transplant shock are mostly B-vitamins and mild hormones. They don’t hurt, but there’s no strong evidence they help aquarium plants specifically. Stable conditions and patience outperform any bottle. Save the money for more plants.
My new plant melted completely — bare crown, no leaves. Is it dead?
Probably not, if the crown or rhizome is firm. Crypts and swords routinely lose 100% of their leaves and regrow from the base within a month. The test is firmness: firm and pale/green means alive; mushy and brown/black means rot. Give firm-but-leafless plants a full 4 weeks before declaring them dead.
Can I speed up acclimation with extra light or CO2?
No — and trying usually backfires. A melting plant can’t use extra light; the excess just grows algae on its dying leaves. Keep light moderate and CO2 stable (not boosted) during acclimation. Growth speed comes from the plant’s own adaptation timeline, which you can’t rush, only avoid delaying.
Should new plants go straight into my main display tank?
After quarantine/dipping, yes — there’s no benefit to a separate “growing-in” tank for most plants. They acclimate to your water fastest in the tank they’ll live in. The exception is very delicate species going into a tank with boisterous fish; give those a few weeks in a calm corner or breeder box first.
The Patience Rule
The single most important acclimation skill is restraint: plant it right, set gentle conditions, remove decay, and then leave it alone for a month. The hobbyists with the best plant growth aren’t doing something clever in week one — they’re simply not interfering in weeks two through four while the plants do what they’ve evolved to do. Melt looks like failure and feels like failure, but in most cases it’s the visible part of a plant successfully becoming yours.