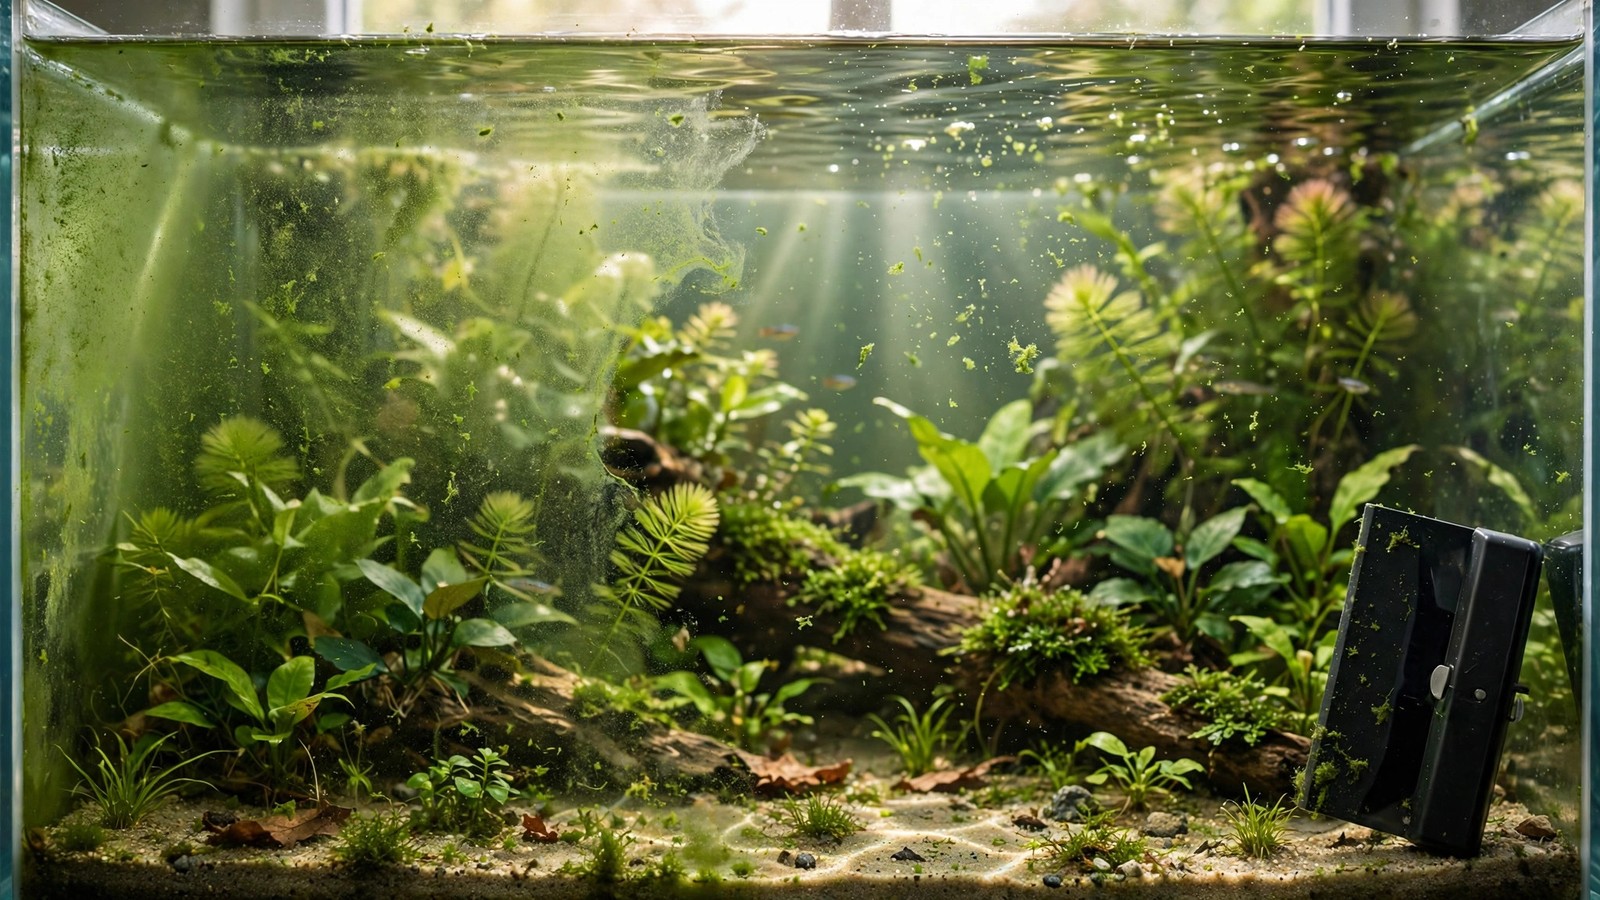
You wipe the front glass on Monday, and by Friday it's hazy again with a fine green film you can barely feel under your fingertip. That's green dust algae, and it's one of the most misunderstood nuisances in planted tanks. The good news: green dust algae on glass and plants is harmless to livestock, easy to identify, and responds to a surprisingly patient treatment — the hard part is resisting the urge to scrub it every day, because constant wiping actually makes it worse.
What Green Dust Algae Looks Like
Green dust algae (GDA) forms a uniform, powdery green film across glass panels, most often the front and sides facing the light. It starts as a faint haze that's only visible at an angle, then thickens into an opaque olive-green coating. Rubbed between your fingers, it feels like nothing — no grit, no slime, just a fine dust that rinses off easily.
On plant leaves, it appears as a thin green dusting rather than distinct spots or threads. Slow-growing plants with broad leaves — anubias, java fern, bucephalandra — show it most, because their leaves sit still long enough for the film to settle. Fast-growing stems usually outgrow it before it's visible.
How it differs from look-alikes:
- Green spot algae (GSA) — hard, circular spots that need a razor blade to remove. GDA wipes off with a finger. See our green spot algae guide if the spots resist scrubbing.
- Green water — suspended single cells that turn the whole water column pea-soup green. GDA coats surfaces; the water itself stays clear. If your water is cloudy green, read clearing green water blooms instead.
- Diatoms (brown algae) — brown, dusty, and usually confined to new tanks. They wipe off like GDA but are distinctly brown. Our brown diatom guide covers that one.
What Causes Green Dust Algae
The lifecycle that punishes scrubbing
GDA has a lifecycle of roughly 3–4 weeks, and this is the key to the whole treatment. The algae reproduces by releasing motile zoospores into the water. When you scrub the glass mid-cycle, you scatter millions of these spores across every surface in the tank — and they all resettle and restart the clock. Daily wiping doesn't remove GDA; it farms it.
Triggers that invite it in
- Excess light relative to plant mass — too many hours or too much intensity before the plants can use it. New tanks with sparse planting are the classic victims.
- Ammonia spikes — even brief ones from disturbed substrate, dead livestock, or a filter hiccup. GDA zoospores seem especially opportunistic after ammonia events.
- Low plant competition — slow-growing or sparse planting leaves nutrients and light unclaimed. Heavily planted tanks rarely get persistent GDA.
- Warm, bright conditions — tanks near windows or running above 26°C (79°F) see it more often.
The Treatment: The "Let It Ride" Method
This is counterintuitive, but it works reliably. Stop scrubbing the glass entirely and let the GDA run its full lifecycle.
Step 1: Leave the glass alone (3–4 weeks)
Pick a start date and do not wipe the glass for 3–4 weeks. Yes, the tank will look hazy. Yes, it's ugly. The algae will thicken, peak, and then — because its lifecycle completes — begin to die off and flake away on its own. Wiping during this period resets the clock, so discipline matters more than any product.
Step 2: Reduce light during the ride
Shorten the photoperiod to 6 hours per day and reduce intensity 20–30% if your light dims. This slows the algae's metabolism without starving your plants, and it reduces the peak severity of the film.
Step 3: Keep everything else stable
Continue normal water changes (30% weekly), keep CO2 steady if you inject it, and maintain your regular fertilizer routine. Starving the tank of nutrients backfires — hungry plants compete worse, and algae fills the gap. See our nutrient deficiency guide if you're tempted to stop dosing.
Step 4: The single big cleanup
Once the film starts looking ragged and flaking — usually around week 3–4 — do one thorough cleaning: scrape all glass with a razor or algae pad, siphon the water change immediately to remove the dislodged mass, and clean the filter pre-sponge. Follow with a 50% water change. In most tanks, this single cleanup ends the outbreak permanently.
Step 5: Prevent the sequel
After the cleanup, return light gradually (add 30 minutes per week back toward your normal photoperiod), and increase plant mass — every empty patch of substrate is an invitation. Fast growers like hornwort or water sprite as temporary "nutrient sponges" work well while slower plants establish.
When "Let It Ride" Isn't Enough
Most GDA clears with the lifecycle method, but a few situations need more:
- GDA on plant leaves — if broad-leafed plants stay dusted after the glass clears, their leaves are simply too still. Gently rub leaves during a water change, trim the worst-affected old leaves, and consider adding a cleanup crew (nerite snails and otocinclus graze light films effectively).
- Recurring outbreaks every few weeks — this signals an unresolved trigger. Test for ammonia after filter maintenance, check that your photoperiod hasn't crept upward, and look at whether plant mass has thinned. Persistent GDA is a symptom, not the disease.
- GDA in a high-light CO2 tank — usually means CO2 distribution is uneven. The plants in still corners can't compete, and algae colonizes their leaves. Improve flow before reaching for algaecides.
What Not to Do
- Don't dose algaecides as a first resort — products containing glutaraldehyde or copper can knock GDA back, but they stress plants and shrimp, and the algae returns if the trigger is unresolved.
- Don't black out the tank for a week — blackouts work on some algae, but GDA's lifecycle means it often just waits out a short blackout and resumes.
- Don't scrub daily — worth repeating, since it's the single most common mistake. Every wipe reseeds the tank.
- Don't tear down the tank — GDA is cosmetic and temporary. A full rescape over green dust is the definition of overkill.
Green Dust Algae vs. Your Livestock
GDA is completely harmless to fish, shrimp, and snails. In fact, shrimp and many snails graze on it happily — a tank full of cherry shrimp will visibly thin a GDA film over a few weeks. The only real cost is aesthetic, and the secondary cost is the temptation to "fix" it with aggressive measures that cause genuine harm. If you can tolerate three ugly weeks, the lifecycle method is the gentlest option available.
Frequently Asked Questions
Can I just wipe green dust algae off the glass?
You can, but it comes back within days — wiping scatters the algae's reproductive spores across the tank and restarts its 3–4 week lifecycle. The effective method is to leave the glass untouched for one full lifecycle, then do a single thorough scrape and large water change. One disciplined month beats a year of daily wiping.
Is green dust algae harmful to my plants?
A light film is harmless, but a thick, long-standing coating blocks light from reaching the leaf surface and slows photosynthesis on slow-growing plants. If leaves stay dusted after the glass clears, gently rub them during water changes and trim the worst leaves. Healthy, fast-growing plants outgrow GDA faster than it can settle.
Will a UV sterilizer kill green dust algae?
Partially. A UV sterilizer kills the free-floating zoospore stage, which reduces reseeding and can shorten the outbreak. It won't remove the film already on the glass, though. UV is a reasonable supporting tool during the "let it ride" period, but not a standalone cure — address the light and plant-mass triggers too.
Why does green dust algae only grow on the front glass?
It grows where light is strongest and most consistent — usually the front panel facing the room and the light fixture. The back glass often stays cleaner because it's shaded by plants or background. This light-dependent pattern is actually a useful diagnostic: if it's worst on the brightest panel, excess light relative to plant mass is your trigger.
How do I stop green dust algae from coming back?
Fix the underlying imbalance: keep the photoperiod at 6–8 hours, avoid ammonia spikes (don't overfeed, clean filters gently), and maintain dense, healthy plant growth so algae has no unclaimed resources. Tanks with fast-growing stems and stable CO2 rarely see repeat outbreaks. If it recurs on a cycle, something — usually light creeping up or thinning plants — is re-inviting it.
The Patient Aquarist Wins
Green dust algae is the hobby's test of patience disguised as a cleaning problem. The instinct to scrub is exactly wrong, and the correct action — doing nothing to the glass for a month — feels like surrender. But the lifecycle is real, the one-time cleanup works, and tanks that get through it with their light and planting fixed rarely see GDA again. Wipe less, plant more, and let biology finish what it started.
Tissue-culture plants are the exception — they’re grown in sterile gel and adapt with minimal melting, which is part of what you’re paying for. Plants bought submersed from another hobbyist’s tank also transition with little melt, since they’re already in the right form.
Which Plants Melt Most (and Least)
Heavy melters (expect significant leaf loss)
- Cryptocorynes — infamous for “crypt melt,” sometimes dropping every leaf after any disturbance. They almost always recover from the roots within weeks.
- Stem plants grown emersed — rotala, ludwigia, and hygrophila often shed lower emersed leaves while the growing tips transition.
- Amazon swords — emersed-grown swords typically lose their broad oval aerial leaves and replace them with longer submersed ribbon leaves.
Light melters
- Anubias, java fern, bucephalandra — slow-growing rhizome plants transition gradually; occasional old-leaf melt but rarely dramatic.
- Vallisneria — usually transitions well, though it dislikes the move itself and may sulk for a week.
- Floating plants — minimal melt since their leaves were already at the air-water interface.
The Acclimation Protocol
Step 1: Quarantine or dip first
Before acclimating to your tank’s conditions, make sure you’re not acclimating pests along with the plant. Run new arrivals through our quarantine and dip protocol — it adds days upfront but prevents months of regret.
Step 2: Float to temperature-match (30 minutes)
Float the bag or container in your tank for 20–30 minutes to equalize temperature. Plants are less temperature-sensitive than fish, but a 10°F shock on top of transplant stress is an avoidable insult.
Step 3: Trim before planting
Remove any leaves that are already damaged, yellowing, or heavily algae-covered — they won’t recover and they’ll rot in your tank, feeding algae. For stem plants, trim off the bottom inch and any emersed leaves that look unlikely to adapt; the plant wastes energy maintaining leaves it’s going to shed anyway. Keep the healthy growing tips — that’s where recovery starts.
Step 4: Plant correctly the first time
Follow our planting guide — right depth, crown exposed on rosettes, rhizomes unburied on epiphytes. Every uprooting and replanting restarts the acclimation clock, so get placement right on the first attempt. Decide where each plant goes before it goes in the water.
Step 5: Run a gentle first week
For the first 7 days after planting:
- Moderate light — run your normal photoperiod but consider dropping intensity 20–30% if your light is dimmable. Blast-level light on a melting plant grows algae on the dying leaves, not recovery.
- Stable CO2 — if you inject CO2, keep it consistent. Fluctuating CO2 during acclimation is a melt accelerator. If you’re low-tech, this doesn’t apply — see growing without CO2.
- Half-strength fertilizer — new plants with damaged leaves can’t use full dosing, and the excess feeds algae. Ramp to full strength over 2–3 weeks per our fertilizer schedule.
- No disturbance — don’t move, trim, or “check on” new plants for at least two weeks. Every touch resets root establishment. This is especially critical for crypts.
Step 6: Remove melt, keep the base
As emersed leaves melt, remove the mushy material promptly — decaying leaves release ammonia and grow fungus that can spread to healthy tissue. But never discard the plant while the crown, rhizome, or roots are firm and alive. A crypt that’s lost every leaf but has firm roots is a plant that’s about to recover, not a dead plant. Give it 3–4 weeks before judging.
Telling Normal Melt From Real Problems
Normal transition melt:
- Affects oldest/emersed leaves first, newest growth last
- New submersed leaves emerge even as old ones dissolve
- Roots and crown stay firm and white/green
- Timeline: 1–4 weeks, then obvious new growth
Concerning melt (see our full melting diagnosis guide):
- New growth also melts or emerges deformed
- Rhizome or crown turns mushy and brown — this is rot, not transition
- Entire plant dissolves within days with no new growth after 4+ weeks
- Melting spreads to established plants that weren’t recently moved
Buying Tips to Minimize Melt
- Buy submersed-grown when available — hobbyist-grown cuttings transition with almost no melt.
- Choose tissue culture for sensitive species — crypts and delicate stems establish far more reliably from sterile cups.
- Avoid plants already melting in the store tank — some melt is normal, but a plant that’s mostly mush at purchase has less energy for recovery.
- Transport carefully — keep plants damp and out of direct sun/heat. A plant that dries out or cooks in a hot car melts far worse than one transported properly.
The First-Month Timeline: What to Expect Week by Week
Knowing what’s normal when removes most acclimation anxiety. Here’s the typical timeline for a healthy plant adapting to a new tank:
Week 1: The quiet week
Almost nothing visible happens. The plant is growing roots you can’t see and assessing its new environment. Some species (vallisneria, stem plants) may start shedding their lowest leaves. This is normal. Resist the urge to “help” — no moving, no extra fertilizer, no light changes. The most common beginner mistake is intervening during a week when the correct action is nothing.
Week 2: Melt peaks
This is when emersed leaves give up in earnest. Crypts may drop everything; swords shed their broad aerial leaves; stem plants lose lower foliage. It looks catastrophic and it’s usually fine. Keep removing mushy material, keep conditions stable, and watch the crown and growing tips — if those are firm and green, recovery is already underway.
Week 3: The turn
New submersed-adapted leaves emerge — smaller, thinner, often a slightly different shade of green than the emersed foliage. Stem plant tips start growing visibly; crypts push tiny curled leaves from the crown; swords unfurl narrow ribbon leaves. This is the moment most beginners exhale for the first time.
Week 4+: Established
New growth outpaces melt, and the plant is functionally yours. You can resume full-strength fertilizer, normal trimming, and stop treating it as fragile. Some slow growers (anubias, bucephalandra) take 6–8 weeks to show obvious progress — that’s their normal speed, not a problem.
Acclimating Different Plant Formats
Tissue-culture cups
Sterile, pest-free, and already adapted to high-humidity (not emersed) growth — tissue cultures melt the least of any format. Rinse the agar gel off gently (leftover gel rots and feeds fungus), split the portion into small plantlets, and plant per our planting guide. They establish slowly for the first two weeks, then accelerate. No dip needed, minimal acclimation stress — this is the premium experience you’re paying for.
Potted plants
Remove the pot and strip away the rockwool completely — leftover rockwool traps debris and rots. Tease the root mass apart gently; if it’s a dense mat, splitting it into 2–3 smaller portions actually establishes faster than planting one big clump (more growing points, better water flow around roots). Potted plants are usually emersed-grown, so expect the standard 2–4 week melt cycle.
Bare-root / bunched stems
Typically sold as weighted bunches. Remove any bands, foam, or weights, strip the lower leaves, and plant stems individually or in small groups. Bunched stems from the store are often already transitioning — check for new submersed growth at the tips, which tells you the plant is mid-adaptation and will settle quickly.
Hobbyist cuttings
Already submersed-grown and the fastest to establish — often showing new growth within days. The main acclimation factor is water-parameter difference between the two tanks. Float to temperature-match, plant promptly, and they’ll usually take off with minimal melt. This is why experienced hobbyists prefer trading cuttings over buying potted plants.
Frequently Asked Questions
Should I use a “plant starter” or transplant fertilizer?
Products marketed for transplant shock are mostly B-vitamins and mild hormones. They don’t hurt, but there’s no strong evidence they help aquarium plants specifically. Stable conditions and patience outperform any bottle. Save the money for more plants.
My new plant melted completely — bare crown, no leaves. Is it dead?
Probably not, if the crown or rhizome is firm. Crypts and swords routinely lose 100% of their leaves and regrow from the base within a month. The test is firmness: firm and pale/green means alive; mushy and brown/black means rot. Give firm-but-leafless plants a full 4 weeks before declaring them dead.
Can I speed up acclimation with extra light or CO2?
No — and trying usually backfires. A melting plant can’t use extra light; the excess just grows algae on its dying leaves. Keep light moderate and CO2 stable (not boosted) during acclimation. Growth speed comes from the plant’s own adaptation timeline, which you can’t rush, only avoid delaying.
Should new plants go straight into my main display tank?
After quarantine/dipping, yes — there’s no benefit to a separate “growing-in” tank for most plants. They acclimate to your water fastest in the tank they’ll live in. The exception is very delicate species going into a tank with boisterous fish; give those a few weeks in a calm corner or breeder box first.
The Patience Rule
The single most important acclimation skill is restraint: plant it right, set gentle conditions, remove decay, and then leave it alone for a month. The hobbyists with the best plant growth aren’t doing something clever in week one — they’re simply not interfering in weeks two through four while the plants do what they’ve evolved to do. Melt looks like failure and feels like failure, but in most cases it’s the visible part of a plant successfully becoming yours.