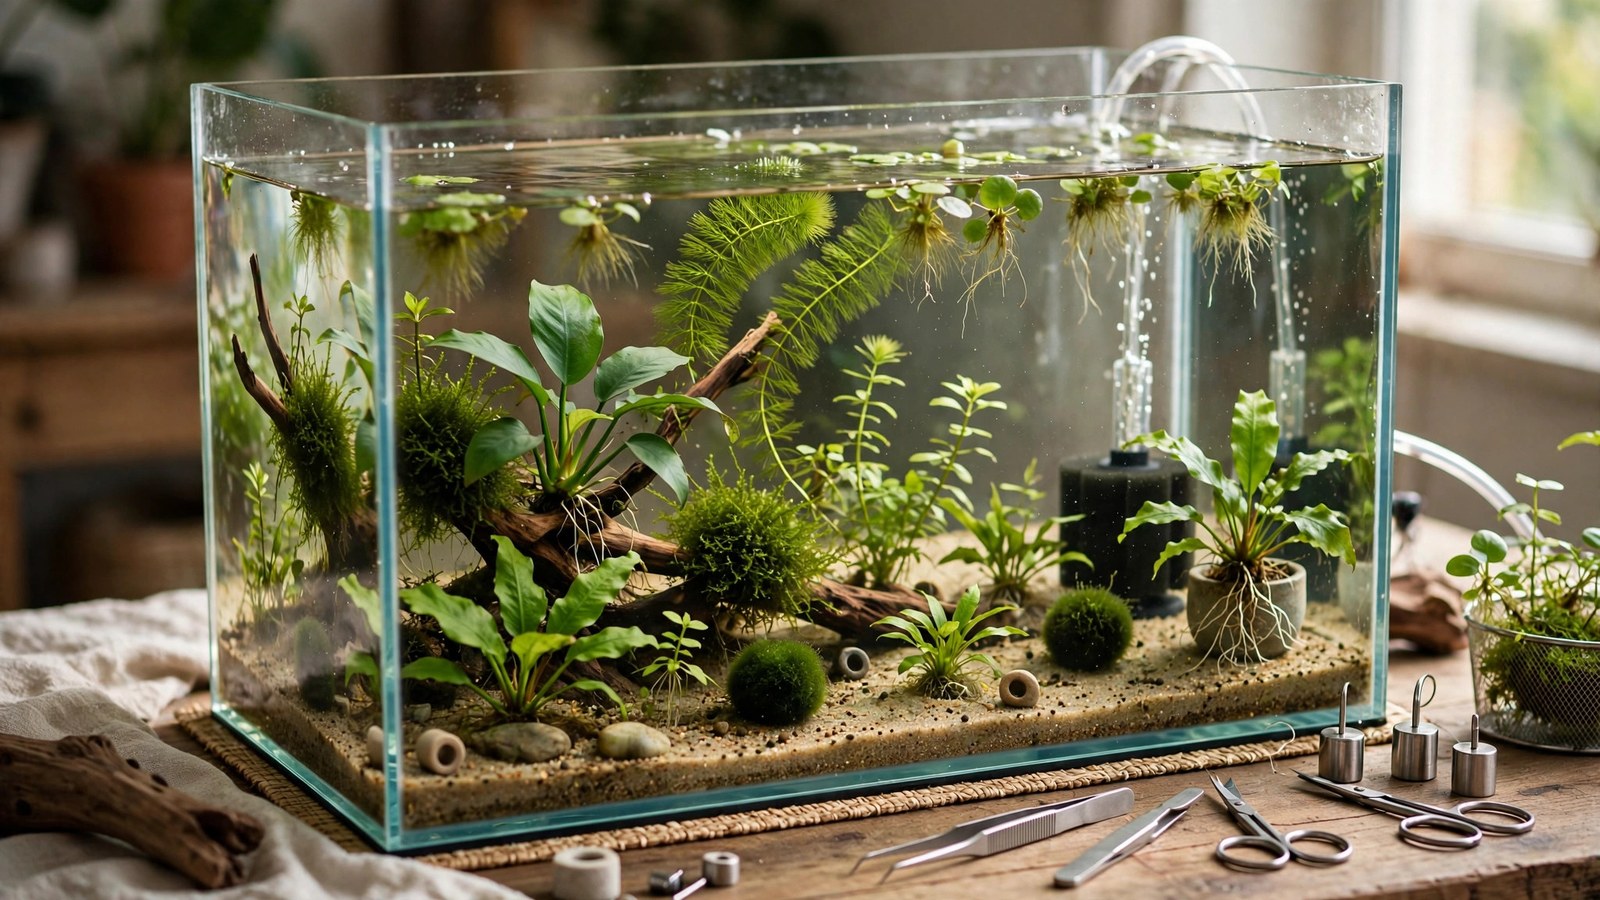
Every experienced hobbyist has a story about the "free" plant that cost them months: the snail infestation, the hydra outbreak, the algae species they'd never seen before. Quarantining new plants — holding them in a separate tank for observation before they join your display — is how you stop paying that tuition. A plant quarantine tank doesn't need to be fancy; it needs to be separate, observable, and inhospitable to whatever might be hitching a ride. Here's how to set one up and run it.
Why Quarantine When Dips Exist?
Dips (peroxide, bleach) kill what's exposed on the plant's surface right now. Quarantine catches everything else:
- Eggs that hatch later — snail eggs surviving a dip hatch in days; in quarantine, you see the babies before they reach your display.
- Pests in egg or dormant stages — hydra, planaria, damselfly nymphs, and parasites with life cycles longer than a 2-minute dip.
- Algae spores that germinate later — a plant that looks clean on arrival can sprout thread algae a week later in quarantine, where it's a 30-second fix instead of a display-tank infestation.
- Plant health assessment — is this plant actually healthy, or was it dying at the shop? Two weeks of observation answers definitively.
- Transition melt in isolation — emersed-grown plants melt on arrival; in quarantine, the mess happens where it doesn't matter. See our acclimation guide for the melt timeline.
The professional standard is dip + quarantine: dip kills the obvious, quarantine catches the rest. Either alone is good; together they're as close to guaranteed clean as the hobby gets. Our quarantine protocol guide covers the procedure; this article is about the tank itself.
The Setup: Simple and Functional
Tank
A 5–10 gallon tank (or even a clean plastic storage tote) is plenty. It doesn't need to be pretty — it needs to hold water and let you see everything. Bare-bottom or a thin layer of sand: bare-bottom makes pests and eggs maximally visible; sand is kinder to rooted plants during longer quarantines. Avoid aquasoil — its ammonia leach complicates observation, and you don't need its nutrients for a temporary holding tank.
Filtration
A sponge filter driven by a small air pump is ideal: gentle flow (won't batter delicate new plants), no intake to trap leaves, biological filtration, and cheap enough to dedicate permanently to quarantine. Keep a spare cycled sponge in your main tank's filter — when you need the quarantine tank, move the seeded sponge over and it's instantly cycled. This trick eliminates the "quarantine tank isn't cycled" problem entirely.
Light
A basic LED on a timer, 6–7 hours daily at moderate intensity. The goal is keeping plants alive and growing (so you can observe them), not showcasing them. Too much light grows algae that obscures observation; too little melts the plants you're trying to assess. A cheap clip-on plant light is perfect.
Heater
A small adjustable heater holding 74–76°F — warm enough for tropical plants and for pest eggs to hatch (cold water slows hatching, which defeats the purpose of observation). In a warm room, you may not need one; verify with a thermometer rather than assuming.
Everything else
- Lid or cover: prevents jumpers (if you hold anything mobile) and reduces evaporation. A simple glass lid or even plastic wrap works.
- Thermometer: the stick-on kind is fine.
- Dedicated tools: a net, tweezers, and siphon hose that never touch the main tank. Cross-contamination via shared tools is a classic quarantine failure — label them.
- No substrate fertilizers needed; dose a little all-in-one liquid weekly so plants don't starve during observation. That's it — this isn't a display tank.
Total cost: $30–60 using basic equipment, much of which you may already own. The seeded-sponge trick means it can sit dry in a closet between uses and be running in 20 minutes when new plants arrive.
Running Quarantine: The 2–4 Week Protocol
Day 0: Intake
- Dip new plants first (bleach for unknown sources, peroxide for trusted ones), neutralize, rinse.
- Place in the quarantine tank. Floaters float; stems can float or be loosely planted in the sand; rhizome plants rest on the bottom.
- Note the date and source on a piece of tape on the tank. You'll thank yourself later.
Days 1–7: Watch for the obvious
Daily 60-second inspections: snail babies on the glass (tiny moving dots), hydra (small white tentacled polyps on glass), planaria (arrow-headed worms, usually nocturnal — check with a flashlight after lights-out), algae sprouting on leaves, unexpected melt beyond normal transition melt. Remove anything suspicious immediately — tweezers, siphon, or targeted peroxide spot treatment.
Days 8–14: Watch for the delayed
Snail eggs hatch in 1–3 weeks depending on temperature and species — week two is prime hatching time. Keep inspecting. This is also when latent algae appears and when you'll know whether the plant is genuinely healthy or was dying slowly at the shop.
Days 14–28: Extended hold (for high-risk sources)
Plants from ponds, wild collection, or tanks with known pest issues deserve the full month. Most parasites and pest life cycles complete within 3–4 weeks at tropical temperatures — a clean month is strong evidence of clean plants. For reputable nursery or tissue-culture plants, two weeks is plenty (tissue culture can often skip quarantine entirely — it's sterile by production).
Graduation day
Plants graduate when: no pests observed for the full hold period, no unexplained algae, and the plant shows healthy new growth (proof it's viable, not just surviving). Move to the display tank and acclimate normally. Drain quarantine water (don't pour it into the display — it held the suspects), and either keep the tank running (if more plants are coming) or break it down.
Quarantine Tank Maintenance
It's a simple tank, but not a no-maintenance tank:
- Weekly 30–50% water change — small volume + rotting melt material = fast water quality decline. This is the main chore.
- Remove dead leaves promptly — quarantine melt is expected; remove the mush so it doesn't foul the small volume.
- Light weekly fertilizer dose — half-strength all-in-one keeps plants fed without fueling algae in the simple setup.
- Between uses: break down completely, bleach the tank and equipment (1:20 solution, rinse well), dry thoroughly. Drying kills almost everything — a bone-dry tank stored for a week is a reset. Re-seed with the spare sponge from the main tank on next use.
What Quarantine Can't Do (Honest Limits)
- It can't detect everything. Some pathogens and parasites have dormant stages lasting months. Quarantine dramatically reduces risk; it doesn't eliminate it to zero. Nothing does.
- It doesn't replace dips. A pest visible on day 1 could have been killed by a dip on day 0. Use both.
- It's only as good as your observation. A quarantine tank you never look at is just a second tank growing pests. The daily 60-second check is the actual mechanism — the tank is just the venue.
- Tissue-culture plants don't need quarantine (sterile production), and quarantining them just adds pointless transition stress. Dip not needed either — rinse the gel and plant.
Frequently Asked Questions
Do I really need a separate tank? Can't I quarantine in a bucket?
A bucket works for short holds (a few days) but fails for real quarantine: no filtration (ammonia builds), no light control (plants suffer), poor visibility (can't observe properly). For the 2–4 week protocol, a filtered, lit tank is meaningfully better. That said, a bucket with daily water changes beats no quarantine at all — don't let perfect be the enemy of good.
Can I quarantine fish and plants together?
Not ideally. Fish quarantine often involves medications that harm plants, and plant quarantine conditions (bright observation light, frequent disturbance) stress fish. Worse, combining them lets fish parasites meet plants that then carry them to the display. Run separate quarantines — the plant tank described here, and a separate simple tank for fish. The spare-sponge trick works for both.
How do I know how long to quarantine?
Two weeks minimum for reputable sources; four weeks for ponds, wild plants, or unknown-source tanks. The deciding factor is pest life cycles at your temperature: most hatch/emerge within 2–3 weeks at 74–76°F. When in doubt, go longer — the cost of an extra two weeks is trivial compared to a display-tank infestation. Tissue culture: zero days.
What should I do if I find pests in quarantine?
Congratulations — the system worked. Identify the pest, treat in the quarantine tank (where aggressive treatment is safe): manual removal + targeted treatment for snails/hydra, extended observation for algae, bleach re-dip for severe cases. Only graduate the plants after a full clean observation period following the treatment. Never "treat in the display tank and hope" — that's how you got into this hobby's horror stories.
Is quarantine overkill for plants from a trusted local shop?
Less necessary, but not overkill. Even good shops receive plants from wholesalers, hold them in shared systems, and can't inspect every leaf. Snail eggs are the great equalizer — they arrive on plants from the best shops in the world. A two-week hold for shop plants is cheap insurance; reserve the full month for riskier sources.
The Cheapest Insurance in the Hobby
A $40 quarantine setup, a seeded sponge, and two weeks of 60-second daily glances — that's the entire price of never introducing snails, hydra, or mystery algae to your display tank again. Every keeper who quarantines has a story about the pest they caught in quarantine; every keeper who doesn't has a story about the pest they caught too late. Set up the tank before you need it, and make dip-plus-quarantine the unskippable ritual for every new plant that enters your home.
Tissue-culture plants are the exception — they’re grown in sterile gel and adapt with minimal melting, which is part of what you’re paying for. Plants bought submersed from another hobbyist’s tank also transition with little melt, since they’re already in the right form.
Which Plants Melt Most (and Least)
Heavy melters (expect significant leaf loss)
- Cryptocorynes — infamous for “crypt melt,” sometimes dropping every leaf after any disturbance. They almost always recover from the roots within weeks.
- Stem plants grown emersed — rotala, ludwigia, and hygrophila often shed lower emersed leaves while the growing tips transition.
- Amazon swords — emersed-grown swords typically lose their broad oval aerial leaves and replace them with longer submersed ribbon leaves.
Light melters
- Anubias, java fern, bucephalandra — slow-growing rhizome plants transition gradually; occasional old-leaf melt but rarely dramatic.
- Vallisneria — usually transitions well, though it dislikes the move itself and may sulk for a week.
- Floating plants — minimal melt since their leaves were already at the air-water interface.
The Acclimation Protocol
Step 1: Quarantine or dip first
Before acclimating to your tank’s conditions, make sure you’re not acclimating pests along with the plant. Run new arrivals through our quarantine and dip protocol — it adds days upfront but prevents months of regret.
Step 2: Float to temperature-match (30 minutes)
Float the bag or container in your tank for 20–30 minutes to equalize temperature. Plants are less temperature-sensitive than fish, but a 10°F shock on top of transplant stress is an avoidable insult.
Step 3: Trim before planting
Remove any leaves that are already damaged, yellowing, or heavily algae-covered — they won’t recover and they’ll rot in your tank, feeding algae. For stem plants, trim off the bottom inch and any emersed leaves that look unlikely to adapt; the plant wastes energy maintaining leaves it’s going to shed anyway. Keep the healthy growing tips — that’s where recovery starts.
Step 4: Plant correctly the first time
Follow our planting guide — right depth, crown exposed on rosettes, rhizomes unburied on epiphytes. Every uprooting and replanting restarts the acclimation clock, so get placement right on the first attempt. Decide where each plant goes before it goes in the water.
Step 5: Run a gentle first week
For the first 7 days after planting:
- Moderate light — run your normal photoperiod but consider dropping intensity 20–30% if your light is dimmable. Blast-level light on a melting plant grows algae on the dying leaves, not recovery.
- Stable CO2 — if you inject CO2, keep it consistent. Fluctuating CO2 during acclimation is a melt accelerator. If you’re low-tech, this doesn’t apply — see growing without CO2.
- Half-strength fertilizer — new plants with damaged leaves can’t use full dosing, and the excess feeds algae. Ramp to full strength over 2–3 weeks per our fertilizer schedule.
- No disturbance — don’t move, trim, or “check on” new plants for at least two weeks. Every touch resets root establishment. This is especially critical for crypts.
Step 6: Remove melt, keep the base
As emersed leaves melt, remove the mushy material promptly — decaying leaves release ammonia and grow fungus that can spread to healthy tissue. But never discard the plant while the crown, rhizome, or roots are firm and alive. A crypt that’s lost every leaf but has firm roots is a plant that’s about to recover, not a dead plant. Give it 3–4 weeks before judging.
Telling Normal Melt From Real Problems
Normal transition melt:
- Affects oldest/emersed leaves first, newest growth last
- New submersed leaves emerge even as old ones dissolve
- Roots and crown stay firm and white/green
- Timeline: 1–4 weeks, then obvious new growth
Concerning melt (see our full melting diagnosis guide):
- New growth also melts or emerges deformed
- Rhizome or crown turns mushy and brown — this is rot, not transition
- Entire plant dissolves within days with no new growth after 4+ weeks
- Melting spreads to established plants that weren’t recently moved
Buying Tips to Minimize Melt
- Buy submersed-grown when available — hobbyist-grown cuttings transition with almost no melt.
- Choose tissue culture for sensitive species — crypts and delicate stems establish far more reliably from sterile cups.
- Avoid plants already melting in the store tank — some melt is normal, but a plant that’s mostly mush at purchase has less energy for recovery.
- Transport carefully — keep plants damp and out of direct sun/heat. A plant that dries out or cooks in a hot car melts far worse than one transported properly.
The First-Month Timeline: What to Expect Week by Week
Knowing what’s normal when removes most acclimation anxiety. Here’s the typical timeline for a healthy plant adapting to a new tank:
Week 1: The quiet week
Almost nothing visible happens. The plant is growing roots you can’t see and assessing its new environment. Some species (vallisneria, stem plants) may start shedding their lowest leaves. This is normal. Resist the urge to “help” — no moving, no extra fertilizer, no light changes. The most common beginner mistake is intervening during a week when the correct action is nothing.
Week 2: Melt peaks
This is when emersed leaves give up in earnest. Crypts may drop everything; swords shed their broad aerial leaves; stem plants lose lower foliage. It looks catastrophic and it’s usually fine. Keep removing mushy material, keep conditions stable, and watch the crown and growing tips — if those are firm and green, recovery is already underway.
Week 3: The turn
New submersed-adapted leaves emerge — smaller, thinner, often a slightly different shade of green than the emersed foliage. Stem plant tips start growing visibly; crypts push tiny curled leaves from the crown; swords unfurl narrow ribbon leaves. This is the moment most beginners exhale for the first time.
Week 4+: Established
New growth outpaces melt, and the plant is functionally yours. You can resume full-strength fertilizer, normal trimming, and stop treating it as fragile. Some slow growers (anubias, bucephalandra) take 6–8 weeks to show obvious progress — that’s their normal speed, not a problem.
Acclimating Different Plant Formats
Tissue-culture cups
Sterile, pest-free, and already adapted to high-humidity (not emersed) growth — tissue cultures melt the least of any format. Rinse the agar gel off gently (leftover gel rots and feeds fungus), split the portion into small plantlets, and plant per our planting guide. They establish slowly for the first two weeks, then accelerate. No dip needed, minimal acclimation stress — this is the premium experience you’re paying for.
Potted plants
Remove the pot and strip away the rockwool completely — leftover rockwool traps debris and rots. Tease the root mass apart gently; if it’s a dense mat, splitting it into 2–3 smaller portions actually establishes faster than planting one big clump (more growing points, better water flow around roots). Potted plants are usually emersed-grown, so expect the standard 2–4 week melt cycle.
Bare-root / bunched stems
Typically sold as weighted bunches. Remove any bands, foam, or weights, strip the lower leaves, and plant stems individually or in small groups. Bunched stems from the store are often already transitioning — check for new submersed growth at the tips, which tells you the plant is mid-adaptation and will settle quickly.
Hobbyist cuttings
Already submersed-grown and the fastest to establish — often showing new growth within days. The main acclimation factor is water-parameter difference between the two tanks. Float to temperature-match, plant promptly, and they’ll usually take off with minimal melt. This is why experienced hobbyists prefer trading cuttings over buying potted plants.
Frequently Asked Questions
Should I use a “plant starter” or transplant fertilizer?
Products marketed for transplant shock are mostly B-vitamins and mild hormones. They don’t hurt, but there’s no strong evidence they help aquarium plants specifically. Stable conditions and patience outperform any bottle. Save the money for more plants.
My new plant melted completely — bare crown, no leaves. Is it dead?
Probably not, if the crown or rhizome is firm. Crypts and swords routinely lose 100% of their leaves and regrow from the base within a month. The test is firmness: firm and pale/green means alive; mushy and brown/black means rot. Give firm-but-leafless plants a full 4 weeks before declaring them dead.
Can I speed up acclimation with extra light or CO2?
No — and trying usually backfires. A melting plant can’t use extra light; the excess just grows algae on its dying leaves. Keep light moderate and CO2 stable (not boosted) during acclimation. Growth speed comes from the plant’s own adaptation timeline, which you can’t rush, only avoid delaying.
Should new plants go straight into my main display tank?
After quarantine/dipping, yes — there’s no benefit to a separate “growing-in” tank for most plants. They acclimate to your water fastest in the tank they’ll live in. The exception is very delicate species going into a tank with boisterous fish; give those a few weeks in a calm corner or breeder box first.
The Patience Rule
The single most important acclimation skill is restraint: plant it right, set gentle conditions, remove decay, and then leave it alone for a month. The hobbyists with the best plant growth aren’t doing something clever in week one — they’re simply not interfering in weeks two through four while the plants do what they’ve evolved to do. Melt looks like failure and feels like failure, but in most cases it’s the visible part of a plant successfully becoming yours.