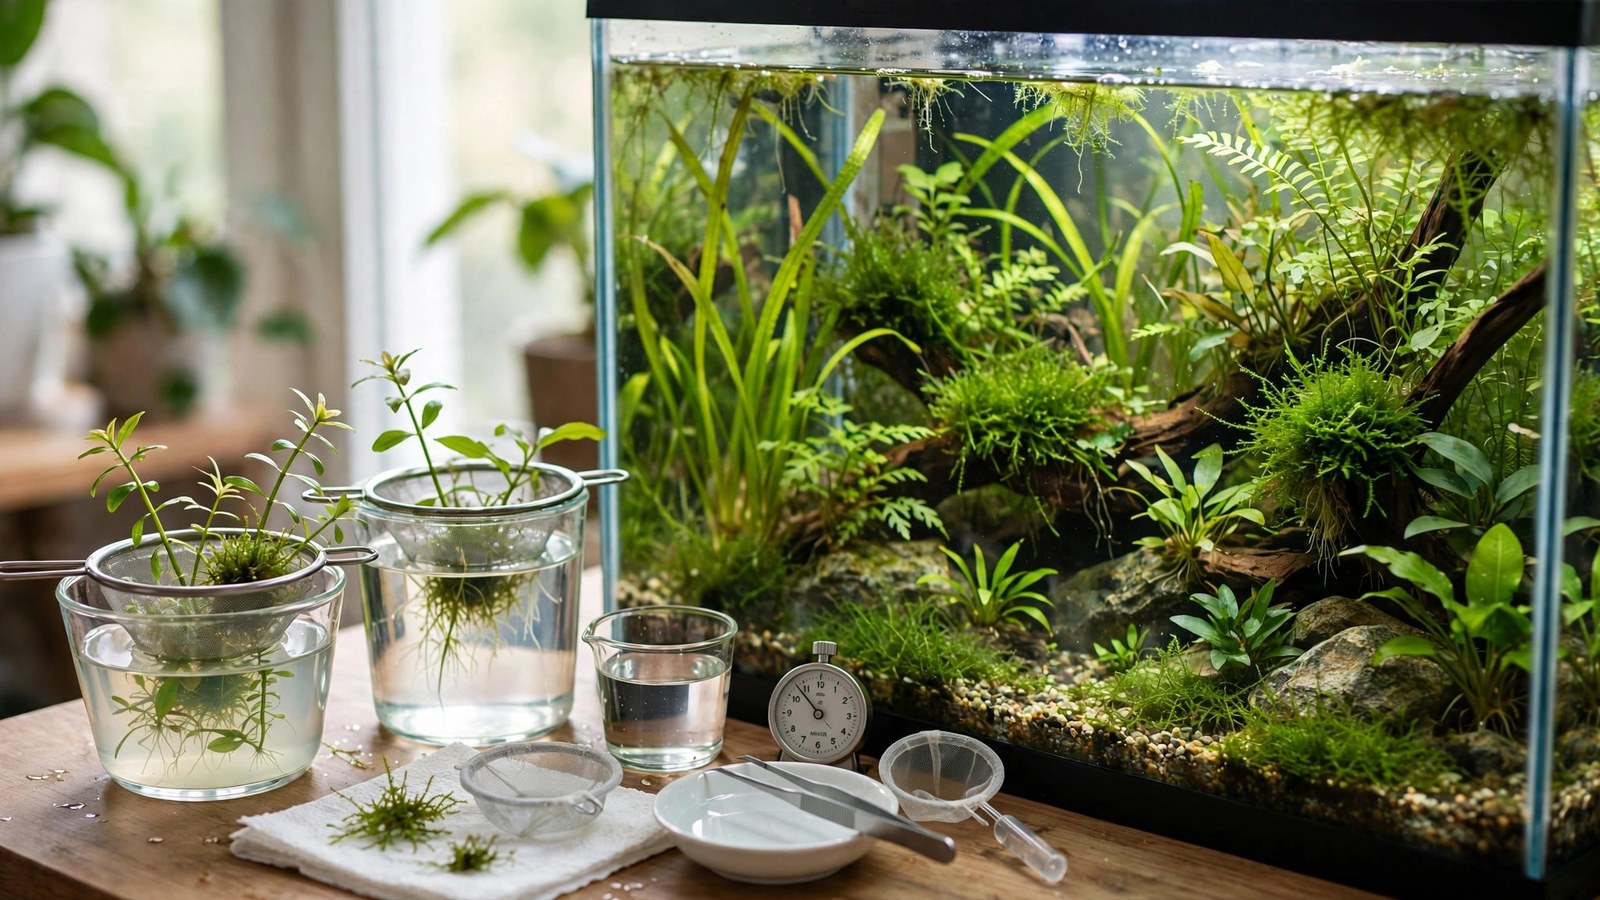
Bleach dipping is the nuclear option of plant treatment: a brief bath in diluted household bleach that kills algae, snail eggs, parasites, and pathogens that gentler methods merely annoy. It's the most effective dip in the hobby — and the easiest to get wrong. Too strong or too long and you melt the plant along with the pests; too weak and you've stressed the plant for nothing. This guide gives you the exact safe protocol: ratios, timing by plant type, the critical neutralization step, and when to choose bleach over hydrogen peroxide.
What Bleach Kills (and Why It's Worth the Risk)
Sodium hypochlorite — plain unscented household bleach — is a broad-spectrum oxidizer and disinfectant. A proper dip eliminates:
- All common algae including black brush algae (BBA), which survives peroxide dips
- Snail eggs and tiny pest snails — the gelatinous egg clutches that peroxide can't penetrate
- Parasites and pathogens — including many organisms responsible for introducing disease
- Hitchhiking insect larvae (damselfly nymphs, etc.) that arrive on pond-grown plants
The trade-off is real: bleach doesn't distinguish between pest cells and plant cells. The entire protocol — concentration, duration, neutralization — exists to exploit the fact that pests die faster than plants do. Get the timing right and the plant shrugs it off; get it wrong and you've chemically burned the foliage. Respect the numbers below and you'll be fine — thousands of hobbyists bleach-dip routinely.
The Safe Protocol: Step by Step
What you need
- Plain, unscented household bleach (sodium hypochlorite, typically 5–8% concentration). No splashless, no scented, no "bleach with fabric softener" — additives kill plants and livestock. Check the label: the only active ingredient should be sodium hypochlorite.
- A container for the dip (a bucket or large bowl)
- A second container with clean, dechlorinated water for rinsing
- Dechlorinator (sodium thiosulfate-based, e.g., Seachem Prime) — double or triple dose for the neutralizing soak
- Gloves (bleach irritates skin) and ventilation
The procedure
- Mix the dip: 1 part bleach to 20 parts water (e.g., 50 ml bleach in 1 liter of water). For very delicate plants, 1:30. Never stronger than 1:20 — stronger doesn't kill pests "better," it just kills plants faster.
- Submerge the plant fully for 90 seconds to 2 minutes — no longer. Swish gently. Set a timer; "about two minutes" by feel becomes four minutes, and four minutes melts things.
- Rinse immediately and thoroughly in clean water — 60 seconds of swishing rinse.
- Neutralizing soak (CRITICAL): place the plant in clean water dosed with 2–3x the normal dechlorinator amount for 5–10 minutes. Dechlorinator neutralizes residual chlorine/chloramine. Skipping this step is how bleach gets into your tank — don't skip it.
- Final rinse in clean water, then plant or quarantine as normal.
Total plant exposure to active bleach: under 2 minutes. Total process: about 15 minutes. The neutralization soak is not optional and not "extra credit" — it's half the protocol.
Timing by Plant Type
| Plant type | Ratio | Duration | Notes |
|---|---|---|---|
| Tough (anubias, java fern, swords) | 1:20 | 2 minutes | Ideal candidates; tolerate the full protocol well |
| Medium (most stems, bacopa, hygro) | 1:20 | 90 seconds | Watch for leaf curling after; usually temporary |
| Delicate (fine stems, mosses) | 1:30 | 60–90 seconds | Test a small piece first; consider peroxide instead |
| Vallisneria | 1:30 | 60 seconds max | Vals are bleach-sensitive; expect some melt regardless |
| Crypts | 1:20 | 90 seconds | May trigger crypt melt — usually recovers from roots |
Never bleach-dip: plants you can't afford to lose with no backup, extremely rare/expensive specimens on their first outing (test the protocol on a cheap plant first), or plants already stressed and melting — bleach on a weakened plant finishes the job.
Bleach vs. Other Dips: Choosing Your Weapon
- Hydrogen peroxide dip: Gentler, great for routine algae, no neutralization needed. Default choice for algae-only problems. Won't reliably kill snail eggs.
- Bleach dip: Stronger, kills snail eggs and pathogens, handles BBA. Default choice for pest elimination and severe infestations. Requires the neutralization protocol.
- Alum dip (1 tbsp/gallon, 24-hour soak): Excellent snail-egg killer, very gentle on plants, but slow and does little for algae. Good when snails are the only concern and you have a day to spare.
- Quarantine (no dip): Observation over 2–4 weeks catches what dips miss and stresses plants least. The gold standard when combined with a dip — dip first, quarantine after.
For new plants from unknown sources, the professional sequence is: bleach dip → neutralizing soak → quarantine tank for 2 weeks → main tank. Belt, suspenders, and a backup belt.
After the Dip: Recovery and What to Expect
- Mild stress is normal: slight translucency at leaf edges or minor curling for 1–3 days. The plant was chemically assaulted; brief sulking is expected.
- Some melt is possible: crypts may melt (they do that anyway), delicate stems may shed a few leaves. Remove mushy material, keep conditions stable — recovery from roots/crown is the norm, not the exception.
- Algae turns white/pink and dies over 24–72 hours. Dead BBA often stays attached as gray fuzz — trim the worst leaves rather than waiting for it to vanish.
- Don't fertilize extra "to help recovery." Stable, normal conditions heal plants; a fertilizer spike just feeds any surviving algae. Keep your regular schedule.
- Quarantine after dipping if the source was questionable — the dip kills what's on the plant, but eggs in crevices or pathogens in an early stage can occasionally survive. Two weeks of observation in a quarantine tank closes the loop.
Safety: For You and Your Tank
- Yourself: Wear gloves. Don't inhale fumes directly — mix in a ventilated area. If bleach contacts eyes, rinse immediately. Keep the working bleach solution away from children and pets during the process.
- Your tank: The neutralizing soak is the firewall. After proper neutralization and rinsing, no active chlorine reaches your tank — dechlorinator chemistry on this is well established. If you're nervous, quarantine the dipped plant for 24 hours in a bucket of clean water before adding to the main tank; any residual issue shows up there, not in your display.
- Never pour dip water into the tank or down a drain connected to septic with a biofilter — dump it on soil outside or down a municipal drain with plenty of flushing water.
- Never mix bleach with other chemicals — especially ammonia-based cleaners or acids (vinegar included). Chloramine/chlorine gas is dangerous. The dip uses bleach + water only, period.
Common Bleach Dip Mistakes
- Eyeballing the ratio. "A glug of bleach in a bucket" is how plants die. Measure: 1:20 means measure. A kitchen measuring cup is fine.
- Leaving plants in "just a bit longer." The difference between 2 minutes (safe) and 5 minutes (melted) is smaller than it feels. Use a timer, every time.
- Skipping the neutralizing soak. Rinsing alone doesn't reliably remove all chlorine from plant crevices. The dechlorinator soak is the actual safety step — rinsing is just the prelude.
- Using scented/splashless bleach. The surfactants and fragrances in "splashless" or scented bleach are plant killers and tank poisons. Plain unscented only — read the label.
- Dipping an already-dying plant. Bleach is for healthy plants with pest/algae problems, not rescue therapy for failing plants. It will not save a melting plant; it will accelerate it.
- Treating the dip as quarantine. A dip kills what's exposed on the surface right now. It doesn't replace observation time for things that hatch, emerge, or develop later. Dip + quarantine, not dip instead of quarantine.
Frequently Asked Questions
Will bleach dipping kill my plant?
Not at the correct ratio and duration — healthy plants tolerate 1:20 for 90–120 seconds with only transient stress. What kills plants is stronger ratios, longer soaks, or dipping already-weakened plants. Follow the protocol exactly (especially the timer and the neutralizing soak) and the risk is minimal. When trying it the first time, practice on an inexpensive plant.
Can I bleach-dip plants that are already in my tank?
You'd have to remove them first — never add bleach to the tank itself. For established rooted plants, uprooting for a dip is disruptive; in-tank peroxide spot treatment is usually the better choice for plants you don't want to disturb. Reserve bleach dips for new arrivals and plants you're already moving.
How do I know the bleach is fully neutralized?
The dechlorinator soak at 2–3x dose for 5–10 minutes is chemically sufficient — sodium thiosulfate neutralizes chlorine rapidly and completely. For extra confidence, smell the plant after the soak: any chlorine smell means soak longer. A chlorine test strip on the soak water reading zero is definitive. In practice, the standard soak has an enormous safety margin.
Does bleach dipping kill algae spores too?
It kills exposed algae and most surface organisms effectively. Truly dormant spores in microscopic crevices can occasionally survive any dip — which is why the dip-then-quarantine sequence exists. No dip is 100% sterilization; bleach is simply the closest the hobby gets. Manage expectations: "extremely thorough," not "magical."
Is there anything gentler that still kills snail eggs?
An alum dip (aluminum sulfate, 1 tablespoon per gallon, 12–24 hour soak) is the gentlest reliable snail-egg killer — very easy on plants, but slow and weak against algae. If snails are your only concern and you're not in a hurry, alum is excellent. If you also need algae and pathogen control, or you need it done today, bleach is the answer.
Respect the Protocol, Reap the Clean Plants
Bleach dipping has a scary reputation it doesn't deserve — the fear comes from people free-pouring and over-soaking, not from the protocol itself. Measured 1:20, timed to 90–120 seconds, neutralized with dechlorinator, it's a routine, repeatable, safe procedure that delivers genuinely pest-free plants. Add it to your new-plant workflow alongside quarantine, and the words "where did these snails come from" leave your vocabulary for good.
Tissue-culture plants are the exception — they’re grown in sterile gel and adapt with minimal melting, which is part of what you’re paying for. Plants bought submersed from another hobbyist’s tank also transition with little melt, since they’re already in the right form.
Which Plants Melt Most (and Least)
Heavy melters (expect significant leaf loss)
- Cryptocorynes — infamous for “crypt melt,” sometimes dropping every leaf after any disturbance. They almost always recover from the roots within weeks.
- Stem plants grown emersed — rotala, ludwigia, and hygrophila often shed lower emersed leaves while the growing tips transition.
- Amazon swords — emersed-grown swords typically lose their broad oval aerial leaves and replace them with longer submersed ribbon leaves.
Light melters
- Anubias, java fern, bucephalandra — slow-growing rhizome plants transition gradually; occasional old-leaf melt but rarely dramatic.
- Vallisneria — usually transitions well, though it dislikes the move itself and may sulk for a week.
- Floating plants — minimal melt since their leaves were already at the air-water interface.
The Acclimation Protocol
Step 1: Quarantine or dip first
Before acclimating to your tank’s conditions, make sure you’re not acclimating pests along with the plant. Run new arrivals through our quarantine and dip protocol — it adds days upfront but prevents months of regret.
Step 2: Float to temperature-match (30 minutes)
Float the bag or container in your tank for 20–30 minutes to equalize temperature. Plants are less temperature-sensitive than fish, but a 10°F shock on top of transplant stress is an avoidable insult.
Step 3: Trim before planting
Remove any leaves that are already damaged, yellowing, or heavily algae-covered — they won’t recover and they’ll rot in your tank, feeding algae. For stem plants, trim off the bottom inch and any emersed leaves that look unlikely to adapt; the plant wastes energy maintaining leaves it’s going to shed anyway. Keep the healthy growing tips — that’s where recovery starts.
Step 4: Plant correctly the first time
Follow our planting guide — right depth, crown exposed on rosettes, rhizomes unburied on epiphytes. Every uprooting and replanting restarts the acclimation clock, so get placement right on the first attempt. Decide where each plant goes before it goes in the water.
Step 5: Run a gentle first week
For the first 7 days after planting:
- Moderate light — run your normal photoperiod but consider dropping intensity 20–30% if your light is dimmable. Blast-level light on a melting plant grows algae on the dying leaves, not recovery.
- Stable CO2 — if you inject CO2, keep it consistent. Fluctuating CO2 during acclimation is a melt accelerator. If you’re low-tech, this doesn’t apply — see growing without CO2.
- Half-strength fertilizer — new plants with damaged leaves can’t use full dosing, and the excess feeds algae. Ramp to full strength over 2–3 weeks per our fertilizer schedule.
- No disturbance — don’t move, trim, or “check on” new plants for at least two weeks. Every touch resets root establishment. This is especially critical for crypts.
Step 6: Remove melt, keep the base
As emersed leaves melt, remove the mushy material promptly — decaying leaves release ammonia and grow fungus that can spread to healthy tissue. But never discard the plant while the crown, rhizome, or roots are firm and alive. A crypt that’s lost every leaf but has firm roots is a plant that’s about to recover, not a dead plant. Give it 3–4 weeks before judging.
Telling Normal Melt From Real Problems
Normal transition melt:
- Affects oldest/emersed leaves first, newest growth last
- New submersed leaves emerge even as old ones dissolve
- Roots and crown stay firm and white/green
- Timeline: 1–4 weeks, then obvious new growth
Concerning melt (see our full melting diagnosis guide):
- New growth also melts or emerges deformed
- Rhizome or crown turns mushy and brown — this is rot, not transition
- Entire plant dissolves within days with no new growth after 4+ weeks
- Melting spreads to established plants that weren’t recently moved
Buying Tips to Minimize Melt
- Buy submersed-grown when available — hobbyist-grown cuttings transition with almost no melt.
- Choose tissue culture for sensitive species — crypts and delicate stems establish far more reliably from sterile cups.
- Avoid plants already melting in the store tank — some melt is normal, but a plant that’s mostly mush at purchase has less energy for recovery.
- Transport carefully — keep plants damp and out of direct sun/heat. A plant that dries out or cooks in a hot car melts far worse than one transported properly.
The First-Month Timeline: What to Expect Week by Week
Knowing what’s normal when removes most acclimation anxiety. Here’s the typical timeline for a healthy plant adapting to a new tank:
Week 1: The quiet week
Almost nothing visible happens. The plant is growing roots you can’t see and assessing its new environment. Some species (vallisneria, stem plants) may start shedding their lowest leaves. This is normal. Resist the urge to “help” — no moving, no extra fertilizer, no light changes. The most common beginner mistake is intervening during a week when the correct action is nothing.
Week 2: Melt peaks
This is when emersed leaves give up in earnest. Crypts may drop everything; swords shed their broad aerial leaves; stem plants lose lower foliage. It looks catastrophic and it’s usually fine. Keep removing mushy material, keep conditions stable, and watch the crown and growing tips — if those are firm and green, recovery is already underway.
Week 3: The turn
New submersed-adapted leaves emerge — smaller, thinner, often a slightly different shade of green than the emersed foliage. Stem plant tips start growing visibly; crypts push tiny curled leaves from the crown; swords unfurl narrow ribbon leaves. This is the moment most beginners exhale for the first time.
Week 4+: Established
New growth outpaces melt, and the plant is functionally yours. You can resume full-strength fertilizer, normal trimming, and stop treating it as fragile. Some slow growers (anubias, bucephalandra) take 6–8 weeks to show obvious progress — that’s their normal speed, not a problem.
Acclimating Different Plant Formats
Tissue-culture cups
Sterile, pest-free, and already adapted to high-humidity (not emersed) growth — tissue cultures melt the least of any format. Rinse the agar gel off gently (leftover gel rots and feeds fungus), split the portion into small plantlets, and plant per our planting guide. They establish slowly for the first two weeks, then accelerate. No dip needed, minimal acclimation stress — this is the premium experience you’re paying for.
Potted plants
Remove the pot and strip away the rockwool completely — leftover rockwool traps debris and rots. Tease the root mass apart gently; if it’s a dense mat, splitting it into 2–3 smaller portions actually establishes faster than planting one big clump (more growing points, better water flow around roots). Potted plants are usually emersed-grown, so expect the standard 2–4 week melt cycle.
Bare-root / bunched stems
Typically sold as weighted bunches. Remove any bands, foam, or weights, strip the lower leaves, and plant stems individually or in small groups. Bunched stems from the store are often already transitioning — check for new submersed growth at the tips, which tells you the plant is mid-adaptation and will settle quickly.
Hobbyist cuttings
Already submersed-grown and the fastest to establish — often showing new growth within days. The main acclimation factor is water-parameter difference between the two tanks. Float to temperature-match, plant promptly, and they’ll usually take off with minimal melt. This is why experienced hobbyists prefer trading cuttings over buying potted plants.
Frequently Asked Questions
Should I use a “plant starter” or transplant fertilizer?
Products marketed for transplant shock are mostly B-vitamins and mild hormones. They don’t hurt, but there’s no strong evidence they help aquarium plants specifically. Stable conditions and patience outperform any bottle. Save the money for more plants.
My new plant melted completely — bare crown, no leaves. Is it dead?
Probably not, if the crown or rhizome is firm. Crypts and swords routinely lose 100% of their leaves and regrow from the base within a month. The test is firmness: firm and pale/green means alive; mushy and brown/black means rot. Give firm-but-leafless plants a full 4 weeks before declaring them dead.
Can I speed up acclimation with extra light or CO2?
No — and trying usually backfires. A melting plant can’t use extra light; the excess just grows algae on its dying leaves. Keep light moderate and CO2 stable (not boosted) during acclimation. Growth speed comes from the plant’s own adaptation timeline, which you can’t rush, only avoid delaying.
Should new plants go straight into my main display tank?
After quarantine/dipping, yes — there’s no benefit to a separate “growing-in” tank for most plants. They acclimate to your water fastest in the tank they’ll live in. The exception is very delicate species going into a tank with boisterous fish; give those a few weeks in a calm corner or breeder box first.
The Patience Rule
The single most important acclimation skill is restraint: plant it right, set gentle conditions, remove decay, and then leave it alone for a month. The hobbyists with the best plant growth aren’t doing something clever in week one — they’re simply not interfering in weeks two through four while the plants do what they’ve evolved to do. Melt looks like failure and feels like failure, but in most cases it’s the visible part of a plant successfully becoming yours.