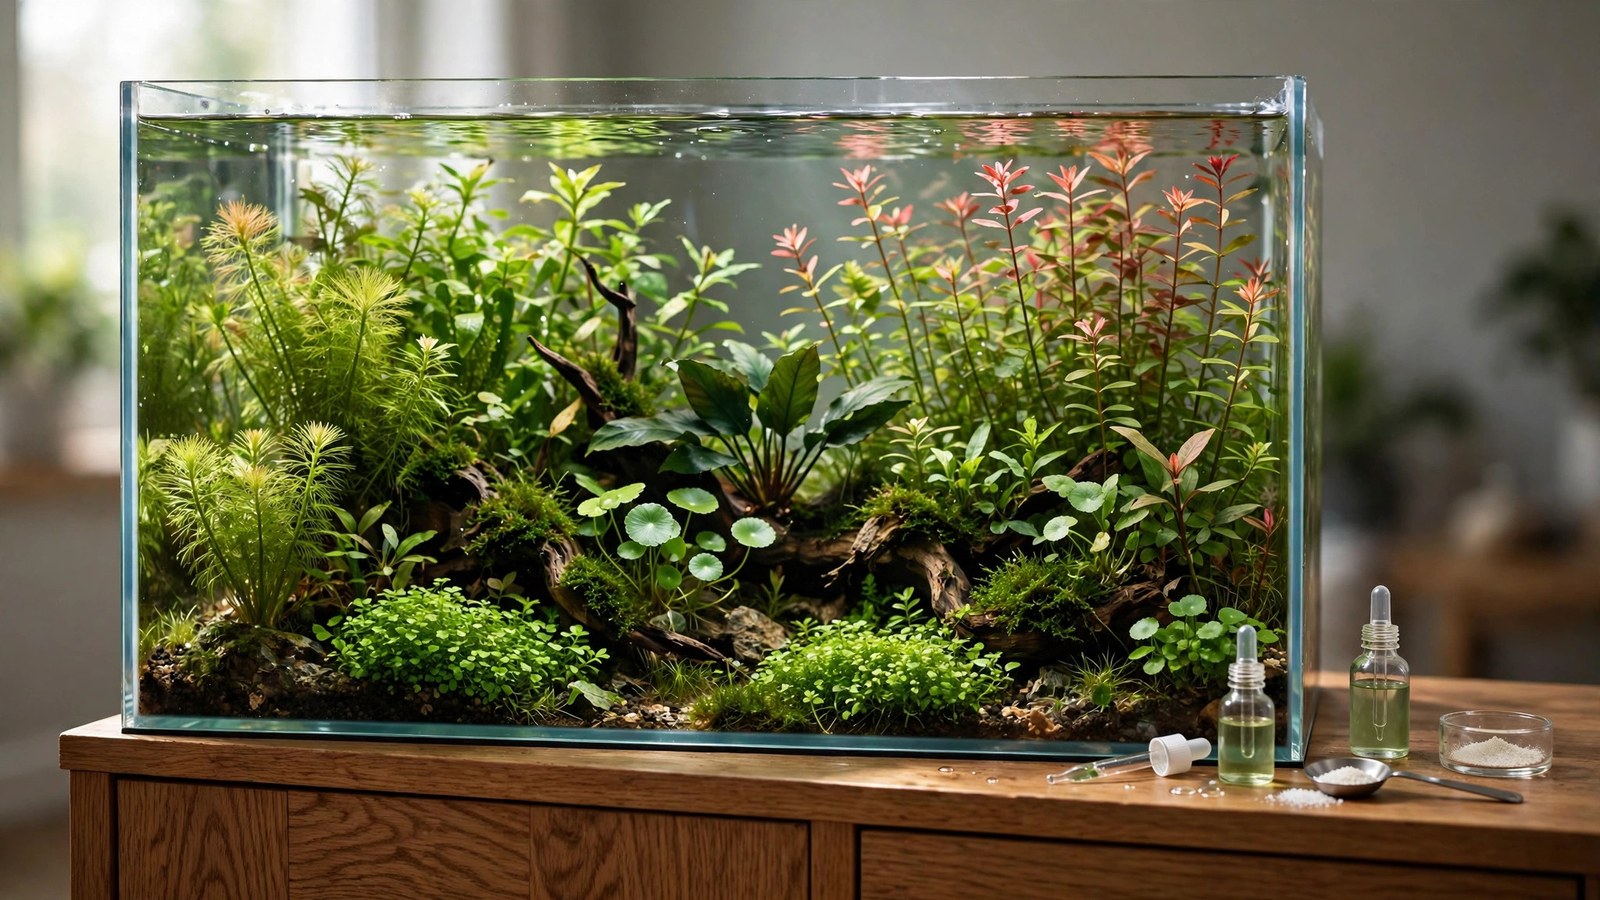
If fertilizing a planted tank feels like guesswork — a little of this bottle on Monday, a pinch of that powder when the plants look sad — EI dosing was invented to end that guessing. Short for the Estimative Index, EI is a fertilization method created by hobbyist Tom Barr that works on a beautifully simple premise: instead of trying to measure exactly what your plants consume, you dose slightly more nutrients than they could possibly need, then reset everything with a large weekly water change. No test kits, no spreadsheets, no deficiency detective work. Just a routine.
This guide walks you through exactly how EI dosing works for aquarium plants, the standard schedule, how to mix your own solutions from cheap dry salts, and — just as important — when EI is the wrong method for your tank.
What the Estimative Index Actually Is
Tom Barr introduced the Estimative Index in the early 2000s as a rebellion against the test-kit culture of planted tanks. His argument: hobbyist test kits are imprecise, plant uptake varies constantly, and chasing exact nutrient numbers keeps you forever reacting. The alternative is to stop estimating demand and simply supply everything in abundance.
The name "Estimative Index" comes from the method's core idea: you estimate a range of nutrient uptake and dose at the top of that range. You don't need to know whether your tank consumes 8 or 12 ppm of nitrate per week — you dose 20 and the question becomes irrelevant. The weekly 50% water change then flushes the excess before it can accumulate.
EI is not a product. It's a philosophy with a schedule. You can run it with dry fertilizer salts (the classic approach, and by far the cheapest) or with pre-mixed liquid EI bottles. The method is the same either way.
The Core Idea: Non-Limiting Nutrients Plus a Weekly Reset
EI has two pillars, and both matter equally:
Pillar 1: Dose everything in slight excess
Plants need macronutrients (nitrogen, phosphorus, potassium) and micronutrients (iron, manganese, zinc, copper, boron, molybdenum, and others — collectively "traces"). Under EI, you dose all of them at levels that exceed what even a fast-growing, CO2-injected tank can consume in a week. The goal is that no nutrient ever becomes the limiting factor for growth. When every nutrient is abundant, the only things controlling growth are light and CO2 — which is exactly what you want, because those are the dials you can actually control deliberately.
Pillar 2: The 50% weekly water change
Excess has to go somewhere. The weekly 50% water change is the reset button: it caps accumulation, exports the unconsumed fertilizer, removes organic waste, and replenishes carbonate buffers. This is non-negotiable in classic EI. If you skip water changes for three weeks, nutrient levels don't just drift — they compound. The method was designed around the reset, and it falls apart without it. If weekly 50% changes don't fit your life, see our comparison of PPS-Pro daily dosing, which was designed specifically for smaller water changes.
The Standard EI Dosing Schedule
The classic Tom Barr schedule is written for a 20-gallon (75 liter) tank, dosed with dry salts. Scale up or down proportionally for your tank size — the math is in the next section.
| Day | Dose | Amount (per 20 gal) |
|---|---|---|
| Monday | Macros (NPK) | ¼ tsp KNO₃ + 1/16 tsp KH₂PO₄ |
| Tuesday | Micros (traces) | 1/16 tsp trace mix (CSM+B or equivalent) |
| Wednesday | Macros (NPK) | ¼ tsp KNO₃ + 1/16 tsp KH₂PO₄ |
| Thursday | Micros (traces) | 1/16 tsp trace mix |
| Friday | Macros (NPK) | ¼ tsp KNO₃ + 1/16 tsp KH₂PO₄ |
| Saturday | Micros (traces) | 1/16 tsp trace mix |
| Sunday | Rest + 50% water change | Dose nothing before the change |
A few notes on this schedule:
- Macros and micros are dosed on alternating days because iron in the trace mix can react with phosphate and precipitate out, making both less available. Alternating days keeps them apart. This is a real chemistry concern, not superstition — see the section on mixing stock solutions below for how to handle it in bottles.
- KNO₃ supplies both nitrogen and potassium; KH₂PO₄ supplies phosphorus and more potassium. Together they cover the full NPK spectrum. If your tank already has high nitrates from fish waste, you can reduce or skip the KNO₃ and dose potassium separately — more on adjustments below.
- The trace mix is typically CSM+B (also sold as Plantex CSM+B), a chelated micronutrient blend formulated for exactly this purpose. Dose it dry with the little measuring spoon that comes with most dry-fertilizer kits, or mix it into a solution.
What does this actually put in the water? Roughly: nitrate ~20 ppm, phosphate ~3 ppm, potassium ~20 ppm, and iron ~0.5 ppm per week. These are deliberately generous numbers — most aquatic plants grow perfectly well at a third of these levels, and the excess is the safety margin that makes testing unnecessary.
Scaling EI to Your Tank Size
The 20-gallon schedule above scales linearly. For a 10-gallon tank, halve everything; for a 40-gallon breeder, double it; for a 75-gallon, multiply by 3.75 (or just call it 4x and don't stress — EI's whole point is that precision doesn't matter).
Practical examples:
- 10 gallons: ⅛ tsp KNO₃ + a pinch (1/32 tsp) KH₂PO₄, 3x weekly; a pinch of traces 3x weekly.
- 55 gallons: ~⅔ tsp KNO₃ + ~⅛ tsp KH₂PO₄, 3x weekly; ~⅛ tsp traces 3x weekly.
For nano tanks under 10 gallons, dry teaspoon dosing gets fiddly — measuring milliliters of stock solution is easier than eyeballing sixteenths of a teaspoon. See our complete fertilizer schedule guide for how EI fits into a weekly routine alongside water changes and maintenance.
Mixing Your Own EI Stock Solutions
Dry salts are cheapest bought in bulk, but daily teaspoon measuring gets old. Stock solutions — concentrated liquids you mix once and dose by the pump or capful — are the convenience upgrade. Here's a reliable pair of recipes using standard 500 ml dosing bottles:
Macro solution (NPK)
- 500 ml distilled water
- 33 g potassium nitrate (KNO₃)
- 7 g potassium phosphate (KH₂PO₄)
- Optional: 25 g potassium sulfate (K₂SO₄) for extra potassium — useful if you reduce KNO₃ because of high fish-waste nitrates
Dose 2 ml (about half a pump) per 10 gallons, 3x weekly on macro days. Shake before use. Lasts roughly two months on a 20-gallon tank.
Micro solution (traces)
- 500 ml distilled water
- 15 g CSM+B or equivalent trace mix
- Optional: a few drops of hydrochloric acid or a pinch of ascorbic acid + potassium sorbate as preservative — trace solutions can grow mold over months
Dose 2 ml per 10 gallons, 3x weekly on micro days. Keep this bottle separate from the macro bottle — never mix macros and micros in the same container, because the iron and phosphate will precipitate into useless sludge at the bottom.
Use distilled or RO water for mixing, not tap water — tap water's minerals and chlorine can react with the concentrates. Stored cool and dark, stock solutions stay good for 3–6 months. If you'd rather skip mixing entirely, our roundup of the best liquid fertilizers includes pre-mixed EI-style bottles where someone else did the chemistry.
What EI Demands From You: Light, CO2, and Plant Mass
EI was designed for high-energy tanks: strong light, pressurized CO2, fast-growing stem plants. In that environment, plants devour nutrients, the excess gets consumed or flushed, and everything balances. But the method's logic shifts in calmer tanks:
- High-tech tanks (strong light + CO2): Run full EI exactly as written. Your plants will use most of it, and the weekly reset handles the rest. This is EI's home turf.
- Medium-tech tanks (moderate light, no CO2 or liquid carbon): Run EI at half to one-third strength. Without injected CO2, growth is slower, uptake is lower, and full EI dosing mostly accumulates. Halve the schedule above and you'll still be in comfortable excess. Our guide to growing aquarium plants without CO2 pairs well with a reduced EI routine.
- Low-tech, low-light tanks: Full EI is overkill. Consider PPS-Pro or a lean all-in-one dosing routine instead — both were designed around smaller water changes and gentler nutrient levels.
One more prerequisite people miss: EI assumes meaningful plant mass. A tank with three anubias and a java fern cannot absorb EI-level nutrients no matter what. In sparsely planted tanks, dose at quarter strength until the garden fills in, then ramp up. Algae doesn't care about your schedule — it happily eats the surplus your plants can't.
Reading Your Plants: When to Adjust EI
EI's promise is "no testing," but you should still look at your plants. They're better instruments than any kit. Adjust when you see:
- Pinholes in older leaves with yellowing edges: Classic potassium deficiency. Even on EI this can appear in very fast-growing tanks — add extra K₂SO₄ on macro days. Our potassium guide covers diagnosis in detail.
- New leaves pale or white while veins stay green: Iron deficiency. Increase the trace dose slightly, or add a dedicated iron supplement — see iron dosing for redder plants.
- Stunted, twisted new growth: Often calcium/magnesium (GH) related rather than a fertilizer issue — EI doesn't add GH minerals. If your water is very soft, you may need a GH booster alongside EI.
- Persistent green-spot algae on slow growers: Often a phosphate-limitation signal, ironically in a method that doses phosphate generously. Before increasing anything, check that your trace dosing isn't precipitating — the alternating-day schedule exists for this reason.
- Nitrates climbing past 40–60 ppm despite weekly changes: Your bioload is contributing more nitrogen than the schedule assumes. Cut the KNO₃ dose in half or drop it entirely and let the fish feed the plants — keep dosing KH₂PO₄ and traces normally.
The adjustment principle: change one thing, wait two weeks, observe. EI's excess gives you a wide safety margin, so small tweaks are safe — but changing three variables at once teaches you nothing.
EI vs. Other Dosing Methods
EI isn't the only philosophy. The main alternatives each solve a different problem:
- PPS-Pro (Perpetual Preservation System): Daily micro-doses calibrated to actual uptake, with monthly (not weekly) water changes. Better for low-tech tanks and people who hate big water changes. More measuring, less flushing.
- All-in-one liquid fertilizers: One bottle, one pump, done. Less flexible and more expensive per dose than dry salts, but unbeatable for simplicity — ideal for beginners with one or two tanks.
- Dry vs. liquid fertilizers: Our full comparison of the two formats, including cost math that usually surprises people (dry salts typically cost under $20 per year even for large tanks).
There's no universally "best" method — there's the method whose maintenance demands match your life. EI's demand is the weekly 50% water change; if you'll actually do it, EI is the most forgiving high-performance method in the hobby.
Common EI Mistakes
- Skipping the water change. The single most common failure. EI without the reset is just "dump fertilizer in weekly," and nutrient soup is what grows algae, not plants.
- Dosing full EI into a brand-new tank. Fresh aquasoil already leaches ammonia and nutrients; adding full EI on top is asking for an algae bloom. Start at quarter strength and ramp up over the first month — our guide to fertilizing a new aquasoil tank lays out the week-by-week ramp.
- Mixing macros and micros in one bottle. The iron-phosphate precipitate is real. Two bottles, alternating days, always.
- Chasing test-kit numbers anyway. If you're going to test nitrates daily and stress over 5 ppm swings, you've missed the point. Trust the excess, watch the plants, change the water.
- Running EI with inadequate CO2. In high-light tanks, EI-level nutrients with fluctuating or insufficient CO2 is the classic recipe for staghorn and BBA. Nutrients were never the limiting factor — carbon was. If you're adjusting CO2 levels, read our guide to acclimating plants to new CO2 levels first.
For the canonical source material, Tom Barr's original EI write-ups live on the Barr Report forums, and the method's underlying plant-nutrition science is well summarized in university extension material on aquatic plant nutrient requirements.
Frequently Asked Questions
Is EI dosing safe for fish and shrimp?
Yes, at standard doses. The nutrient levels EI produces (nitrate ~20 ppm, traces of copper from the CSM+B) are well within safe ranges for fish, and the vast majority of shrimp keepers run EI without issues. The copper in trace mixes is chelated and dosed in tiny amounts — far below toxic thresholds. The real livestock risk in EI tanks isn't the fertilizer, it's CO2 mismanagement, which is a separate issue.
Can I do EI with liquid fertilizers instead of dry salts?
Absolutely. Several brands sell pre-mixed EI macro and micro bottles — you just follow the pump counts on the label instead of measuring teaspoons. It's the same method with training wheels. The trade-off is cost: pre-mixed liquids run roughly 5–10x the price per dose of dry salts. For one small tank the convenience is worth it; for multiple or large tanks, dry salts win.
Do I really need the 50% water change, or is 25% enough?
The 50% figure is doing mathematical work: it caps accumulation at roughly 2x your weekly dose no matter how long you run the method. A 25% change caps it at 4x, which is still usually fine biologically but gives you less margin for skipped weeks and heavy bioloads. If 50% weekly is genuinely unsustainable for you, switch methods rather than running compromised EI — PPS-Pro was literally designed for this situation.
How long until I see results from EI?
New growth responds within 1–2 weeks — look at fresh leaves and growing tips, not existing foliage, which won't repair itself. Full transformation of a deficient tank takes 4–6 weeks as old damaged leaves are replaced. If nothing changes after a month of consistent EI plus adequate light and CO2, the limiting factor is something EI doesn't address: usually carbon, light, or a GH deficiency.
Should beginners start with EI?
It depends on the beginner. If you're setting up a CO2-injected tank and you're willing to do weekly 50% water changes, EI is actually one of the most beginner-proof methods because it removes all decision-making. If you're running a low-tech first tank, start simpler — an all-in-one liquid at label dose teaches you the routine without the chemistry. You can graduate to EI dry salts whenever you're ready.
Start Simple, Stay Consistent
EI dosing rewards one virtue above all others: consistency. The hobbyists who get spectacular results from the Estimative Index aren't measuring more precisely than you — they're just dosing on schedule, changing water on Sunday, and leaving the test kits in the drawer. Pick the scaling that fits your tank, mix your two bottles, set a phone reminder for dose days, and let the abundance do the work.
Tissue-culture plants are the exception — they’re grown in sterile gel and adapt with minimal melting, which is part of what you’re paying for. Plants bought submersed from another hobbyist’s tank also transition with little melt, since they’re already in the right form.
Which Plants Melt Most (and Least)
Heavy melters (expect significant leaf loss)
- Cryptocorynes — infamous for “crypt melt,” sometimes dropping every leaf after any disturbance. They almost always recover from the roots within weeks.
- Stem plants grown emersed — rotala, ludwigia, and hygrophila often shed lower emersed leaves while the growing tips transition.
- Amazon swords — emersed-grown swords typically lose their broad oval aerial leaves and replace them with longer submersed ribbon leaves.
Light melters
- Anubias, java fern, bucephalandra — slow-growing rhizome plants transition gradually; occasional old-leaf melt but rarely dramatic.
- Vallisneria — usually transitions well, though it dislikes the move itself and may sulk for a week.
- Floating plants — minimal melt since their leaves were already at the air-water interface.
The Acclimation Protocol
Step 1: Quarantine or dip first
Before acclimating to your tank’s conditions, make sure you’re not acclimating pests along with the plant. Run new arrivals through our quarantine and dip protocol — it adds days upfront but prevents months of regret.
Step 2: Float to temperature-match (30 minutes)
Float the bag or container in your tank for 20–30 minutes to equalize temperature. Plants are less temperature-sensitive than fish, but a 10°F shock on top of transplant stress is an avoidable insult.
Step 3: Trim before planting
Remove any leaves that are already damaged, yellowing, or heavily algae-covered — they won’t recover and they’ll rot in your tank, feeding algae. For stem plants, trim off the bottom inch and any emersed leaves that look unlikely to adapt; the plant wastes energy maintaining leaves it’s going to shed anyway. Keep the healthy growing tips — that’s where recovery starts.
Step 4: Plant correctly the first time
Follow our planting guide — right depth, crown exposed on rosettes, rhizomes unburied on epiphytes. Every uprooting and replanting restarts the acclimation clock, so get placement right on the first attempt. Decide where each plant goes before it goes in the water.
Step 5: Run a gentle first week
For the first 7 days after planting:
- Moderate light — run your normal photoperiod but consider dropping intensity 20–30% if your light is dimmable. Blast-level light on a melting plant grows algae on the dying leaves, not recovery.
- Stable CO2 — if you inject CO2, keep it consistent. Fluctuating CO2 during acclimation is a melt accelerator. If you’re low-tech, this doesn’t apply — see growing without CO2.
- Half-strength fertilizer — new plants with damaged leaves can’t use full dosing, and the excess feeds algae. Ramp to full strength over 2–3 weeks per our fertilizer schedule.
- No disturbance — don’t move, trim, or “check on” new plants for at least two weeks. Every touch resets root establishment. This is especially critical for crypts.
Step 6: Remove melt, keep the base
As emersed leaves melt, remove the mushy material promptly — decaying leaves release ammonia and grow fungus that can spread to healthy tissue. But never discard the plant while the crown, rhizome, or roots are firm and alive. A crypt that’s lost every leaf but has firm roots is a plant that’s about to recover, not a dead plant. Give it 3–4 weeks before judging.
Telling Normal Melt From Real Problems
Normal transition melt:
- Affects oldest/emersed leaves first, newest growth last
- New submersed leaves emerge even as old ones dissolve
- Roots and crown stay firm and white/green
- Timeline: 1–4 weeks, then obvious new growth
Concerning melt (see our full melting diagnosis guide):
- New growth also melts or emerges deformed
- Rhizome or crown turns mushy and brown — this is rot, not transition
- Entire plant dissolves within days with no new growth after 4+ weeks
- Melting spreads to established plants that weren’t recently moved
Buying Tips to Minimize Melt
- Buy submersed-grown when available — hobbyist-grown cuttings transition with almost no melt.
- Choose tissue culture for sensitive species — crypts and delicate stems establish far more reliably from sterile cups.
- Avoid plants already melting in the store tank — some melt is normal, but a plant that’s mostly mush at purchase has less energy for recovery.
- Transport carefully — keep plants damp and out of direct sun/heat. A plant that dries out or cooks in a hot car melts far worse than one transported properly.
The First-Month Timeline: What to Expect Week by Week
Knowing what’s normal when removes most acclimation anxiety. Here’s the typical timeline for a healthy plant adapting to a new tank:
Week 1: The quiet week
Almost nothing visible happens. The plant is growing roots you can’t see and assessing its new environment. Some species (vallisneria, stem plants) may start shedding their lowest leaves. This is normal. Resist the urge to “help” — no moving, no extra fertilizer, no light changes. The most common beginner mistake is intervening during a week when the correct action is nothing.
Week 2: Melt peaks
This is when emersed leaves give up in earnest. Crypts may drop everything; swords shed their broad aerial leaves; stem plants lose lower foliage. It looks catastrophic and it’s usually fine. Keep removing mushy material, keep conditions stable, and watch the crown and growing tips — if those are firm and green, recovery is already underway.
Week 3: The turn
New submersed-adapted leaves emerge — smaller, thinner, often a slightly different shade of green than the emersed foliage. Stem plant tips start growing visibly; crypts push tiny curled leaves from the crown; swords unfurl narrow ribbon leaves. This is the moment most beginners exhale for the first time.
Week 4+: Established
New growth outpaces melt, and the plant is functionally yours. You can resume full-strength fertilizer, normal trimming, and stop treating it as fragile. Some slow growers (anubias, bucephalandra) take 6–8 weeks to show obvious progress — that’s their normal speed, not a problem.
Acclimating Different Plant Formats
Tissue-culture cups
Sterile, pest-free, and already adapted to high-humidity (not emersed) growth — tissue cultures melt the least of any format. Rinse the agar gel off gently (leftover gel rots and feeds fungus), split the portion into small plantlets, and plant per our planting guide. They establish slowly for the first two weeks, then accelerate. No dip needed, minimal acclimation stress — this is the premium experience you’re paying for.
Potted plants
Remove the pot and strip away the rockwool completely — leftover rockwool traps debris and rots. Tease the root mass apart gently; if it’s a dense mat, splitting it into 2–3 smaller portions actually establishes faster than planting one big clump (more growing points, better water flow around roots). Potted plants are usually emersed-grown, so expect the standard 2–4 week melt cycle.
Bare-root / bunched stems
Typically sold as weighted bunches. Remove any bands, foam, or weights, strip the lower leaves, and plant stems individually or in small groups. Bunched stems from the store are often already transitioning — check for new submersed growth at the tips, which tells you the plant is mid-adaptation and will settle quickly.
Hobbyist cuttings
Already submersed-grown and the fastest to establish — often showing new growth within days. The main acclimation factor is water-parameter difference between the two tanks. Float to temperature-match, plant promptly, and they’ll usually take off with minimal melt. This is why experienced hobbyists prefer trading cuttings over buying potted plants.
Frequently Asked Questions
Should I use a “plant starter” or transplant fertilizer?
Products marketed for transplant shock are mostly B-vitamins and mild hormones. They don’t hurt, but there’s no strong evidence they help aquarium plants specifically. Stable conditions and patience outperform any bottle. Save the money for more plants.
My new plant melted completely — bare crown, no leaves. Is it dead?
Probably not, if the crown or rhizome is firm. Crypts and swords routinely lose 100% of their leaves and regrow from the base within a month. The test is firmness: firm and pale/green means alive; mushy and brown/black means rot. Give firm-but-leafless plants a full 4 weeks before declaring them dead.
Can I speed up acclimation with extra light or CO2?
No — and trying usually backfires. A melting plant can’t use extra light; the excess just grows algae on its dying leaves. Keep light moderate and CO2 stable (not boosted) during acclimation. Growth speed comes from the plant’s own adaptation timeline, which you can’t rush, only avoid delaying.
Should new plants go straight into my main display tank?
After quarantine/dipping, yes — there’s no benefit to a separate “growing-in” tank for most plants. They acclimate to your water fastest in the tank they’ll live in. The exception is very delicate species going into a tank with boisterous fish; give those a few weeks in a calm corner or breeder box first.
The Patience Rule
The single most important acclimation skill is restraint: plant it right, set gentle conditions, remove decay, and then leave it alone for a month. The hobbyists with the best plant growth aren’t doing something clever in week one — they’re simply not interfering in weeks two through four while the plants do what they’ve evolved to do. Melt looks like failure and feels like failure, but in most cases it’s the visible part of a plant successfully becoming yours.