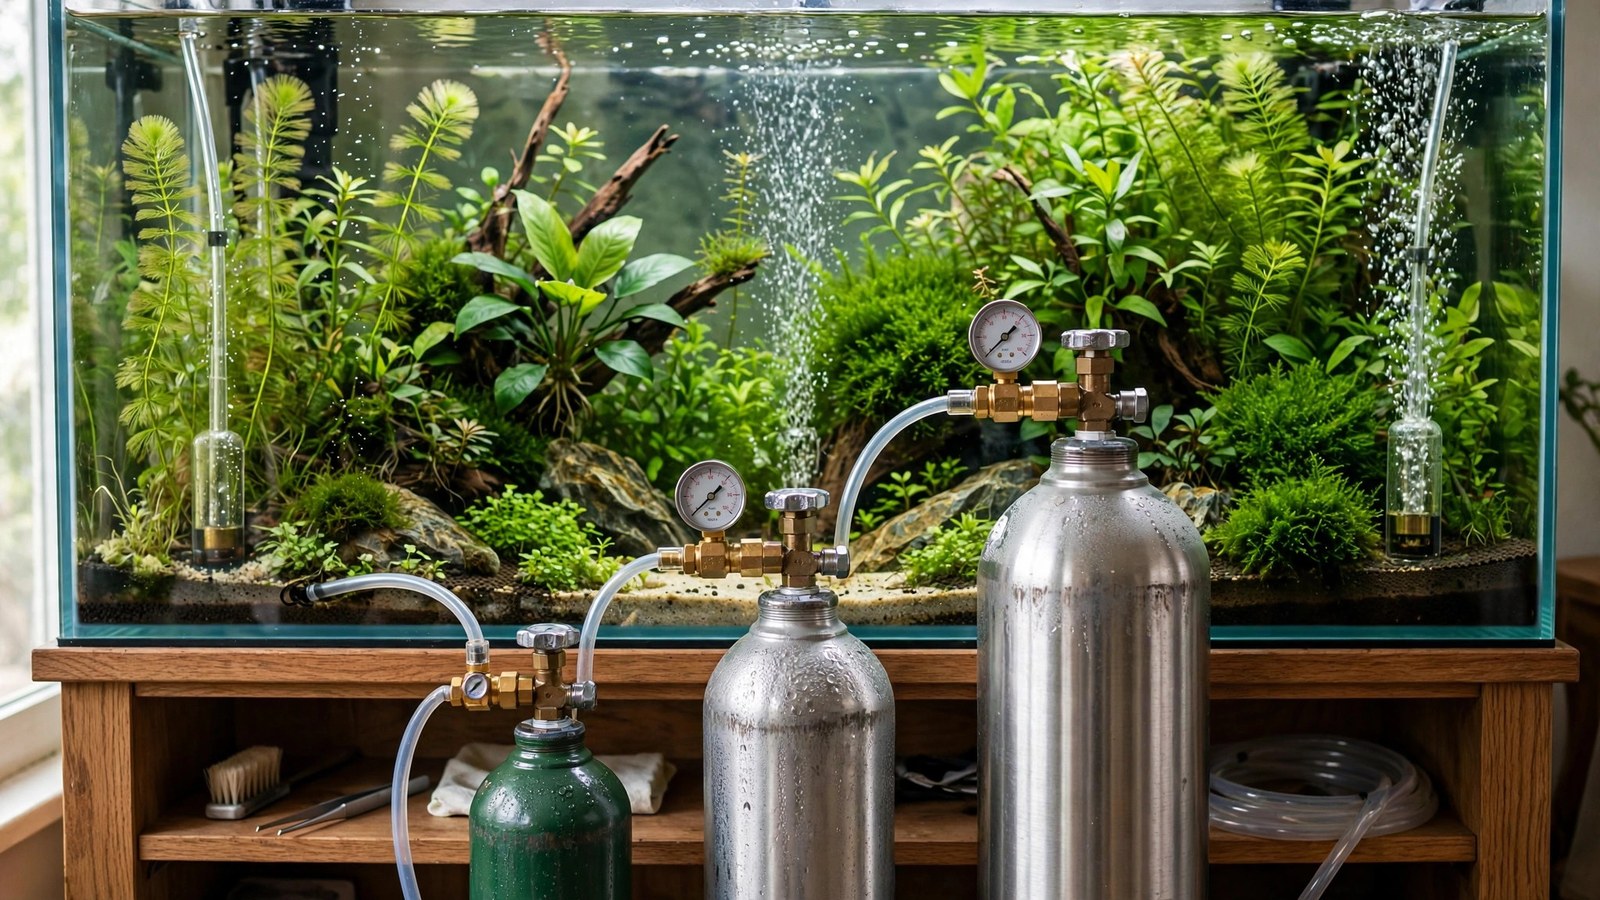
One of the first questions when going pressurized: what size CO2 cylinder should I buy, and how long will it last? The answer depends on tank size, bubble rate, how many hours a day you inject, and how efficiently your diffusion method dissolves the gas. This guide gives you realistic lifespan numbers for each common cylinder size so you can buy once and plan refills without surprises.
The Common Cylinder Sizes
CO2 cylinders for aquariums are sold by weight of CO2 they hold (not by physical volume, though the two correlate). The usual lineup:
| Cylinder size | CO2 capacity | Typical height | Fits under a standard stand? |
|---|---|---|---|
| Paintball 20 oz | ~0.57 kg (1.25 lb) | ~10 in | Yes — anywhere |
| 2.5 lb | ~1.1 kg | ~14 in | Yes |
| 5 lb | ~2.3 kg | ~18 in | Yes |
| 10 lb | ~4.5 kg | ~20 in | Usually |
| 20 lb | ~9 kg | ~27 in | Often not — measure |
Notes: the 20 oz paintball size is a different thread standard (it needs a paintball-to-CGA-320 adapter or a dedicated paintball regulator) — see paintball CO2 for nano tanks. Sizes above 20 lb exist but are impractical for home aquariums. In Europe and elsewhere, sizes are metric (2 kg, 5 kg); the math below works the same — just use your cylinder's rated fill weight.
How Long Each Size Lasts: Realistic Estimates
Gas consumption scales with bubble rate and daily run time. A "bubble" isn't a standardized unit, but at typical working pressures, 1 bubble per second ≈ 1–1.5 grams of CO2 per hour through a standard bubble counter. These estimates assume ~9 hours of injection per day (including pre-injection) and reasonably efficient diffusion:
| Cylinder | Nano tank (~1 bps) | Medium tank (~2 bps) | Large tank (~4 bps) |
|---|---|---|---|
| 20 oz paintball | 5–7 weeks | 2–3 weeks | — (too small) |
| 2.5 lb | 2–3 months | 5–7 weeks | 2–3 weeks |
| 5 lb | 4–6 months | 2–3 months | 5–7 weeks |
| 10 lb | 9–12 months | 4–6 months | 2–3 months |
| 20 lb | 18+ months | 9–12 months | 4–6 months |
These are ranges, not promises. Poor diffusion (coarse mist escaping at the surface), leaks (see finding CO2 leaks — the #1 cause of mysteriously short cylinder life), higher bubble rates, and longer photoperiods all shorten life. If your cylinder consistently lasts half the estimate, suspect a leak before suspecting the math. As a sanity check on your bubble rate, Tropica's fertiliser and CO2 guide lists target CO2 concentrations by plant difficulty (roughly 10–15 mg/L for medium plants, 15–30 mg/L for advanced) — useful for confirming your injection level is in a sensible range for your plants.
The Math (So You Can Compute Your Own)
For a quick personal estimate:
- Grams per day = bubbles/sec × 1.25 g/hr × hours injected per day. (Use 1.0 for small bubble counters, 1.5 for large ones — it's approximate.)
- Days per cylinder = cylinder grams ÷ grams per day.
Example: 2 bubbles/sec × 1.25 g/hr × 9 hrs = ~22.5 g/day. A 5 lb cylinder (2,268 g) ÷ 22.5 = ~100 days, or just over 3 months. That lands right in the table's range for a medium tank.
Choosing Your Size
The case for 5 lb (the default recommendation)
For most aquarists with one tank in the 20–60 gallon range, 5 lb is the sweet spot: lasts 2–3 months per fill (infrequent enough to not be annoying), fits under virtually any stand, is cheap to refill or swap, and isn't a wrestling match to carry. If you're unsure, start here.
When to go smaller (2.5 lb or paintball)
- Nano tanks under 10 gallons — a 5 lb cylinder looks absurd next to a desktop nano and the gas would last half a year; 2.5 lb or paintball keeps proportions sane.
- Space constraints — apartments, desktop setups, stands with no clearance.
- First-timers testing pressurized CO2 — lower upfront cost while you learn; upgrade later.
When to go bigger (10–20 lb)
- Large tanks (75+ gal) — a 5 lb cylinder on a 4-bps tank needs refilling every 5–7 weeks; a 20 lb stretches that to 4–6 months.
- Multiple tanks on one regulator — manifold-fed systems multiply consumption; size up accordingly.
- Refill inconvenience — if your nearest refill is a 45-minute drive, bigger cylinders mean fewer trips. Refill cost per pound also drops with size.
- High-light, high-demand setups — dense Dutch-style tanks at high bubble rates drink gas.
Refill vs Swap: How Cylinder Logistics Work
You have two ways to get gas, and the choice affects which cylinder to buy:
- Refill (keep your cylinder): a shop pumps CO2 into your tank while you wait or by appointment. You keep your nice aluminum cylinder. Common at welding supply shops, fire extinguisher services, and homebrew stores. Best if you bought a quality cylinder.
- Swap (exchange): hand over your empty, take a full one off the rack. Fast and common at beverage/gas distributors, but you may receive a battered steel cylinder in exchange for your pretty aluminum one. Ask whether swap is "like for like."
Before buying any cylinder, call your local refill sources first and ask: what sizes do you fill, do you refill or swap, and what does it cost? There's no point owning a 10 lb cylinder if nobody within driving distance fills that size. Also ask about hydrotest dates — cylinders need periodic pressure testing (usually every 5 years, stamped on the shoulder), and shops won't fill an out-of-date cylinder.
Where to Get CO2 Refills
Good sources, roughly in order of convenience for most hobbyists:
- Welding/gas supply shops — the most reliable option; they fill any size and understand cylinders.
- Fire extinguisher service companies — CO2 is their business; often cheap and fast.
- Homebrew shops — cater to keg users; usually do 5 lb and 20 lb.
- Paintball fields/shops — for 20 oz paintball tanks specifically.
- Beverage distributors — often swap-only, larger sizes.
Expect to pay roughly $15–30 for a 5 lb fill and $25–45 for 20 lb (prices vary widely by region). One caution: make sure you're getting food/beverage-grade or industrial CO2 — both are fine for aquariums; avoid anything with added odorants.
Safety and Storage Basics
- Always store upright and secured — strap or chain the cylinder so it can't tip. A falling cylinder can shear its valve, turning it into a dangerous projectile.
- Keep away from heat — not next to radiators or in hot cars; pressure rises with temperature.
- Ventilate the stand — a slow leak in a sealed cabinet can accumulate CO2; a small vent gap is cheap insurance (and CO2 is an asphyxiant in enclosed spaces).
- Transport upright, secured, with the valve cap on; crack a window.
- Respect hydrotest dates — an out-of-test cylinder is a liability, not a bargain, when buying used.
Maximizing Cylinder Life
- Fix leaks first — a single loose fitting can halve cylinder life. Run the soapy water test at setup and after every cylinder change.
- Use efficient diffusion — an inline reactor's near-100% dissolution means lower bubble rates for the same dissolved CO2.
- Time it right — pre-injection plus pre-dark shutoff via a solenoid timer means you only inject when plants can use it.
- Don't over-bubble — tune to a green drop checker, not to a bubble count you read online. Excess beyond target is pure waste.
- Swap single-stage regulators' cylinders at ~500 PSI remaining to avoid end-dump — or better, use a dual-stage regulator and run them dry safely.
Frequently Asked Questions
How do I know when my cylinder is getting empty?
Watch the high-pressure gauge: CO2 stays at ~800 PSI while liquid remains, then drops steeply when only gas is left — that drop means you have days, not weeks. With a single-stage regulator, swap at ~500 PSI to avoid end-dump; with dual-stage, you can run until the gauge bottoms out. Keep a spare filled cylinder or know your refill shop's hours.
Can I use a bigger cylinder than my regulator is "rated" for?
Yes — regulators don't care about cylinder size, only the CGA-320 fitting and that inlet pressure is in the normal CO2 range (~800 PSI full, which is the same for all sizes). A 20 lb cylinder works with the same regulator as a 5 lb. Size up freely as long as it fits your space.
Is it cheaper to buy a bigger cylinder?
Almost always: refill cost per pound drops with size, and you make fewer trips. A 20 lb refill often costs only slightly more than a 5 lb fill. The tradeoff is upfront cylinder cost, space, and weight (a full 20 lb cylinder weighs ~50 lb — plan your carrying accordingly).
Can I refill a CO2 cylinder myself from another tank?
Transferring CO2 between cylinders (e.g., from a 20 lb "donor" to paintball tanks) is a known DIY practice but involves high pressure, freezing temperatures, and real risk if done wrong — plus overfilling beyond the rated weight is dangerous. Most hobbyists are better served by professional fills. If you go DIY, research thoroughly and use a scale.
How should I store a spare full cylinder?
Upright, secured against tipping, valve cap on, in a cool ventilated spot out of direct sun — a closet or garage corner works. Keep it away from the aquarium stand's heat and ensure the hydrotest date is current before you need it in an emergency swap.
Do cylinders expire?
The CO2 inside doesn't go bad, but the cylinder needs hydrostatic testing every 5 years (date stamped on the shoulder). An out-of-test cylinder can't legally be refilled until retested. When buying used, check the test date first — a cheap cylinder needing an immediate $30–50 hydrotest isn't cheap.
Buy for Your Actual Tank, Then Stop Worrying
Default to 5 lb for a single medium tank, go smaller for nanos, bigger for large or multi-tank setups — and confirm your local refill options before you buy. Once the cylinder is in place, strapped upright and leak-tested, it becomes the most boring part of your CO2 system: months of silent service between refills. That's exactly what you want.
Tissue-culture plants are the exception — they’re grown in sterile gel and adapt with minimal melting, which is part of what you’re paying for. Plants bought submersed from another hobbyist’s tank also transition with little melt, since they’re already in the right form.
Which Plants Melt Most (and Least)
Heavy melters (expect significant leaf loss)
- Cryptocorynes — infamous for “crypt melt,” sometimes dropping every leaf after any disturbance. They almost always recover from the roots within weeks.
- Stem plants grown emersed — rotala, ludwigia, and hygrophila often shed lower emersed leaves while the growing tips transition.
- Amazon swords — emersed-grown swords typically lose their broad oval aerial leaves and replace them with longer submersed ribbon leaves.
Light melters
- Anubias, java fern, bucephalandra — slow-growing rhizome plants transition gradually; occasional old-leaf melt but rarely dramatic.
- Vallisneria — usually transitions well, though it dislikes the move itself and may sulk for a week.
- Floating plants — minimal melt since their leaves were already at the air-water interface.
The Acclimation Protocol
Step 1: Quarantine or dip first
Before acclimating to your tank’s conditions, make sure you’re not acclimating pests along with the plant. Run new arrivals through our quarantine and dip protocol — it adds days upfront but prevents months of regret.
Step 2: Float to temperature-match (30 minutes)
Float the bag or container in your tank for 20–30 minutes to equalize temperature. Plants are less temperature-sensitive than fish, but a 10°F shock on top of transplant stress is an avoidable insult.
Step 3: Trim before planting
Remove any leaves that are already damaged, yellowing, or heavily algae-covered — they won’t recover and they’ll rot in your tank, feeding algae. For stem plants, trim off the bottom inch and any emersed leaves that look unlikely to adapt; the plant wastes energy maintaining leaves it’s going to shed anyway. Keep the healthy growing tips — that’s where recovery starts.
Step 4: Plant correctly the first time
Follow our planting guide — right depth, crown exposed on rosettes, rhizomes unburied on epiphytes. Every uprooting and replanting restarts the acclimation clock, so get placement right on the first attempt. Decide where each plant goes before it goes in the water.
Step 5: Run a gentle first week
For the first 7 days after planting:
- Moderate light — run your normal photoperiod but consider dropping intensity 20–30% if your light is dimmable. Blast-level light on a melting plant grows algae on the dying leaves, not recovery.
- Stable CO2 — if you inject CO2, keep it consistent. Fluctuating CO2 during acclimation is a melt accelerator. If you’re low-tech, this doesn’t apply — see growing without CO2.
- Half-strength fertilizer — new plants with damaged leaves can’t use full dosing, and the excess feeds algae. Ramp to full strength over 2–3 weeks per our fertilizer schedule.
- No disturbance — don’t move, trim, or “check on” new plants for at least two weeks. Every touch resets root establishment. This is especially critical for crypts.
Step 6: Remove melt, keep the base
As emersed leaves melt, remove the mushy material promptly — decaying leaves release ammonia and grow fungus that can spread to healthy tissue. But never discard the plant while the crown, rhizome, or roots are firm and alive. A crypt that’s lost every leaf but has firm roots is a plant that’s about to recover, not a dead plant. Give it 3–4 weeks before judging.
Telling Normal Melt From Real Problems
Normal transition melt:
- Affects oldest/emersed leaves first, newest growth last
- New submersed leaves emerge even as old ones dissolve
- Roots and crown stay firm and white/green
- Timeline: 1–4 weeks, then obvious new growth
Concerning melt (see our full melting diagnosis guide):
- New growth also melts or emerges deformed
- Rhizome or crown turns mushy and brown — this is rot, not transition
- Entire plant dissolves within days with no new growth after 4+ weeks
- Melting spreads to established plants that weren’t recently moved
Buying Tips to Minimize Melt
- Buy submersed-grown when available — hobbyist-grown cuttings transition with almost no melt.
- Choose tissue culture for sensitive species — crypts and delicate stems establish far more reliably from sterile cups.
- Avoid plants already melting in the store tank — some melt is normal, but a plant that’s mostly mush at purchase has less energy for recovery.
- Transport carefully — keep plants damp and out of direct sun/heat. A plant that dries out or cooks in a hot car melts far worse than one transported properly.
The First-Month Timeline: What to Expect Week by Week
Knowing what’s normal when removes most acclimation anxiety. Here’s the typical timeline for a healthy plant adapting to a new tank:
Week 1: The quiet week
Almost nothing visible happens. The plant is growing roots you can’t see and assessing its new environment. Some species (vallisneria, stem plants) may start shedding their lowest leaves. This is normal. Resist the urge to “help” — no moving, no extra fertilizer, no light changes. The most common beginner mistake is intervening during a week when the correct action is nothing.
Week 2: Melt peaks
This is when emersed leaves give up in earnest. Crypts may drop everything; swords shed their broad aerial leaves; stem plants lose lower foliage. It looks catastrophic and it’s usually fine. Keep removing mushy material, keep conditions stable, and watch the crown and growing tips — if those are firm and green, recovery is already underway.
Week 3: The turn
New submersed-adapted leaves emerge — smaller, thinner, often a slightly different shade of green than the emersed foliage. Stem plant tips start growing visibly; crypts push tiny curled leaves from the crown; swords unfurl narrow ribbon leaves. This is the moment most beginners exhale for the first time.
Week 4+: Established
New growth outpaces melt, and the plant is functionally yours. You can resume full-strength fertilizer, normal trimming, and stop treating it as fragile. Some slow growers (anubias, bucephalandra) take 6–8 weeks to show obvious progress — that’s their normal speed, not a problem.
Acclimating Different Plant Formats
Tissue-culture cups
Sterile, pest-free, and already adapted to high-humidity (not emersed) growth — tissue cultures melt the least of any format. Rinse the agar gel off gently (leftover gel rots and feeds fungus), split the portion into small plantlets, and plant per our planting guide. They establish slowly for the first two weeks, then accelerate. No dip needed, minimal acclimation stress — this is the premium experience you’re paying for.
Potted plants
Remove the pot and strip away the rockwool completely — leftover rockwool traps debris and rots. Tease the root mass apart gently; if it’s a dense mat, splitting it into 2–3 smaller portions actually establishes faster than planting one big clump (more growing points, better water flow around roots). Potted plants are usually emersed-grown, so expect the standard 2–4 week melt cycle.
Bare-root / bunched stems
Typically sold as weighted bunches. Remove any bands, foam, or weights, strip the lower leaves, and plant stems individually or in small groups. Bunched stems from the store are often already transitioning — check for new submersed growth at the tips, which tells you the plant is mid-adaptation and will settle quickly.
Hobbyist cuttings
Already submersed-grown and the fastest to establish — often showing new growth within days. The main acclimation factor is water-parameter difference between the two tanks. Float to temperature-match, plant promptly, and they’ll usually take off with minimal melt. This is why experienced hobbyists prefer trading cuttings over buying potted plants.
Frequently Asked Questions
Should I use a “plant starter” or transplant fertilizer?
Products marketed for transplant shock are mostly B-vitamins and mild hormones. They don’t hurt, but there’s no strong evidence they help aquarium plants specifically. Stable conditions and patience outperform any bottle. Save the money for more plants.
My new plant melted completely — bare crown, no leaves. Is it dead?
Probably not, if the crown or rhizome is firm. Crypts and swords routinely lose 100% of their leaves and regrow from the base within a month. The test is firmness: firm and pale/green means alive; mushy and brown/black means rot. Give firm-but-leafless plants a full 4 weeks before declaring them dead.
Can I speed up acclimation with extra light or CO2?
No — and trying usually backfires. A melting plant can’t use extra light; the excess just grows algae on its dying leaves. Keep light moderate and CO2 stable (not boosted) during acclimation. Growth speed comes from the plant’s own adaptation timeline, which you can’t rush, only avoid delaying.
Should new plants go straight into my main display tank?
After quarantine/dipping, yes — there’s no benefit to a separate “growing-in” tank for most plants. They acclimate to your water fastest in the tank they’ll live in. The exception is very delicate species going into a tank with boisterous fish; give those a few weeks in a calm corner or breeder box first.
The Patience Rule
The single most important acclimation skill is restraint: plant it right, set gentle conditions, remove decay, and then leave it alone for a month. The hobbyists with the best plant growth aren’t doing something clever in week one — they’re simply not interfering in weeks two through four while the plants do what they’ve evolved to do. Melt looks like failure and feels like failure, but in most cases it’s the visible part of a plant successfully becoming yours.