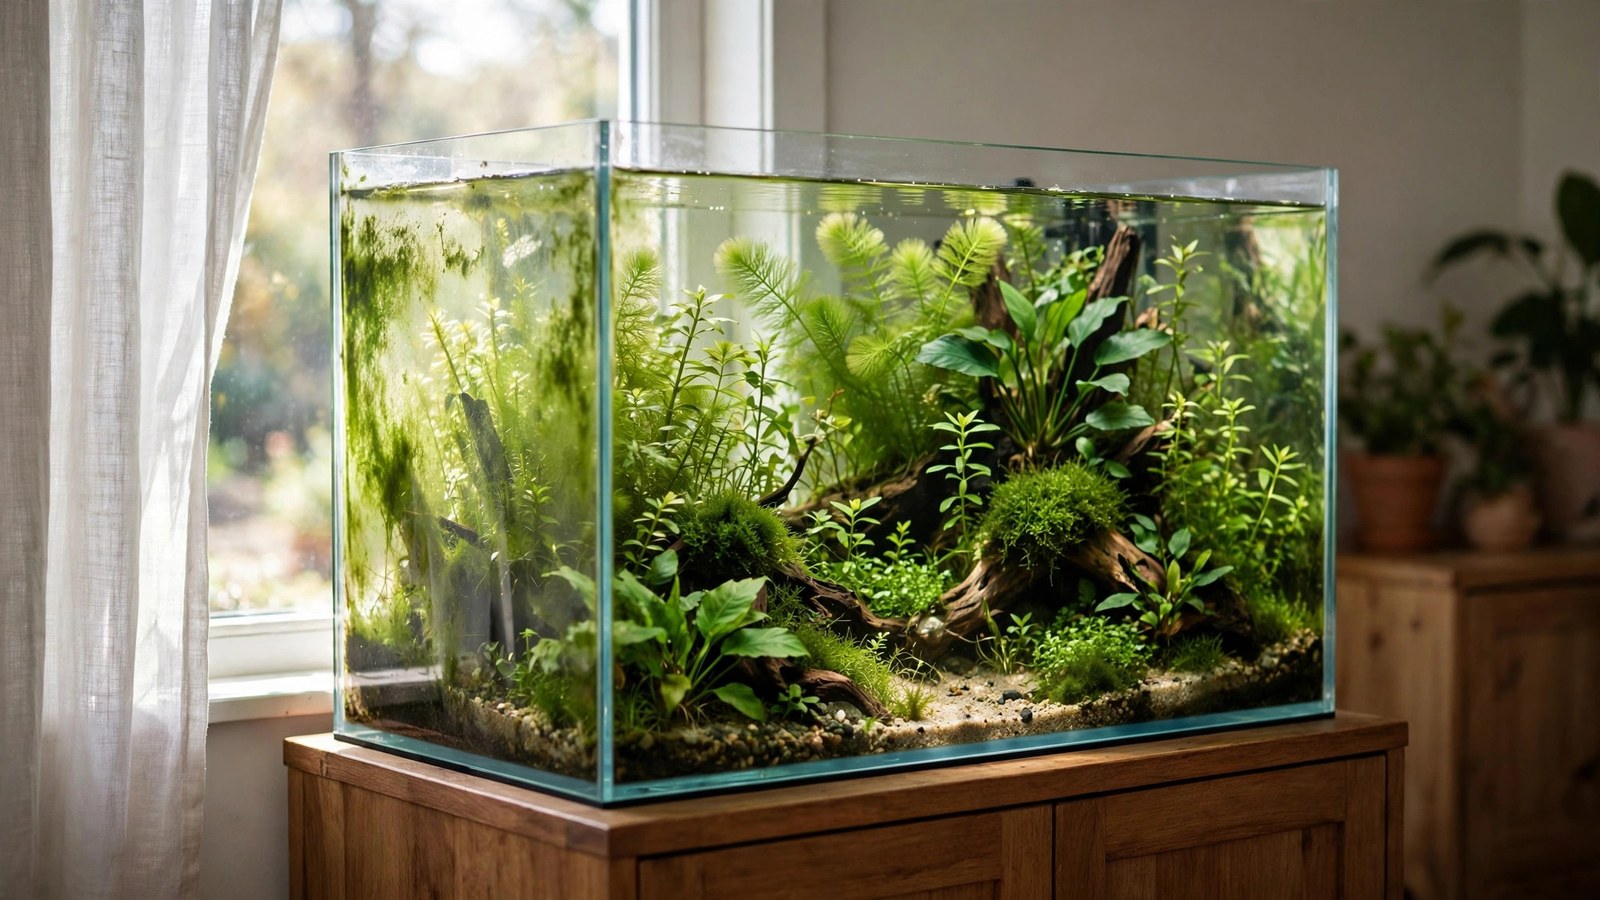
Your aquarium light runs a disciplined 8 hours — but the tank sits in a bright living room for 14. Does that ambient room light count? Is the sunshine from the window a friend feeding your plants, or just fuel for the algae on your glass? Ambient light is the unmeasured, unscheduled illumination every tank receives, and understanding it separates the aquarists who fight mystery algae from those who don't.
What Counts as Ambient Light
- Daylight from windows — the big one. Direct sun through glass is intense (thousands of lux); indirect daylight is moderate but lasts all day.
- Room lighting — ceiling lights, lamps, TV glow. Generally dim at the tank (tens of lux), but present for many evening hours.
- Reflected light — light bouncing off walls and ceilings into the tank. Diffuse, weak, but real.
The key question for each: does it reach photosynthetic significance at the substrate? Rough thresholds: under ~50 lux at the tank, ambient light is biologically negligible for plants and algae alike. A few hundred lux of indirect daylight for hours does count — it's a real (if weak) photoperiod extension.
Friend: When Ambient Light Helps
Gentle indirect daylight
A tank near (not in) a bright window receiving indirect daylight gets a free supplement to its photoperiod — often 2–4 hours of weak-to-moderate light morning and evening around the main schedule. For low-tech tanks, this is genuinely beneficial: extra photons the plants can use, at zero cost and zero equipment. Many of the lushest low-tech tanks in the hobby sit near windows for exactly this reason.
Viewing and circadian cues
Soft ambient light during the day gives fish a natural-feeling environment and lets you enjoy the tank outside the main photoperiod without extending it artificially. A tank that's gently visible in daylight and dark at night matches fish circadian needs better than one in a windowless room lit only 8 hours.
Algae-free rooms
In rooms with only modest ambient light (no direct sun, normal ceiling lighting), ambient contribution is negligible — you can effectively ignore it. Most tanks in most rooms fall here. Don't invent a problem you don't have.
Foe: When Ambient Light Feeds Algae
Direct sunlight on the tank
This is the classic disaster: a tank catching 2–3 hours of direct sun daily. Direct sun delivers enormous intensity — far beyond what the tank's CO2 and nutrient balance is tuned for — and it's uncontrolled: you can't dim the sun, and its hours shift seasonally. The result is predictable: green water, hair algae explosions, and temperature swings (sun-heated water stresses everything).
Fixes, in order of preference: reposition the tank out of the sun path; apply a background or window film to block the direct beam while keeping indirect light; add floating plants as a living sunshade (they love the extra light and shade everything below); or run blinds/curtains during the sun hours. What doesn't work: "balancing" direct sun with more fertilizer — you can't out-fertilize the sun.
Bright indirect light + long photoperiod
The subtler trap: a tank in a very bright room (sunroom, wall of windows) getting 6+ hours of strong indirect daylight a full 8-hour artificial photoperiod. The total effective day is 12–14 hours — deep in too-much-light territory — even though the timer says 8. If your bright-room tank grows algae despite a "correct" schedule, shorten the artificial photoperiod to compensate: 6 hours of fixture light + strong ambient can equal 8–9 hours of fixture light alone. See photoperiod duration for the dose logic.
Evening room light extending the day
Less dramatic but real: a tank in the main living space with bright overhead lights on until midnight gets a dim-but-long evening extension. At typical room-light levels this rarely drives algae alone, but combined with other imbalances it contributes. If your main fixture runs on a consistent timer schedule, treat bright room-light hours as a soft extension when judging total dose — the same honest accounting you'd apply to long sunrise/sunset ramps. The 2Hr Aquarist low-tech guide suggests 30–50 PAR as a starting point for low-tech setups — a useful benchmark when deciding whether your room's free light lets you shorten the fixture's day.
Measuring Your Ambient Light
You don't need a PAR meter for this — a phone lux-meter app is adequate for ambient assessment (you're measuring rough magnitude, not precision):
- Lights off, daytime: hold the phone at the substrate facing up. Note the lux from ambient alone, morning/midday/evening.
- Interpret: under ~100 lux — negligible, ignore it. 100–500 lux — meaningful supplement; factor it into photoperiod thinking. 1000+ lux (near windows, direct sun patches) — significant; manage it actively.
- Check seasonally: sun angles change through the year. A tank that's fine in winter can catch direct sun in summer. Reassess when you notice the light in the room changing.
Placement Strategy: Choosing the Tank's Spot
If you're placing a new tank, ambient light should be part of the decision:
- Ideal: a bright room with indirect daylight, no direct sun on the glass. Free supplemental light, no algae bomb, pleasant viewing.
- Acceptable: an interior room with normal lighting — fully controlled photoperiod, zero ambient complications. The "lab conditions" choice.
- Avoid: direct sun path (especially afternoon sun, the hottest and most algae-productive), and spots where you can't control the light (e.g., a conservatory).
- The north-window trick: in the northern hemisphere, a north-facing window gives bright indirect light all day with almost no direct sun — arguably the best free ambient light available. (Southern hemisphere: south-facing.)
Working With What You Have: Mitigation Tactics
- Backgrounds: a dark background on the sun-side glass blocks the direct beam's worst effects while keeping the tank viewable.
- Floating plants: frogbit, salvinia, or red root floaters under strong ambient light form a self-regulating shade — they consume the excess photons and nutrients, starving algae below. Thin them weekly so they don't shade everything.
- Shorten the artificial photoperiod to compensate for strong ambient — treat total light as the budget, however it's composed.
- Window film: frosted or UV-filtering film on the relevant window cuts intensity dramatically while keeping the room bright. Cheap, renter-friendly, reversible.
- Algae crew: in sun-assisted tanks, a solid cleanup crew (otocinclus, amano shrimp, nerite snails) handles the baseline algae pressure that extra light creates. They're the maintenance margin.
Frequently Asked Questions
Does ambient room light count toward my photoperiod?
Dim room lighting (under ~100 lux at the tank) is negligible — don't count it. Bright indirect daylight (several hundred lux for hours) does contribute meaningfully; mentally add a fraction of those hours to your photoperiod, or shorten the artificial schedule to compensate. Direct sun counts fully and excessively — manage it as a problem, not a supplement.
Can I grow plants with only window light and no aquarium light?
In a bright spot with several hours of strong indirect (or gentle direct morning) sun, yes — low-tech plants (anubias, java fern, crypts, mosses) can thrive on window light alone. It's uncontrolled and seasonal, so results vary through the year, but as a low-cost approach it genuinely works. Most window-only tanks do best with floating plants to modulate the intensity.
Why does my tank get algae only in summer?
Seasonal sun-angle change is the prime suspect: the sun's path shifts, and a tank that missed direct sun all winter starts catching it daily. Check the tank at different times of day across seasons. The fix is shading the sun-side (background, film, blinds during those hours) rather than changing your whole fertilization regime for a lighting problem.
Should I cover my tank at night in a bright living room?
Usually unnecessary — typical evening room light is too dim to matter biologically. The exception is a tank directly under a bright reading lamp or next to a TV throwing significant light until late. If the tank is clearly illuminated by room lights all evening, either dim that light or accept a slightly longer effective day in your tuning. A tank cover for darkness alone is overkill for most setups.
Is sunlight good for red plants?
Sunlight's full spectrum and high intensity can intensify red coloration — many growers report their reddest plants in sun-assisted setups. But the same intensity demands matching CO2 and nutrients, or you get red plants plus red-tinted algae. Sunlight is powerful medicine: effective in the right dose, harmful in excess, like everything else in this hobby.
My tank is in a windowless room — any downside?
No — it's the most controllable setup possible. Your fixture is 100% of the light, so photoperiod and intensity tuning are exact. The only "cost" is aesthetic (no natural daylight ambiance) and the lack of free supplemental photons. Many high-tech show tanks live in windowless rooms precisely for the control.
Know Your Room's Light
Ambient light isn't good or bad — it's an unmeasured input, and unmeasured inputs cause mystery problems. Spend five minutes with a phone lux meter, learn what your room actually delivers, and fold it into your lighting plan: shorten the artificial day in bright rooms, welcome the free photons near north windows, and block the direct sunbeam before it blocks your enjoyment. The best light schedule accounts for all the light, not just the fixture's.
Tissue-culture plants are the exception — they’re grown in sterile gel and adapt with minimal melting, which is part of what you’re paying for. Plants bought submersed from another hobbyist’s tank also transition with little melt, since they’re already in the right form.
Which Plants Melt Most (and Least)
Heavy melters (expect significant leaf loss)
- Cryptocorynes — infamous for “crypt melt,” sometimes dropping every leaf after any disturbance. They almost always recover from the roots within weeks.
- Stem plants grown emersed — rotala, ludwigia, and hygrophila often shed lower emersed leaves while the growing tips transition.
- Amazon swords — emersed-grown swords typically lose their broad oval aerial leaves and replace them with longer submersed ribbon leaves.
Light melters
- Anubias, java fern, bucephalandra — slow-growing rhizome plants transition gradually; occasional old-leaf melt but rarely dramatic.
- Vallisneria — usually transitions well, though it dislikes the move itself and may sulk for a week.
- Floating plants — minimal melt since their leaves were already at the air-water interface.
The Acclimation Protocol
Step 1: Quarantine or dip first
Before acclimating to your tank’s conditions, make sure you’re not acclimating pests along with the plant. Run new arrivals through our quarantine and dip protocol — it adds days upfront but prevents months of regret.
Step 2: Float to temperature-match (30 minutes)
Float the bag or container in your tank for 20–30 minutes to equalize temperature. Plants are less temperature-sensitive than fish, but a 10°F shock on top of transplant stress is an avoidable insult.
Step 3: Trim before planting
Remove any leaves that are already damaged, yellowing, or heavily algae-covered — they won’t recover and they’ll rot in your tank, feeding algae. For stem plants, trim off the bottom inch and any emersed leaves that look unlikely to adapt; the plant wastes energy maintaining leaves it’s going to shed anyway. Keep the healthy growing tips — that’s where recovery starts.
Step 4: Plant correctly the first time
Follow our planting guide — right depth, crown exposed on rosettes, rhizomes unburied on epiphytes. Every uprooting and replanting restarts the acclimation clock, so get placement right on the first attempt. Decide where each plant goes before it goes in the water.
Step 5: Run a gentle first week
For the first 7 days after planting:
- Moderate light — run your normal photoperiod but consider dropping intensity 20–30% if your light is dimmable. Blast-level light on a melting plant grows algae on the dying leaves, not recovery.
- Stable CO2 — if you inject CO2, keep it consistent. Fluctuating CO2 during acclimation is a melt accelerator. If you’re low-tech, this doesn’t apply — see growing without CO2.
- Half-strength fertilizer — new plants with damaged leaves can’t use full dosing, and the excess feeds algae. Ramp to full strength over 2–3 weeks per our fertilizer schedule.
- No disturbance — don’t move, trim, or “check on” new plants for at least two weeks. Every touch resets root establishment. This is especially critical for crypts.
Step 6: Remove melt, keep the base
As emersed leaves melt, remove the mushy material promptly — decaying leaves release ammonia and grow fungus that can spread to healthy tissue. But never discard the plant while the crown, rhizome, or roots are firm and alive. A crypt that’s lost every leaf but has firm roots is a plant that’s about to recover, not a dead plant. Give it 3–4 weeks before judging.
Telling Normal Melt From Real Problems
Normal transition melt:
- Affects oldest/emersed leaves first, newest growth last
- New submersed leaves emerge even as old ones dissolve
- Roots and crown stay firm and white/green
- Timeline: 1–4 weeks, then obvious new growth
Concerning melt (see our full melting diagnosis guide):
- New growth also melts or emerges deformed
- Rhizome or crown turns mushy and brown — this is rot, not transition
- Entire plant dissolves within days with no new growth after 4+ weeks
- Melting spreads to established plants that weren’t recently moved
Buying Tips to Minimize Melt
- Buy submersed-grown when available — hobbyist-grown cuttings transition with almost no melt.
- Choose tissue culture for sensitive species — crypts and delicate stems establish far more reliably from sterile cups.
- Avoid plants already melting in the store tank — some melt is normal, but a plant that’s mostly mush at purchase has less energy for recovery.
- Transport carefully — keep plants damp and out of direct sun/heat. A plant that dries out or cooks in a hot car melts far worse than one transported properly.
The First-Month Timeline: What to Expect Week by Week
Knowing what’s normal when removes most acclimation anxiety. Here’s the typical timeline for a healthy plant adapting to a new tank:
Week 1: The quiet week
Almost nothing visible happens. The plant is growing roots you can’t see and assessing its new environment. Some species (vallisneria, stem plants) may start shedding their lowest leaves. This is normal. Resist the urge to “help” — no moving, no extra fertilizer, no light changes. The most common beginner mistake is intervening during a week when the correct action is nothing.
Week 2: Melt peaks
This is when emersed leaves give up in earnest. Crypts may drop everything; swords shed their broad aerial leaves; stem plants lose lower foliage. It looks catastrophic and it’s usually fine. Keep removing mushy material, keep conditions stable, and watch the crown and growing tips — if those are firm and green, recovery is already underway.
Week 3: The turn
New submersed-adapted leaves emerge — smaller, thinner, often a slightly different shade of green than the emersed foliage. Stem plant tips start growing visibly; crypts push tiny curled leaves from the crown; swords unfurl narrow ribbon leaves. This is the moment most beginners exhale for the first time.
Week 4+: Established
New growth outpaces melt, and the plant is functionally yours. You can resume full-strength fertilizer, normal trimming, and stop treating it as fragile. Some slow growers (anubias, bucephalandra) take 6–8 weeks to show obvious progress — that’s their normal speed, not a problem.
Acclimating Different Plant Formats
Tissue-culture cups
Sterile, pest-free, and already adapted to high-humidity (not emersed) growth — tissue cultures melt the least of any format. Rinse the agar gel off gently (leftover gel rots and feeds fungus), split the portion into small plantlets, and plant per our planting guide. They establish slowly for the first two weeks, then accelerate. No dip needed, minimal acclimation stress — this is the premium experience you’re paying for.
Potted plants
Remove the pot and strip away the rockwool completely — leftover rockwool traps debris and rots. Tease the root mass apart gently; if it’s a dense mat, splitting it into 2–3 smaller portions actually establishes faster than planting one big clump (more growing points, better water flow around roots). Potted plants are usually emersed-grown, so expect the standard 2–4 week melt cycle.
Bare-root / bunched stems
Typically sold as weighted bunches. Remove any bands, foam, or weights, strip the lower leaves, and plant stems individually or in small groups. Bunched stems from the store are often already transitioning — check for new submersed growth at the tips, which tells you the plant is mid-adaptation and will settle quickly.
Hobbyist cuttings
Already submersed-grown and the fastest to establish — often showing new growth within days. The main acclimation factor is water-parameter difference between the two tanks. Float to temperature-match, plant promptly, and they’ll usually take off with minimal melt. This is why experienced hobbyists prefer trading cuttings over buying potted plants.
Frequently Asked Questions
Should I use a “plant starter” or transplant fertilizer?
Products marketed for transplant shock are mostly B-vitamins and mild hormones. They don’t hurt, but there’s no strong evidence they help aquarium plants specifically. Stable conditions and patience outperform any bottle. Save the money for more plants.
My new plant melted completely — bare crown, no leaves. Is it dead?
Probably not, if the crown or rhizome is firm. Crypts and swords routinely lose 100% of their leaves and regrow from the base within a month. The test is firmness: firm and pale/green means alive; mushy and brown/black means rot. Give firm-but-leafless plants a full 4 weeks before declaring them dead.
Can I speed up acclimation with extra light or CO2?
No — and trying usually backfires. A melting plant can’t use extra light; the excess just grows algae on its dying leaves. Keep light moderate and CO2 stable (not boosted) during acclimation. Growth speed comes from the plant’s own adaptation timeline, which you can’t rush, only avoid delaying.
Should new plants go straight into my main display tank?
After quarantine/dipping, yes — there’s no benefit to a separate “growing-in” tank for most plants. They acclimate to your water fastest in the tank they’ll live in. The exception is very delicate species going into a tank with boisterous fish; give those a few weeks in a calm corner or breeder box first.
The Patience Rule
The single most important acclimation skill is restraint: plant it right, set gentle conditions, remove decay, and then leave it alone for a month. The hobbyists with the best plant growth aren’t doing something clever in week one — they’re simply not interfering in weeks two through four while the plants do what they’ve evolved to do. Melt looks like failure and feels like failure, but in most cases it’s the visible part of a plant successfully becoming yours.