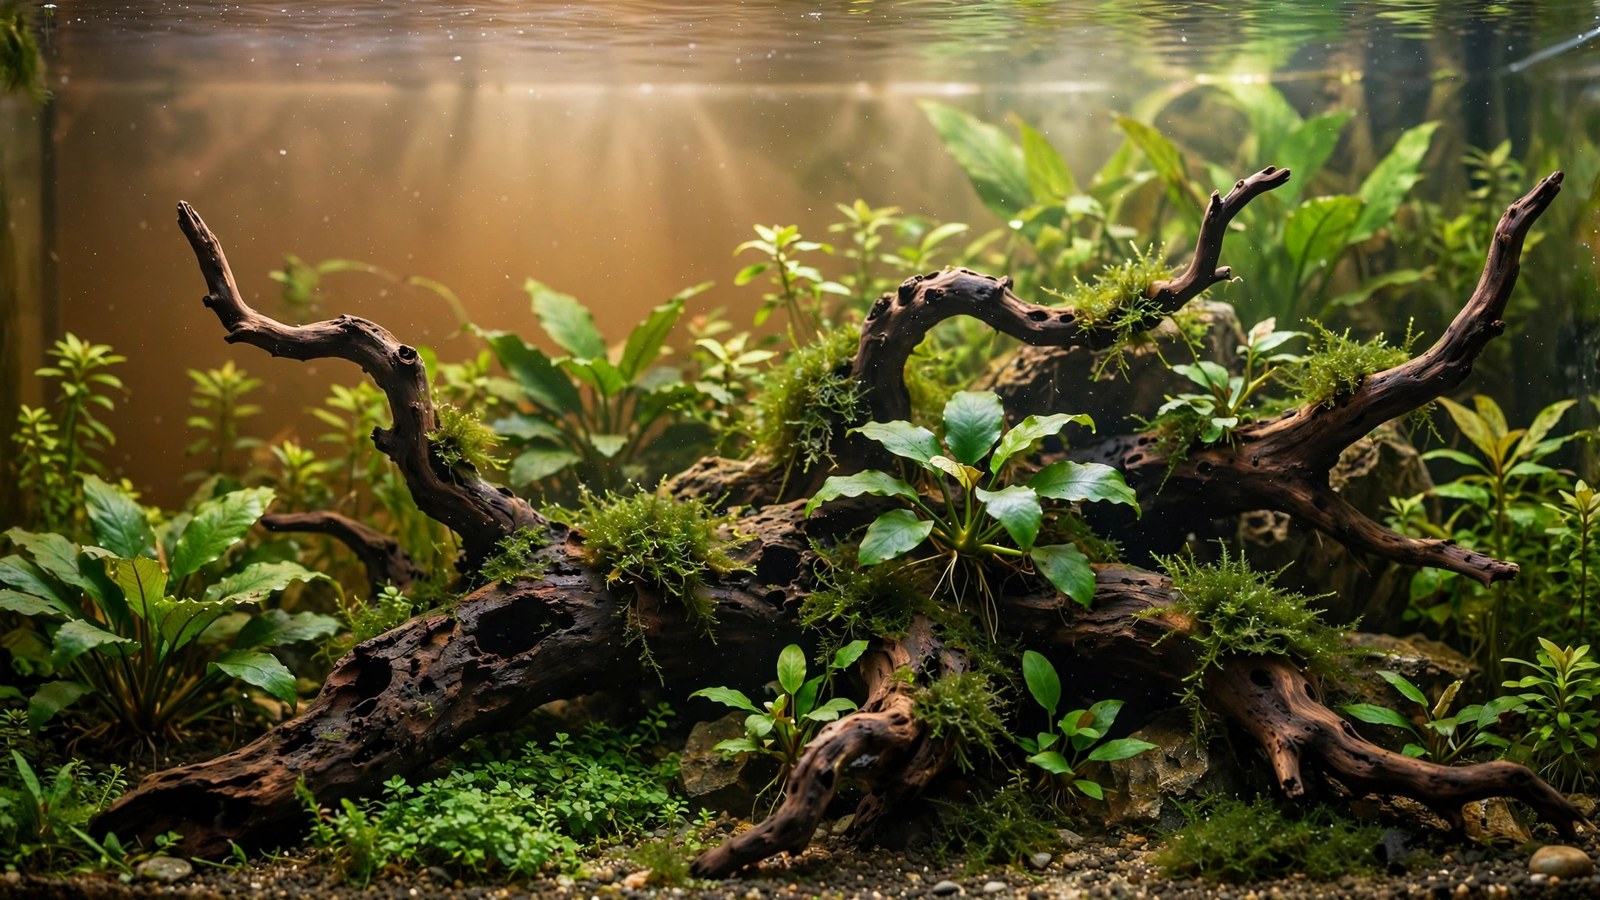
Mopani wood is the driftwood of strong opinions: jaw-droppingly beautiful two-tone grain, sinks like a stone on day one — and leaches enough tannins to turn your tank into dark roast coffee. It's the most dramatic wood in the hobby in every sense, and it rewards keepers who understand its nature. This guide covers Mopani wood's tannins, sinking, preparation, and how to build a stunning tank around it instead of fighting it.
What Mopani Is
Mopani (Colophospermum mopane) is a dense African hardwood with striking two-tone coloration — pale blonde sapwood swirled with dark chocolate-brown heartwood. No other aquarium wood looks like it; the marbled grain is genuinely beautiful and photographs spectacularly. It's extremely dense (hence the instant sinking), very hard, and very long-lived underwater — a Mopani centerpiece can serve for a decade.
The catch, and it's a big one: Mopani is the heaviest tannin leacher among common aquarium woods. A fresh piece can stain a tank dark brown within 48 hours. This isn't a defect — it's the wood's chemistry — but you must plan for it.
Sinking: Mopani's Superpower
Unlike spider wood's infamous floating phase, Mopani sinks immediately. It's one of the densest aquarium woods — you can place it in a filled tank and it stays exactly where you put it. This makes Mopani the easiest wood to aquascape with: no pre-soaking for buoyancy, no anchoring schemes, no month of waiting. Position it, step back, done. For large centerpiece wood in big tanks, this alone makes Mopani worth considering.
Tannins: The Full Story
Mopani's tannin output is legendary. Expect:
- Days 1–7: dramatic darkening — the water can go genuinely coffee-colored. This alarms every first-time Mopani owner. It's normal.
- Weeks 2–8: strong but manageable tinting with regular water changes.
- Months 3–12: gradual fade to a light amber that's actually attractive.
- Year 2+: minimal leaching from most pieces; dense thick pieces may tint faintly longer.
Our tannins guide covers the benefits (antibacterial, stress-reducing, natural blackwater chemistry) and removal methods in depth. The short version for Mopani: boil aggressively before it goes in the tank (see preparation below), run Purigen for the first months if you want clear water, and consider embracing a light amber tint — Mopani's coloration looks right in warm-tinted water.
Preparation: Non-Negotiable Steps
With light-leaching woods you can get away with a rinse. With Mopani, preparation is mandatory. Skipping it means months of dark water.
- Scrub the piece under hot water with a stiff brush — remove loose bark, dirt, and soft spots.
- Boil 2–4 hours total — in batches if the piece is large, changing the water whenever it goes dark brown. You'll be shocked how much color comes out. (If it doesn't fit in any pot, pour boiling water over it repeatedly in a tub.)
- Soak 1–2 weeks in a bucket with daily water changes. When the soak water stays light tea-colored for 48 hours, it's tank-ready.
- Inspect for soft spots — Mopani is sometimes sold with partially rotted sections. Soft, punky areas should be carved out or the piece rejected; they decay underwater and foul the tank.
Even with thorough prep, expect some tinting for months. Preparation converts the flood to a manageable stream — it doesn't eliminate Mopani's nature. Full techniques in our driftwood preparation guide.
Aquascaping With Mopani
Mopani's visual character — bold, marbled, high-contrast — demands a confident scape:
- Let it dominate. Mopani is not a background accent; it's a centerpiece. Build around one strong piece rather than scattering small bits.
- Warm-tinted water suits it. The blonde-and-chocolate grain glows in slightly amber water; in stark clear water it can look harsh. A faint tannin tint (managed, not coffee-dark) is Mopani's best lighting.
- Epiphyte magnet. The rough texture and crevices grip moss, anubias, and bucephalandra beautifully — often without glue. A Mopani root mass planted with epiphytes is a complete scape.
- Contrast with dark substrate. The pale sapwood pops against black sand or dark aquasoil; on light sand the whole composition can wash out.
- Fish pairing: Mopani + tannins + South American fish (tetras, dwarf cichlids, angelfish) is a natural biotope match — the wood comes from Africa, but the water chemistry suits Amazonian species perfectly.
Mopani vs Other Woods
| Wood | Sinking | Tannins | Look | Best for |
|---|---|---|---|---|
| Mopani | Immediate | Very heavy | Two-tone marbled | Bold centerpieces, blackwater |
| Spider wood | Floats for weeks | Moderate | Branchy, chaotic | Root tangles, epiphyte hotels |
| Manzanita | Fast | Light | Smooth, sculptural | Bonsai, elegant nature style |
| Malaysian | Immediate | Heavy | Dark, gnarled | Dark dramatic scapes |
See our spider wood vs manzanita comparison and best driftwood roundup for the wider field.
Common Mopani Problems
- "My water is black." Normal for unprepared Mopani in week one. Big water changes + Purigen + patience. Next time, boil first.
- White fungus/biofilm. Mopani gets the standard new-wood biofilm — harmless, grazed by snails/shrimp, gone in weeks.
- Soft/rotting sections. Reject or carve out punky areas before the tank. Good Mopani is rock-hard throughout.
- pH drop. Heavy tannins + soft water can push pH down notably. Test during the first month if your KH is near zero; water changes manage it.
- Stained silicone. Prolonged dark staining can tint silicone amber — cosmetic, and a reason to pre-treat aggressively if pristine seams matter to you.
Mopani in Blackwater and Biotope Setups
If there's a wood that wants to be in a blackwater tank, it's Mopani. Instead of fighting the tannins, design around them:
- Amazon/Orinoco biotope: Mopani + heavy tannin tint + leaf litter + tetras/dwarf cichlids. The wood's African origin is biotope-inaccurate, but visually and chemically it's a convincing Amazon — and no judge swabs the wood for provenance.
- West African biotope: Mopani is actually correct here — it's African wood. Pair with Congo tetras, African butterflyfish, or Pelvicachromis for the rare biotope that's both authentic and stunning.
- Leaf-litter layering: catappa leaves and alder cones on the substrate extend and deepen Mopani's tannin profile while adding foraging habitat for apistos and shrimp. Replace monthly.
- Lighting for blackwater: dim, warm lighting (or floating plants diffusing bright light) completes the effect — tannin water + dappled light is the single most atmospheric combination in the hobby.
Long-Term Mopani Care
Mopani is a decade wood — here's how to keep it at its best:
- Algae on the grain: the pale sapwood shows green spot algae clearly. A soft toothbrush during water changes keeps it clean; nerite snails do the daily maintenance.
- Color evolution: the dramatic two-tone contrast softens over 1–2 years underwater — the blonde mellows toward honey, the dark chocolate toward espresso. It remains beautiful, just less stark. (If you loved the stark contrast, that's the phase to photograph.)
- Checking for soft spots annually: press suspicious areas firmly once a year. Any punky sections get carved out with a knife — Mopani doesn't "heal," but removing decay stops it spreading.
- Never let it dry out and re-submerge repeatedly. Wet/dry cycling accelerates cracking in dense hardwoods. If you break down the tank, keep the wood damp in a bag until the next setup.
Frequently Asked Questions
How long until Mopani stops leaching tannins?
With proper boiling + soaking prep: strong tinting for 1–2 months, light amber for 3–6 months, minimal after a year. Without prep: dark water for 2–4 months, noticeable tinting up to a year. Dense thick pieces leach longer than thin ones. Purigen throughout collapses the visible timeline dramatically.
Is Mopani safe for shrimp and sensitive fish?
Yes — tannins are not toxic; they're beneficial blackwater chemistry. The only caution is the pH effect in very soft water during peak leaching: test pH weekly for the first month if KH reads near zero, and water-change if pH drops below your livestock's comfort zone.
Can I use Mopani in a bright aquascape that needs crystal-clear water?
You can, but it's fighting the wood's nature — you'd need aggressive pre-treatment plus continuous Purigen. For crystal-clear aesthetics, a light leacher like manzanita or spider wood is the saner choice. Buy the wood that matches the vision.
Why does my Mopani have white fuzzy stuff on it?
Standard new-wood biofilm — bacterial/fungal colonization feeding on surface organics. Harmless to fish, ugly for 3–6 weeks, enthusiastically eaten by nerite snails, otos, and shrimp. Scrub it off during water changes if it bothers you; it'll stop coming back once the surface organics are consumed.
Can I cut or shape Mopani?
Yes — it's very hard, so use a saw rather than hand tools, and sand cut edges smooth (fresh cuts leach extra tannins initially and can have sharp splinters). Many scapers trim Mopani to fit their composition; the wood works fine reshaped.
Respect the Wood
Mopani asks for preparation and patience, and pays back with the most visually striking driftwood in the hobby — instant-sinking, decade-durable, beautifully marbled. Boil it, soak it, manage the tannins for a few months (or embrace the blackwater), and you'll have a centerpiece that anchors the tank for years. The keepers who hate Mopani are the ones who skipped prep; the ones who love it did the work upfront.
Tissue-culture plants are the exception — they’re grown in sterile gel and adapt with minimal melting, which is part of what you’re paying for. Plants bought submersed from another hobbyist’s tank also transition with little melt, since they’re already in the right form.
Which Plants Melt Most (and Least)
Heavy melters (expect significant leaf loss)
- Cryptocorynes — infamous for “crypt melt,” sometimes dropping every leaf after any disturbance. They almost always recover from the roots within weeks.
- Stem plants grown emersed — rotala, ludwigia, and hygrophila often shed lower emersed leaves while the growing tips transition.
- Amazon swords — emersed-grown swords typically lose their broad oval aerial leaves and replace them with longer submersed ribbon leaves.
Light melters
- Anubias, java fern, bucephalandra — slow-growing rhizome plants transition gradually; occasional old-leaf melt but rarely dramatic.
- Vallisneria — usually transitions well, though it dislikes the move itself and may sulk for a week.
- Floating plants — minimal melt since their leaves were already at the air-water interface.
The Acclimation Protocol
Step 1: Quarantine or dip first
Before acclimating to your tank’s conditions, make sure you’re not acclimating pests along with the plant. Run new arrivals through our quarantine and dip protocol — it adds days upfront but prevents months of regret.
Step 2: Float to temperature-match (30 minutes)
Float the bag or container in your tank for 20–30 minutes to equalize temperature. Plants are less temperature-sensitive than fish, but a 10°F shock on top of transplant stress is an avoidable insult.
Step 3: Trim before planting
Remove any leaves that are already damaged, yellowing, or heavily algae-covered — they won’t recover and they’ll rot in your tank, feeding algae. For stem plants, trim off the bottom inch and any emersed leaves that look unlikely to adapt; the plant wastes energy maintaining leaves it’s going to shed anyway. Keep the healthy growing tips — that’s where recovery starts.
Step 4: Plant correctly the first time
Follow our planting guide — right depth, crown exposed on rosettes, rhizomes unburied on epiphytes. Every uprooting and replanting restarts the acclimation clock, so get placement right on the first attempt. Decide where each plant goes before it goes in the water.
Step 5: Run a gentle first week
For the first 7 days after planting:
- Moderate light — run your normal photoperiod but consider dropping intensity 20–30% if your light is dimmable. Blast-level light on a melting plant grows algae on the dying leaves, not recovery.
- Stable CO2 — if you inject CO2, keep it consistent. Fluctuating CO2 during acclimation is a melt accelerator. If you’re low-tech, this doesn’t apply — see growing without CO2.
- Half-strength fertilizer — new plants with damaged leaves can’t use full dosing, and the excess feeds algae. Ramp to full strength over 2–3 weeks per our fertilizer schedule.
- No disturbance — don’t move, trim, or “check on” new plants for at least two weeks. Every touch resets root establishment. This is especially critical for crypts.
Step 6: Remove melt, keep the base
As emersed leaves melt, remove the mushy material promptly — decaying leaves release ammonia and grow fungus that can spread to healthy tissue. But never discard the plant while the crown, rhizome, or roots are firm and alive. A crypt that’s lost every leaf but has firm roots is a plant that’s about to recover, not a dead plant. Give it 3–4 weeks before judging.
Telling Normal Melt From Real Problems
Normal transition melt:
- Affects oldest/emersed leaves first, newest growth last
- New submersed leaves emerge even as old ones dissolve
- Roots and crown stay firm and white/green
- Timeline: 1–4 weeks, then obvious new growth
Concerning melt (see our full melting diagnosis guide):
- New growth also melts or emerges deformed
- Rhizome or crown turns mushy and brown — this is rot, not transition
- Entire plant dissolves within days with no new growth after 4+ weeks
- Melting spreads to established plants that weren’t recently moved
Buying Tips to Minimize Melt
- Buy submersed-grown when available — hobbyist-grown cuttings transition with almost no melt.
- Choose tissue culture for sensitive species — crypts and delicate stems establish far more reliably from sterile cups.
- Avoid plants already melting in the store tank — some melt is normal, but a plant that’s mostly mush at purchase has less energy for recovery.
- Transport carefully — keep plants damp and out of direct sun/heat. A plant that dries out or cooks in a hot car melts far worse than one transported properly.
The First-Month Timeline: What to Expect Week by Week
Knowing what’s normal when removes most acclimation anxiety. Here’s the typical timeline for a healthy plant adapting to a new tank:
Week 1: The quiet week
Almost nothing visible happens. The plant is growing roots you can’t see and assessing its new environment. Some species (vallisneria, stem plants) may start shedding their lowest leaves. This is normal. Resist the urge to “help” — no moving, no extra fertilizer, no light changes. The most common beginner mistake is intervening during a week when the correct action is nothing.
Week 2: Melt peaks
This is when emersed leaves give up in earnest. Crypts may drop everything; swords shed their broad aerial leaves; stem plants lose lower foliage. It looks catastrophic and it’s usually fine. Keep removing mushy material, keep conditions stable, and watch the crown and growing tips — if those are firm and green, recovery is already underway.
Week 3: The turn
New submersed-adapted leaves emerge — smaller, thinner, often a slightly different shade of green than the emersed foliage. Stem plant tips start growing visibly; crypts push tiny curled leaves from the crown; swords unfurl narrow ribbon leaves. This is the moment most beginners exhale for the first time.
Week 4+: Established
New growth outpaces melt, and the plant is functionally yours. You can resume full-strength fertilizer, normal trimming, and stop treating it as fragile. Some slow growers (anubias, bucephalandra) take 6–8 weeks to show obvious progress — that’s their normal speed, not a problem.
Acclimating Different Plant Formats
Tissue-culture cups
Sterile, pest-free, and already adapted to high-humidity (not emersed) growth — tissue cultures melt the least of any format. Rinse the agar gel off gently (leftover gel rots and feeds fungus), split the portion into small plantlets, and plant per our planting guide. They establish slowly for the first two weeks, then accelerate. No dip needed, minimal acclimation stress — this is the premium experience you’re paying for.
Potted plants
Remove the pot and strip away the rockwool completely — leftover rockwool traps debris and rots. Tease the root mass apart gently; if it’s a dense mat, splitting it into 2–3 smaller portions actually establishes faster than planting one big clump (more growing points, better water flow around roots). Potted plants are usually emersed-grown, so expect the standard 2–4 week melt cycle.
Bare-root / bunched stems
Typically sold as weighted bunches. Remove any bands, foam, or weights, strip the lower leaves, and plant stems individually or in small groups. Bunched stems from the store are often already transitioning — check for new submersed growth at the tips, which tells you the plant is mid-adaptation and will settle quickly.
Hobbyist cuttings
Already submersed-grown and the fastest to establish — often showing new growth within days. The main acclimation factor is water-parameter difference between the two tanks. Float to temperature-match, plant promptly, and they’ll usually take off with minimal melt. This is why experienced hobbyists prefer trading cuttings over buying potted plants.
Frequently Asked Questions
Should I use a “plant starter” or transplant fertilizer?
Products marketed for transplant shock are mostly B-vitamins and mild hormones. They don’t hurt, but there’s no strong evidence they help aquarium plants specifically. Stable conditions and patience outperform any bottle. Save the money for more plants.
My new plant melted completely — bare crown, no leaves. Is it dead?
Probably not, if the crown or rhizome is firm. Crypts and swords routinely lose 100% of their leaves and regrow from the base within a month. The test is firmness: firm and pale/green means alive; mushy and brown/black means rot. Give firm-but-leafless plants a full 4 weeks before declaring them dead.
Can I speed up acclimation with extra light or CO2?
No — and trying usually backfires. A melting plant can’t use extra light; the excess just grows algae on its dying leaves. Keep light moderate and CO2 stable (not boosted) during acclimation. Growth speed comes from the plant’s own adaptation timeline, which you can’t rush, only avoid delaying.
Should new plants go straight into my main display tank?
After quarantine/dipping, yes — there’s no benefit to a separate “growing-in” tank for most plants. They acclimate to your water fastest in the tank they’ll live in. The exception is very delicate species going into a tank with boisterous fish; give those a few weeks in a calm corner or breeder box first.
The Patience Rule
The single most important acclimation skill is restraint: plant it right, set gentle conditions, remove decay, and then leave it alone for a month. The hobbyists with the best plant growth aren’t doing something clever in week one — they’re simply not interfering in weeks two through four while the plants do what they’ve evolved to do. Melt looks like failure and feels like failure, but in most cases it’s the visible part of a plant successfully becoming yours.