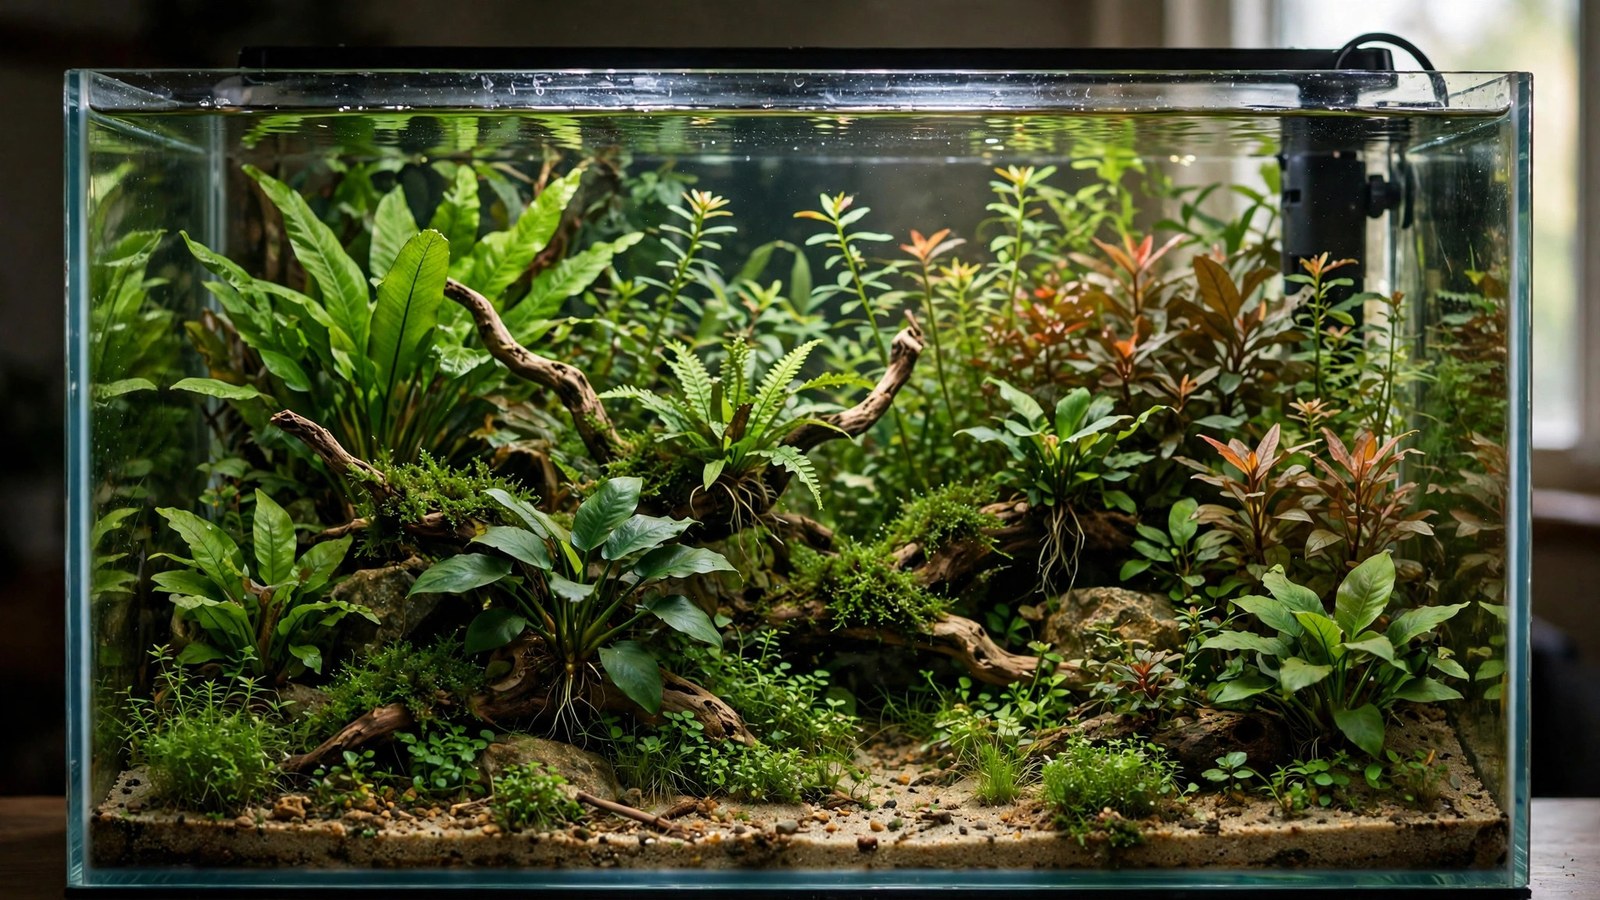
The 20-gallon long is the most recommended tank size in the hobby for good reason: big enough for real aquascaping and stable chemistry, small enough to stay affordable, and the long footprint suits more fish than any other standard size. A 20-gallon planted tank setup is where beginners become aquascapers — here's the complete build, from equipment to stocking.
Why the 20-Gallon Long Wins
The standard 20-long (30" x 12" x 12") offers the best footprint-to-cost ratio in the hobby. Thirty inches of length gives schooling fish real swimming room, supports proper aquascape composition (foreground, midground, background all get space), and provides enough water volume that parameters stay stable with weekly maintenance. Compared to the 10-gallon, it's dramatically more forgiving; compared to the 40-gallon, it's dramatically cheaper to equip and plant.
If you're stepping up from our 10-gallon planted tank setup, the 20-long feels like moving from an apartment to a house — same principles, far more room to execute them.
Equipment: The Full List
- Tank: 20-gallon long (preferred) or 20-high. The long's footprint suits aquascaping and fish far better.
- Light: 30-inch planted-tank LED fixture on a timer. Single most important purchase — buy the good one.
- Filter: hang-on-back rated 20–30 gallons with pre-filter sponge, or a small canister for the clean look. Gentle-to-moderate flow.
- Heater: 100W adjustable — sized with headroom for winter rooms.
- Substrate: one 9L bag of aquasoil (perfect for a 20-long at 2 inches), or 1.5–2 inches of sand/gravel with root tabs.
- Thermometer, timer plug, water conditioner, liquid test kit, aquascaping tweezers and scissors — the supporting cast.
Substrate and Hardscape
Aquasoil 2 inches deep, sloped to 3 inches at the back — one 9L bag nails it. The slope adds perceived depth, which matters enormously at 12 inches of height. For hard-water setups, inert sand or gravel with root tabs under the heavy feeders.
Hardscape: this is the first size where real composition happens. One primary wood piece (12–18 inches) plus 3–5 stones, or a single dramatic stone arrangement. The 30-inch length supports the golden-ratio layout properly — focal element at the 18-inch mark, open space balancing it. Don't crowd: a 20-long with one great wood piece beats one with five mediocre ones.
Layout: Composition at 30 Inches
- Golden ratio focal point — place the main hardscape about 60% across the length.
- Triangle or island layout — tall elements on one side stepping down across the tank; the 20-long's proportions suit this beautifully.
- Depth layering — foreground carpet/meadow, midground mounds, background curtain. Each zone gets ~10 inches of the length.
- Open swimming lane — leave the front-center open; schooling fish need the runway and it showcases the scape.
- Dark background — adds depth; at 12 inches deep, every inch of perceived depth counts.
The 20-Gallon Plant List
Background
- Rotala rotundifolia / H'ra — the 20-long background classic; trims into hedges
- Ludwigia repens / super red — color without CO2 demands
- Vallisneria (Italian) — tall ribbons; one corner planting spreads into a curtain
- Bacopa caroliniana — structural round-leafed stems
Midground
- Cryptocoryne wendtii (bronze/green) — mounds that anchor the composition
- Anubias nana / barteri on wood — broad-leaf anchors
- Java fern (Windeløv, narrow) — textured midground on hardscape
- Bucephalandra — jewel accents; the 20-long is big enough to show them off
- Staurogyne repens — trimmable midground hedges
Foreground
- Dwarf sagittaria — the easy runner carpet
- Monte Carlo — with CO2 or a dry start; the premium carpet
- Cryptocoryne parva — slowest carpet, but bulletproof low-tech
- Marsilea hirsuta — clover-like carpet for variety
Floating
- Frogbit or red root floaters — a controlled patch; see our floating plant guide.
Plant 70%+ from day one — the 20-long needs roughly 25–35 plant portions depending on species. Our planting quantity guide refines the numbers. This is a low-tech-friendly palette; our low-tech planted tank setup covers the equipment-minimal approach.
Stocking: The 20-Gallon Sweet Spot
The 20-long suits more community concepts than any other size. Proven options (choose one primary concept):
- Classic community: 12 neon/cardinal tetras + 6 corydoras + 1 honey gourami — the textbook planted community. Our planted neon tetra tank details the tetra care.
- Shrimp + nano fish: cherry shrimp colony + 10 chili rasboras or ember tetras — our planted shrimp tank setup meets our schooling fish guide.
- Pea puffer group: 6 puffers in a jungle — see our planted pea puffer tank setup.
- Rainbowfish (dwarf): 8 praecox rainbows — our planted rainbowfish tank setup covers the larger species.
- Breeding colony: guppy or platy colony with fry cover — our planted guppy tank setup handles the population math.
- Centerpiece + school: 1 dwarf gourami or pair of rams + 10 tetras + bottom crew.
What still doesn't fit: angelfish (need height), large rainbowfish, goldfish. The 20-long is generous, not infinite.
Cycling and Stocking Order
Plant heavily, cycle 2–3 weeks (plant-assisted — our faster cycling guide), verify zeros for a week, then stock in waves: bottom crew first, school second, centerpiece last — a week apart. Each wave is a bioload step the maturing filter absorbs.
Lighting, CO2, and Fertilization
Light 7–8 hours on a timer. CO2 is optional at this size — the plant list thrives without it; adding CO2 unlocks reds and faster carpets (see our high-tech guide if you go that route). Fertilize: with aquasoil, start liquids at month 3; with inert substrate, half-dose comprehensive fertilizer weekly from the start.
Maintenance: The 20-Minute Week
- 25–30% weekly water change — 5–6 gallons; 20 minutes start to finish.
- Trim stems every 2–3 weeks; replant tops to thicken.
- Thin floaters weekly; vacuum open areas lightly.
- Clean glass biweekly; rinse pre-filter sponge monthly.
- Root tabs quarterly for the heavy feeders.
Aquascaping Styles That Suit the 20-Long
The 20-long's proportions flatter several styles. The island layout — a single hardscape mound with planting radiating outward, open sand on both sides — is the beginner-friendly classic that always looks intentional. The triangle layout stacks height on one side and steps down across the 30 inches, creating strong directional flow that suits schooling fish displays. For the ambitious, a simplified Dutch-inspired street layout works: 3–4 plant streets across the length won't match a full 75-gallon Dutch tank, but the discipline of grouped contrasting stems reads beautifully at this scale — see our Dutch tank walkthrough for the method. And the jungle style is nearly foolproof here: plant the back and sides densely, let vallisneria and swords fill the height, and keep one open lane — our jungle tank build guide covers the controlled-chaos approach.
Whichever style you choose, photograph the tank monthly from the same angle. The 20-long changes fast, and the photo record teaches you more about plant growth rates and composition than any article — including this one.
Frequently Asked Questions
20-long or 20-high — which is better for plants?
The 20-long, decisively. More footprint means more planting area, better aquascape proportions, more swimming room for fish, and easier light penetration (12 inches deep vs 16+). The 20-high suits angelfish better; for everything else planted, the long wins.
How many plants do I need for a 20-gallon?
Roughly 25–35 portions/pots for 70% coverage: 8–10 background stems bunches, 6–8 midground plants, a foreground carpet's worth (3–5 pots of dwarf sag or 4–6 Monte Carlo cups), plus epiphytes for wood. Buy heavy upfront — a sparsely planted new tank invites algae while a dense one suppresses it.
Can I keep angelfish in a 20-gallon?
Not long-term — 12 inches of height can't accommodate an 8-inch-tall adult angel. Juveniles work temporarily, but plan the upgrade. For a 20-long, choose fish scaled to the tank: the stocking list above is proven. Angels want the 29+ gallon heights in our planted angelfish tank setup.
Do I need CO2 on a 20-gallon?
No — every plant in this guide's list grows well without it. CO2 becomes worth considering when you want intense reds, fast HC Cuba carpets, or simply faster everything. It's an upgrade path, not a requirement; master the low-tech 20-long first.
What's the best filter for a 20-gallon long?
A hang-on-back rated for 20–30 gallons with a pre-filter sponge is the sweet spot of price, performance, and simplicity. A small canister (with lily pipes for aesthetics) is the upgrade — quieter, more media, cleaner look. Either way, baffle strong outputs; the 12-inch depth means fish can't escape a current vertically.
How long before a 20-gallon looks mature?
Eight to twelve weeks from planting to genuinely lush, assuming dense initial planting and consistent care. The 20-long fills faster than bigger tanks (less volume to vegetate) but slower than a 10-gallon. Photograph monthly — the progress is motivating and teaches you your plants' growth rates.
The 20-Gallon Payoff
The 20-long is the hobby's workhorse for a reason: it does everything well — aquascaping, communities, breeding, shrimp — without demanding the budget or space of big tanks. Build it with a good light, plant it densely, stock it thoughtfully, and maintain the 20-minute week. It's the tank most hobbyists wish they'd started with, and the size many never outgrow.
New to planted tanks? The 2Hr Aquarist Planted Tank 101 beginner’s guide covers the same fundamentals from first principles.
Tissue-culture plants are the exception — they’re grown in sterile gel and adapt with minimal melting, which is part of what you’re paying for. Plants bought submersed from another hobbyist’s tank also transition with little melt, since they’re already in the right form.
Which Plants Melt Most (and Least)
Heavy melters (expect significant leaf loss)
- Cryptocorynes — infamous for “crypt melt,” sometimes dropping every leaf after any disturbance. They almost always recover from the roots within weeks.
- Stem plants grown emersed — rotala, ludwigia, and hygrophila often shed lower emersed leaves while the growing tips transition.
- Amazon swords — emersed-grown swords typically lose their broad oval aerial leaves and replace them with longer submersed ribbon leaves.
Light melters
- Anubias, java fern, bucephalandra — slow-growing rhizome plants transition gradually; occasional old-leaf melt but rarely dramatic.
- Vallisneria — usually transitions well, though it dislikes the move itself and may sulk for a week.
- Floating plants — minimal melt since their leaves were already at the air-water interface.
The Acclimation Protocol
Step 1: Quarantine or dip first
Before acclimating to your tank’s conditions, make sure you’re not acclimating pests along with the plant. Run new arrivals through our quarantine and dip protocol — it adds days upfront but prevents months of regret.
Step 2: Float to temperature-match (30 minutes)
Float the bag or container in your tank for 20–30 minutes to equalize temperature. Plants are less temperature-sensitive than fish, but a 10°F shock on top of transplant stress is an avoidable insult.
Step 3: Trim before planting
Remove any leaves that are already damaged, yellowing, or heavily algae-covered — they won’t recover and they’ll rot in your tank, feeding algae. For stem plants, trim off the bottom inch and any emersed leaves that look unlikely to adapt; the plant wastes energy maintaining leaves it’s going to shed anyway. Keep the healthy growing tips — that’s where recovery starts.
Step 4: Plant correctly the first time
Follow our planting guide — right depth, crown exposed on rosettes, rhizomes unburied on epiphytes. Every uprooting and replanting restarts the acclimation clock, so get placement right on the first attempt. Decide where each plant goes before it goes in the water.
Step 5: Run a gentle first week
For the first 7 days after planting:
- Moderate light — run your normal photoperiod but consider dropping intensity 20–30% if your light is dimmable. Blast-level light on a melting plant grows algae on the dying leaves, not recovery.
- Stable CO2 — if you inject CO2, keep it consistent. Fluctuating CO2 during acclimation is a melt accelerator. If you’re low-tech, this doesn’t apply — see growing without CO2.
- Half-strength fertilizer — new plants with damaged leaves can’t use full dosing, and the excess feeds algae. Ramp to full strength over 2–3 weeks per our fertilizer schedule.
- No disturbance — don’t move, trim, or “check on” new plants for at least two weeks. Every touch resets root establishment. This is especially critical for crypts.
Step 6: Remove melt, keep the base
As emersed leaves melt, remove the mushy material promptly — decaying leaves release ammonia and grow fungus that can spread to healthy tissue. But never discard the plant while the crown, rhizome, or roots are firm and alive. A crypt that’s lost every leaf but has firm roots is a plant that’s about to recover, not a dead plant. Give it 3–4 weeks before judging.
Telling Normal Melt From Real Problems
Normal transition melt:
- Affects oldest/emersed leaves first, newest growth last
- New submersed leaves emerge even as old ones dissolve
- Roots and crown stay firm and white/green
- Timeline: 1–4 weeks, then obvious new growth
Concerning melt (see our full melting diagnosis guide):
- New growth also melts or emerges deformed
- Rhizome or crown turns mushy and brown — this is rot, not transition
- Entire plant dissolves within days with no new growth after 4+ weeks
- Melting spreads to established plants that weren’t recently moved
Buying Tips to Minimize Melt
- Buy submersed-grown when available — hobbyist-grown cuttings transition with almost no melt.
- Choose tissue culture for sensitive species — crypts and delicate stems establish far more reliably from sterile cups.
- Avoid plants already melting in the store tank — some melt is normal, but a plant that’s mostly mush at purchase has less energy for recovery.
- Transport carefully — keep plants damp and out of direct sun/heat. A plant that dries out or cooks in a hot car melts far worse than one transported properly.
The First-Month Timeline: What to Expect Week by Week
Knowing what’s normal when removes most acclimation anxiety. Here’s the typical timeline for a healthy plant adapting to a new tank:
Week 1: The quiet week
Almost nothing visible happens. The plant is growing roots you can’t see and assessing its new environment. Some species (vallisneria, stem plants) may start shedding their lowest leaves. This is normal. Resist the urge to “help” — no moving, no extra fertilizer, no light changes. The most common beginner mistake is intervening during a week when the correct action is nothing.
Week 2: Melt peaks
This is when emersed leaves give up in earnest. Crypts may drop everything; swords shed their broad aerial leaves; stem plants lose lower foliage. It looks catastrophic and it’s usually fine. Keep removing mushy material, keep conditions stable, and watch the crown and growing tips — if those are firm and green, recovery is already underway.
Week 3: The turn
New submersed-adapted leaves emerge — smaller, thinner, often a slightly different shade of green than the emersed foliage. Stem plant tips start growing visibly; crypts push tiny curled leaves from the crown; swords unfurl narrow ribbon leaves. This is the moment most beginners exhale for the first time.
Week 4+: Established
New growth outpaces melt, and the plant is functionally yours. You can resume full-strength fertilizer, normal trimming, and stop treating it as fragile. Some slow growers (anubias, bucephalandra) take 6–8 weeks to show obvious progress — that’s their normal speed, not a problem.
Acclimating Different Plant Formats
Tissue-culture cups
Sterile, pest-free, and already adapted to high-humidity (not emersed) growth — tissue cultures melt the least of any format. Rinse the agar gel off gently (leftover gel rots and feeds fungus), split the portion into small plantlets, and plant per our planting guide. They establish slowly for the first two weeks, then accelerate. No dip needed, minimal acclimation stress — this is the premium experience you’re paying for.
Potted plants
Remove the pot and strip away the rockwool completely — leftover rockwool traps debris and rots. Tease the root mass apart gently; if it’s a dense mat, splitting it into 2–3 smaller portions actually establishes faster than planting one big clump (more growing points, better water flow around roots). Potted plants are usually emersed-grown, so expect the standard 2–4 week melt cycle.
Bare-root / bunched stems
Typically sold as weighted bunches. Remove any bands, foam, or weights, strip the lower leaves, and plant stems individually or in small groups. Bunched stems from the store are often already transitioning — check for new submersed growth at the tips, which tells you the plant is mid-adaptation and will settle quickly.
Hobbyist cuttings
Already submersed-grown and the fastest to establish — often showing new growth within days. The main acclimation factor is water-parameter difference between the two tanks. Float to temperature-match, plant promptly, and they’ll usually take off with minimal melt. This is why experienced hobbyists prefer trading cuttings over buying potted plants.
Frequently Asked Questions
Should I use a “plant starter” or transplant fertilizer?
Products marketed for transplant shock are mostly B-vitamins and mild hormones. They don’t hurt, but there’s no strong evidence they help aquarium plants specifically. Stable conditions and patience outperform any bottle. Save the money for more plants.
My new plant melted completely — bare crown, no leaves. Is it dead?
Probably not, if the crown or rhizome is firm. Crypts and swords routinely lose 100% of their leaves and regrow from the base within a month. The test is firmness: firm and pale/green means alive; mushy and brown/black means rot. Give firm-but-leafless plants a full 4 weeks before declaring them dead.
Can I speed up acclimation with extra light or CO2?
No — and trying usually backfires. A melting plant can’t use extra light; the excess just grows algae on its dying leaves. Keep light moderate and CO2 stable (not boosted) during acclimation. Growth speed comes from the plant’s own adaptation timeline, which you can’t rush, only avoid delaying.
Should new plants go straight into my main display tank?
After quarantine/dipping, yes — there’s no benefit to a separate “growing-in” tank for most plants. They acclimate to your water fastest in the tank they’ll live in. The exception is very delicate species going into a tank with boisterous fish; give those a few weeks in a calm corner or breeder box first.
The Patience Rule
The single most important acclimation skill is restraint: plant it right, set gentle conditions, remove decay, and then leave it alone for a month. The hobbyists with the best plant growth aren’t doing something clever in week one — they’re simply not interfering in weeks two through four while the plants do what they’ve evolved to do. Melt looks like failure and feels like failure, but in most cases it’s the visible part of a plant successfully becoming yours.