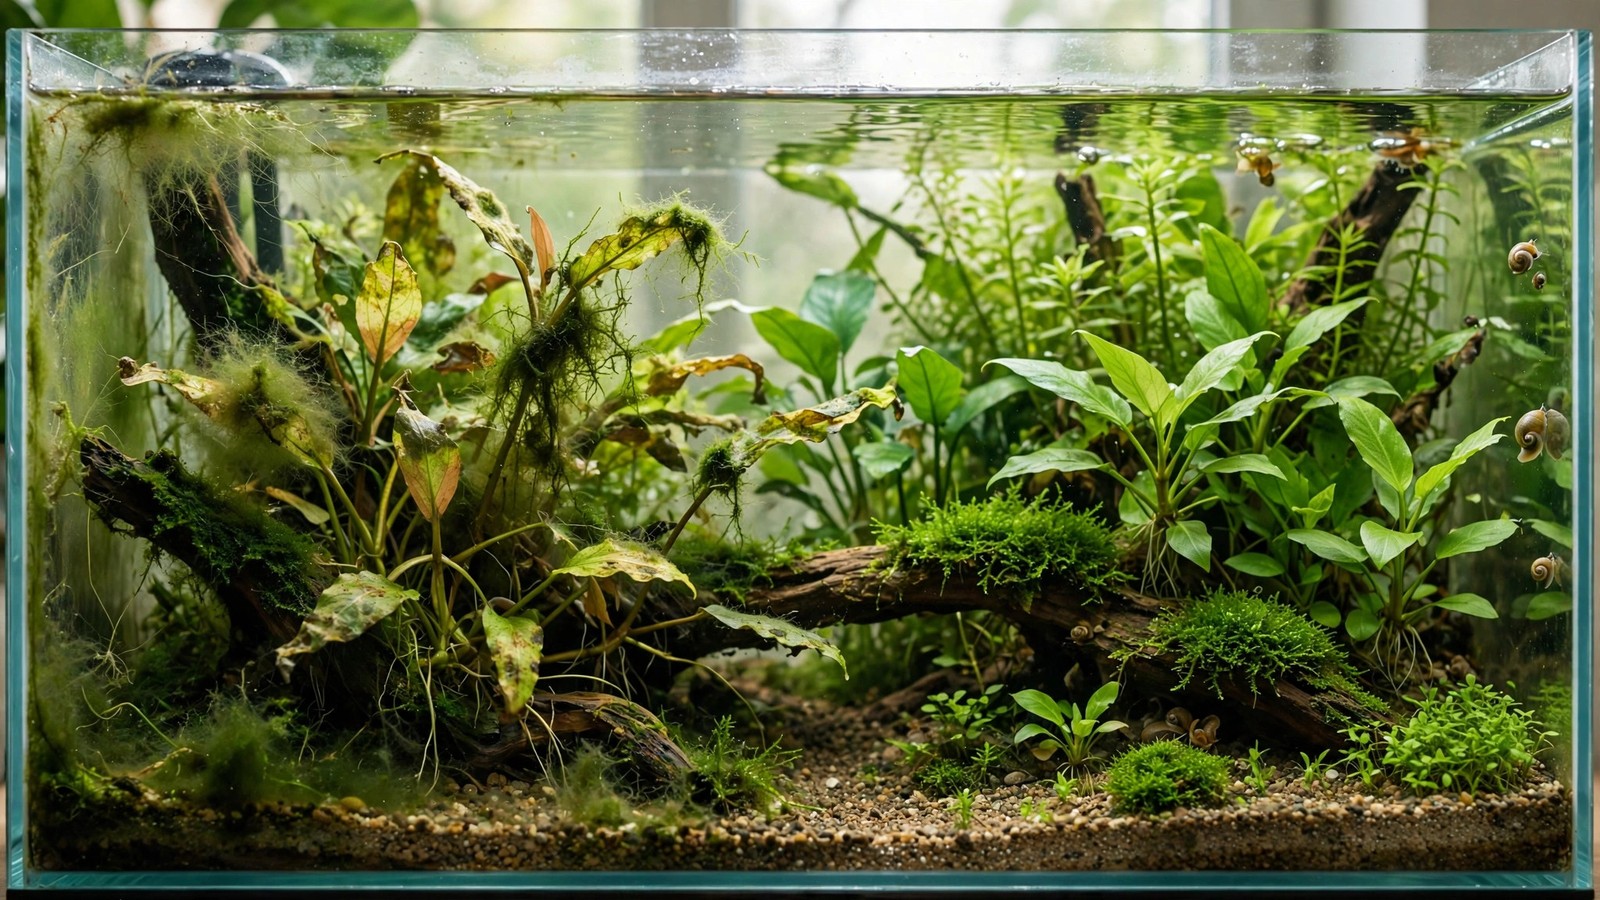
Your plants are stalling, algae is blooming, and your fertilizer bottle says "dose daily" — so you dose more. It's the most intuitive mistake in the hobby: when plants struggle, add more food. But over-fertilizing aquarium plants is real, it has recognizable symptoms, and the fix is gloriously simple — less. This guide covers how to tell over-fertilization from deficiency (they mimic each other cruelly), how to recover a overdosed tank, and how to dose with confidence afterward.
Can You Actually Over-Fertilize? Yes — Here's How
The old mantra "algae can't be caused by excess nutrients" is mostly true for nitrates and phosphates in balanced tanks — but fertilizers aren't just NPK. Overdosing causes problems through several real mechanisms:
- Micronutrient toxicity — iron, copper, manganese, and boron are toxic to plants (and shrimp) above certain thresholds. Copper especially: shrimp die at copper levels that barely bother plants.
- Osmotic stress — very high total dissolved solids from heavy dosing stresses plant roots and livestock osmoregulation.
- Nutrient antagonism — excess of one nutrient blocks uptake of another. Classic example: excess potassium can induce magnesium deficiency symptoms; excess phosphate can lock out iron.
- Ammonia from urea-based fertilizers — some nitrogen fertilizers use urea or ammonium, which spike ammonia if overdosed — instantly triggering algae.
- Algae opportunism during plant stall — when toxicity or antagonism stalls plant growth, algae colonizes the surplus. The algae isn't caused by "excess nutrients" per se, but by the plant shutdown the excess caused.
Symptoms of Over-Fertilizing: The Diagnostic List
Plant symptoms
- Burnt leaf tips and margins — brown, crispy edges on new growth, resembling fertilizer burn in houseplants. The most classic overdose sign.
- Stunted, twisted new growth — new leaves emerge deformed, curled, or abnormally small despite adequate light and CO2.
- Algae bloom coinciding with increased dosing — you upped the fertilizer, plants stalled, algae exploded. Timeline is diagnostic.
- Dark, almost black-green leaves — excessive nitrogen can produce unnaturally dark, soft growth that's algae-prone.
- Root damage — in severe cases, root tips brown and stop extending (check during replanting).
Livestock symptoms
- Shrimp deaths after dosing — the canary in the coal mine. Shrimp are exquisitely sensitive to copper and sudden TDS swings. Deaths within hours of fertilizing point at the bottle.
- Fish gasping or lethargy — severe overdoses (especially urea/ammonium-based nitrogen) spike ammonia.
- Snails retreating into shells after water-column dosing.
Water symptoms
- Persistently high nitrates (>40 ppm) despite water changes — you're adding faster than anything consumes.
- Phosphate off the charts with green water or spot algae following.
- TDS climbing week over week — track with an inexpensive TDS meter; a steadily rising baseline means accumulation.
Over-Fertilizing vs. Deficiency: Telling Them Apart
This is the cruel mimicry — both cause stunted growth, algae, and poor color. Key differentiators:
| Clue | Points to over-fertilizing | Points to deficiency |
|---|---|---|
| Timeline | Problems started after increasing dose | Problems started during lean dosing or after stopping |
| Leaf tips | Burnt, brown, crispy margins | Pale, yellow, or pinholes (see potassium deficiency) |
| Test readings | Nitrates very high, TDS climbing | Nitrates zero, phosphate zero |
| Shrimp behavior | Deaths/stress after dosing | Unaffected |
| New growth | Twisted, deformed, burnt | Pale, small, or melting (see iron deficiency) |
When in doubt, test before you guess. A $20 nitrate/phosphate test kit resolves the question in minutes. Our nutrient deficiency guide covers the deficiency side in full.
The Recovery Protocol
Step 1: Stop dosing immediately (1–2 weeks)
Cease all fertilization. This isn't starvation — your substrate and water column hold weeks of reserves. You're letting levels fall back to sane ranges.
Step 2: Large water changes
Do 50% water changes twice in the first week. This is the fastest way to dilute accumulated nutrients and reset TDS. Use dechlorinated water matched in temperature.
Step 3: Remove the damage
Trim burnt, twisted, and algae-smothered leaves — they won't recover, and decaying tissue feeds algae. Clean up any algae bloom with the appropriate protocol (see our hair algae guide or green water guide).
Step 4: Watch and wait
Within 1–2 weeks, new growth should emerge normal-shaped and healthy-colored. That's your signal the toxicity has cleared. If new growth is still deformed, do another large water change and extend the pause.
Step 5: Resume at half dose
Restart fertilization at 50% of your previous dose. Increase gradually only if deficiency symptoms appear. Most tanks need far less fertilizer than the bottle suggests — manufacturers dose for maximum sales, not your specific tank.
Dosing Right: The Anti-Overdose Framework
- Dose to the tank, not the bottle: start at half the label dose. Increase only when plants show they want more (pale growth, stalling).
- Match dosing to plant mass and light: a sparsely planted low-light tank needs a fraction of what a dense high-light CO2 tank consumes. More light + more plants = more fertilizer justified.
- Account for your substrate: aquasoils release nutrients for months — dosing full strength over fresh aquasoil is double-feeding. Inert sand/gravel needs full water-column dosing from day one.
- Watch livestock: in shrimp tanks, prefer shrimp-safe fertilizers (low/no copper) and dose conservatively. Shrimp health is your early-warning system.
- Track TDS weekly: a stable TDS means dosing matches consumption. A climbing TDS means you're overdosing — cut back before symptoms appear.
- Separate macros from micros if troubleshooting: all-in-ones are convenient, but when diagnosing, dosing NPK and traces separately lets you adjust each independently.
Special Case: Root Tabs
Over-fertilizing isn't only water-column. Too many root tabs, placed too shallow, leach concentrated nutrients into the water — causing localized algae blooms and burning nearby roots. Rules: one tab per 15 cm diameter, pushed at least 5 cm deep, replaced per schedule (not "extra for good measure"). If tabs keep surfacing, cap with gravel. Excess tabs under a carpet cause the patchy melt people blame on everything else.
Over-Fertilizing and Water Change Discipline
Here's the uncomfortable truth about chronic over-fertilizing: it's usually a water-change problem wearing a fertilizer costume. The Estimative Index (EI) dosing method — one of the hobby's most popular regimens — deliberately overdoses nutrients, and it works because it mandates 50% weekly water changes that reset accumulation. Problems arise when keepers adopt EI-level dosing with casual 20%-monthly water changes. The nutrients pile up week after week, TDS climbs, antagonisms develop, and the tank slides into toxicity.
The rule is simple: your dosing boldness must match your water-change discipline. Heavy dosing + heavy water changes = thriving tank. Heavy dosing + neglected water changes = over-fertilizing symptoms within two months. Light dosing + light water changes = also fine. Mismatches cause the problems. If you're not willing to do 40–50% weekly changes, dose lean — the tank will tell you if it wants more, and "wants more" looks like deficiency, not the burnt tips and shrimp deaths of excess.
Frequently Asked Questions
How much fertilizer is too much?
There's no universal number — it depends on plant mass, light, CO2, substrate, and livestock. The practical definition: too much is when nitrates climb above ~40 ppm, TDS rises week over week, shrimp stress after dosing, or leaf tips burn. Start at half the label dose and let plant response guide you upward. The label is a ceiling, not a target.
Can over-fertilizing kill fish?
Directly, rarely — but indirectly, yes. Urea/ammonium-based nitrogen overdoses spike ammonia; massive TDS swings stress osmoregulation; and the algae blooms that follow plant shutdowns crash oxygen at night. Shrimp die first and fastest (copper sensitivity). If livestock suffers after dosing, stop fertilizing and do an immediate large water change.
Should I stop fertilizing if I have algae?
Usually no — stopping fertilizer starves plants and hands algae the win. The exception is confirmed over-fertilizing: high test readings, burnt tips, shrimp deaths, timeline matching a dosing increase. In that case, pause 1–2 weeks with big water changes, then resume at half dose. For algae with low nutrient readings, keep dosing — the algae is feeding on imbalance or ammonia, not your fertilizer. See the deficiency guide for that scenario.
Are "shrimp-safe" fertilizers really safer?
Meaningfully, yes — they minimize copper and heavy metals that standard micros include at levels shrimp dislike. They're not magic: you can still overdose a shrimp-safe fertilizer into TDS problems. But for shrimp tanks, they're the right baseline, dosed conservatively. Invertebrate losses after switching to a standard trace mix are a classic over-fertilizing story.
How long does it take to recover from over-fertilizing?
Water chemistry resets within days of big water changes; plant recovery takes 2–4 weeks as new, healthy growth replaces burnt foliage. Shrimp colonies rebound once water stabilizes, though lost individuals don't return. The full "looks great again" timeline is typically a month — faster than recovering from most deficiencies, because you're removing a toxin rather than rebuilding a deficiency.
Less Is More (Until It Isn't)
Over-fertilizing is the mirror image of deficiency — same stunted plants, same algae, opposite cause. The fix is refreshingly decisive: stop, water-change, halve the dose, and watch. And the lasting lesson: fertilizer is a response to plant demand, not a scheduled ritual. Dose what the tank uses, verify with tests and shrimp behavior, and you'll spend your hobby watching plants grow instead of troubleshooting bottles.
Tissue-culture plants are the exception — they’re grown in sterile gel and adapt with minimal melting, which is part of what you’re paying for. Plants bought submersed from another hobbyist’s tank also transition with little melt, since they’re already in the right form.
Which Plants Melt Most (and Least)
Heavy melters (expect significant leaf loss)
- Cryptocorynes — infamous for “crypt melt,” sometimes dropping every leaf after any disturbance. They almost always recover from the roots within weeks.
- Stem plants grown emersed — rotala, ludwigia, and hygrophila often shed lower emersed leaves while the growing tips transition.
- Amazon swords — emersed-grown swords typically lose their broad oval aerial leaves and replace them with longer submersed ribbon leaves.
Light melters
- Anubias, java fern, bucephalandra — slow-growing rhizome plants transition gradually; occasional old-leaf melt but rarely dramatic.
- Vallisneria — usually transitions well, though it dislikes the move itself and may sulk for a week.
- Floating plants — minimal melt since their leaves were already at the air-water interface.
The Acclimation Protocol
Step 1: Quarantine or dip first
Before acclimating to your tank’s conditions, make sure you’re not acclimating pests along with the plant. Run new arrivals through our quarantine and dip protocol — it adds days upfront but prevents months of regret.
Step 2: Float to temperature-match (30 minutes)
Float the bag or container in your tank for 20–30 minutes to equalize temperature. Plants are less temperature-sensitive than fish, but a 10°F shock on top of transplant stress is an avoidable insult.
Step 3: Trim before planting
Remove any leaves that are already damaged, yellowing, or heavily algae-covered — they won’t recover and they’ll rot in your tank, feeding algae. For stem plants, trim off the bottom inch and any emersed leaves that look unlikely to adapt; the plant wastes energy maintaining leaves it’s going to shed anyway. Keep the healthy growing tips — that’s where recovery starts.
Step 4: Plant correctly the first time
Follow our planting guide — right depth, crown exposed on rosettes, rhizomes unburied on epiphytes. Every uprooting and replanting restarts the acclimation clock, so get placement right on the first attempt. Decide where each plant goes before it goes in the water.
Step 5: Run a gentle first week
For the first 7 days after planting:
- Moderate light — run your normal photoperiod but consider dropping intensity 20–30% if your light is dimmable. Blast-level light on a melting plant grows algae on the dying leaves, not recovery.
- Stable CO2 — if you inject CO2, keep it consistent. Fluctuating CO2 during acclimation is a melt accelerator. If you’re low-tech, this doesn’t apply — see growing without CO2.
- Half-strength fertilizer — new plants with damaged leaves can’t use full dosing, and the excess feeds algae. Ramp to full strength over 2–3 weeks per our fertilizer schedule.
- No disturbance — don’t move, trim, or “check on” new plants for at least two weeks. Every touch resets root establishment. This is especially critical for crypts.
Step 6: Remove melt, keep the base
As emersed leaves melt, remove the mushy material promptly — decaying leaves release ammonia and grow fungus that can spread to healthy tissue. But never discard the plant while the crown, rhizome, or roots are firm and alive. A crypt that’s lost every leaf but has firm roots is a plant that’s about to recover, not a dead plant. Give it 3–4 weeks before judging.
Telling Normal Melt From Real Problems
Normal transition melt:
- Affects oldest/emersed leaves first, newest growth last
- New submersed leaves emerge even as old ones dissolve
- Roots and crown stay firm and white/green
- Timeline: 1–4 weeks, then obvious new growth
Concerning melt (see our full melting diagnosis guide):
- New growth also melts or emerges deformed
- Rhizome or crown turns mushy and brown — this is rot, not transition
- Entire plant dissolves within days with no new growth after 4+ weeks
- Melting spreads to established plants that weren’t recently moved
Buying Tips to Minimize Melt
- Buy submersed-grown when available — hobbyist-grown cuttings transition with almost no melt.
- Choose tissue culture for sensitive species — crypts and delicate stems establish far more reliably from sterile cups.
- Avoid plants already melting in the store tank — some melt is normal, but a plant that’s mostly mush at purchase has less energy for recovery.
- Transport carefully — keep plants damp and out of direct sun/heat. A plant that dries out or cooks in a hot car melts far worse than one transported properly.
The First-Month Timeline: What to Expect Week by Week
Knowing what’s normal when removes most acclimation anxiety. Here’s the typical timeline for a healthy plant adapting to a new tank:
Week 1: The quiet week
Almost nothing visible happens. The plant is growing roots you can’t see and assessing its new environment. Some species (vallisneria, stem plants) may start shedding their lowest leaves. This is normal. Resist the urge to “help” — no moving, no extra fertilizer, no light changes. The most common beginner mistake is intervening during a week when the correct action is nothing.
Week 2: Melt peaks
This is when emersed leaves give up in earnest. Crypts may drop everything; swords shed their broad aerial leaves; stem plants lose lower foliage. It looks catastrophic and it’s usually fine. Keep removing mushy material, keep conditions stable, and watch the crown and growing tips — if those are firm and green, recovery is already underway.
Week 3: The turn
New submersed-adapted leaves emerge — smaller, thinner, often a slightly different shade of green than the emersed foliage. Stem plant tips start growing visibly; crypts push tiny curled leaves from the crown; swords unfurl narrow ribbon leaves. This is the moment most beginners exhale for the first time.
Week 4+: Established
New growth outpaces melt, and the plant is functionally yours. You can resume full-strength fertilizer, normal trimming, and stop treating it as fragile. Some slow growers (anubias, bucephalandra) take 6–8 weeks to show obvious progress — that’s their normal speed, not a problem.
Acclimating Different Plant Formats
Tissue-culture cups
Sterile, pest-free, and already adapted to high-humidity (not emersed) growth — tissue cultures melt the least of any format. Rinse the agar gel off gently (leftover gel rots and feeds fungus), split the portion into small plantlets, and plant per our planting guide. They establish slowly for the first two weeks, then accelerate. No dip needed, minimal acclimation stress — this is the premium experience you’re paying for.
Potted plants
Remove the pot and strip away the rockwool completely — leftover rockwool traps debris and rots. Tease the root mass apart gently; if it’s a dense mat, splitting it into 2–3 smaller portions actually establishes faster than planting one big clump (more growing points, better water flow around roots). Potted plants are usually emersed-grown, so expect the standard 2–4 week melt cycle.
Bare-root / bunched stems
Typically sold as weighted bunches. Remove any bands, foam, or weights, strip the lower leaves, and plant stems individually or in small groups. Bunched stems from the store are often already transitioning — check for new submersed growth at the tips, which tells you the plant is mid-adaptation and will settle quickly.
Hobbyist cuttings
Already submersed-grown and the fastest to establish — often showing new growth within days. The main acclimation factor is water-parameter difference between the two tanks. Float to temperature-match, plant promptly, and they’ll usually take off with minimal melt. This is why experienced hobbyists prefer trading cuttings over buying potted plants.
Frequently Asked Questions
Should I use a “plant starter” or transplant fertilizer?
Products marketed for transplant shock are mostly B-vitamins and mild hormones. They don’t hurt, but there’s no strong evidence they help aquarium plants specifically. Stable conditions and patience outperform any bottle. Save the money for more plants.
My new plant melted completely — bare crown, no leaves. Is it dead?
Probably not, if the crown or rhizome is firm. Crypts and swords routinely lose 100% of their leaves and regrow from the base within a month. The test is firmness: firm and pale/green means alive; mushy and brown/black means rot. Give firm-but-leafless plants a full 4 weeks before declaring them dead.
Can I speed up acclimation with extra light or CO2?
No — and trying usually backfires. A melting plant can’t use extra light; the excess just grows algae on its dying leaves. Keep light moderate and CO2 stable (not boosted) during acclimation. Growth speed comes from the plant’s own adaptation timeline, which you can’t rush, only avoid delaying.
Should new plants go straight into my main display tank?
After quarantine/dipping, yes — there’s no benefit to a separate “growing-in” tank for most plants. They acclimate to your water fastest in the tank they’ll live in. The exception is very delicate species going into a tank with boisterous fish; give those a few weeks in a calm corner or breeder box first.
The Patience Rule
The single most important acclimation skill is restraint: plant it right, set gentle conditions, remove decay, and then leave it alone for a month. The hobbyists with the best plant growth aren’t doing something clever in week one — they’re simply not interfering in weeks two through four while the plants do what they’ve evolved to do. Melt looks like failure and feels like failure, but in most cases it’s the visible part of a plant successfully becoming yours.