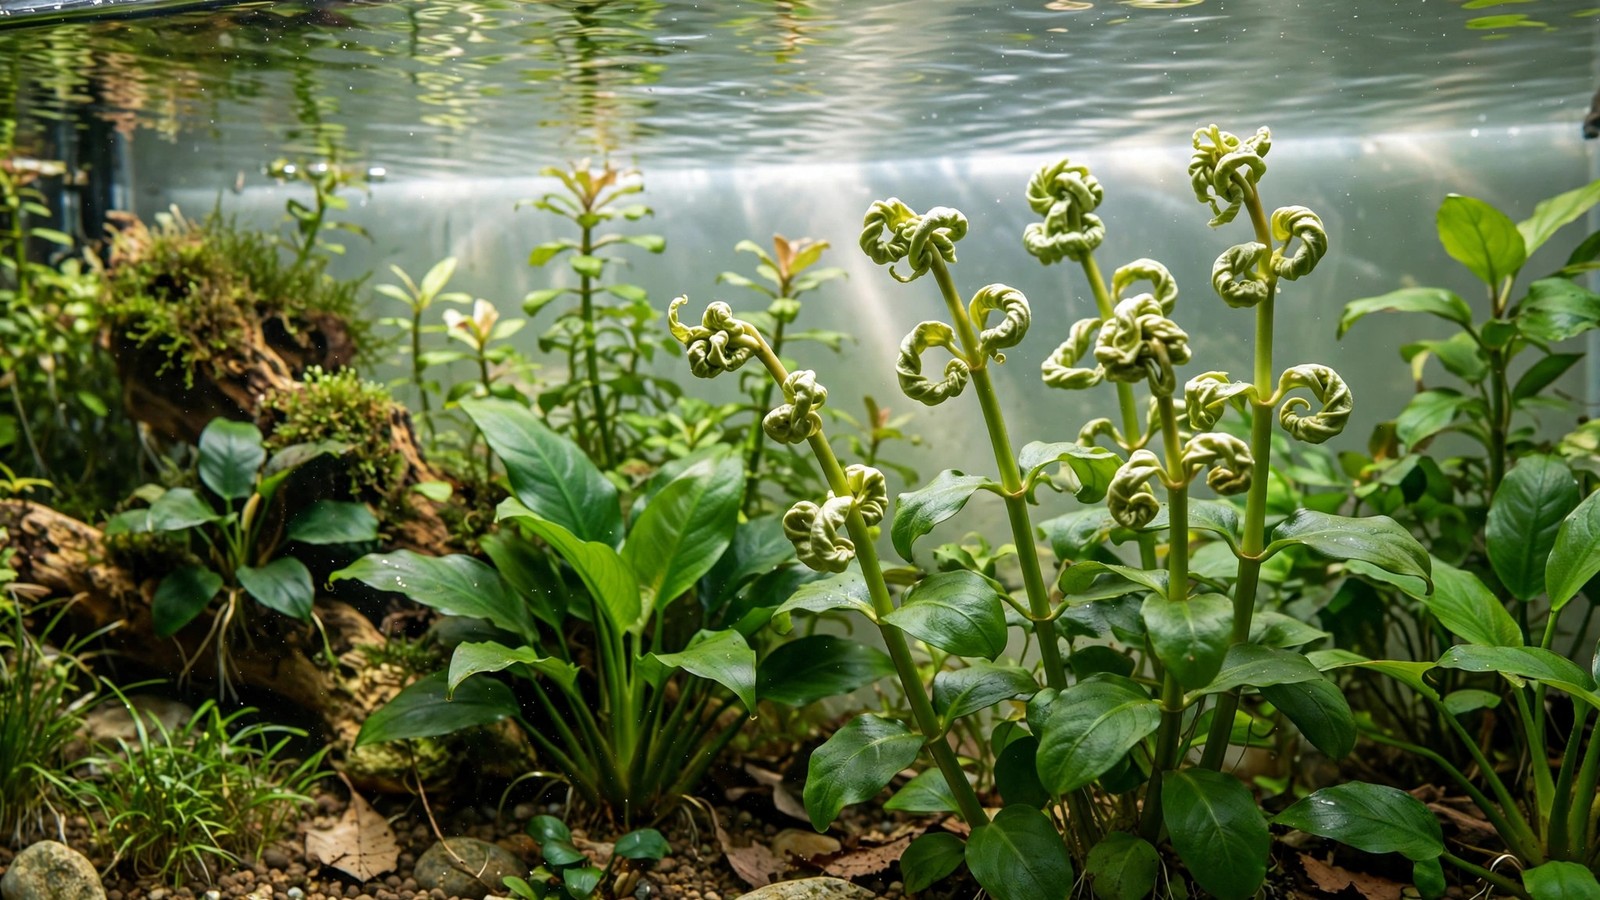
New leaves emerge twisted, curled, and deformed — crinkled like tiny burnt crisps — while old leaves look perfectly normal. Growing tips stall, then die. If your plants' new growth looks tortured while the old foliage is fine, you're seeing calcium deficiency: the immobile-nutrient problem of very soft water, RO systems without remineralization, and occasionally the hidden consequence of "pure water" enthusiasm. It's less common than potassium or nitrogen deficiency, but when it hits, it's unmistakable.
What Calcium Does in Plants
Calcium (Ca) is a secondary macronutrient with structural and signaling roles:
- Cell wall construction — calcium is the mortar of cell walls. New cells literally can't build proper walls without it, which is why deficiency deforms new tissue specifically.
- Cell division — required at growing tips (meristems) where cells divide fastest. Root tips and shoot tips are the hungriest tissues.
- Signal transduction — calcium ions carry stress and environmental signals within the plant.
- Membrane stability — keeps cell membranes intact; deficient membranes leak.
Calcium is immobile in plant tissue — once deposited in old leaves, it stays there. New growth depends entirely on current calcium supply. Cut the supply and the newest tissue fails first: twisted new leaves, dead growing tips, stalled meristems.
Symptoms: The Twisted-New-Growth Signature
The hallmark: deformed NEW growth, normal OLD growth
- New leaves emerge twisted, curled, cupped, or crinkled — distorted shapes, sometimes with hooked tips.
- Growing tips die back — the apical meristem browns and stops; side shoots may try and also deform ("witches' broom" effect in stem plants).
- Leaf edges may brown on new leaves (tip burn), distinct from potassium's old-leaf edge burn.
- Roots stunt — root tips brown and stop extending; new transplants fail to establish.
- Old leaves remain completely normal — this old-vs-new split is the diagnosis.
Advanced deficiency
- Multiple growing tips die; plant becomes a cluster of stunted, deformed shoots.
- New leaves may emerge pale and twisted (combined calcium + iron issues in very pure water).
- Overall growth halts — not slowed, halted, because meristems can't function.
What calcium deficiency is NOT
- Pale new leaves WITHOUT twisting → iron deficiency. See iron deficiency. Calcium twists; iron pales.
- Twisted new growth WITH good water hardness → consider other causes: certain pesticides, extreme CO2 fluctuations, or boron issues (rare). Verify GH is actually low before concluding calcium.
- Old leaves affected → mobile-nutrient issue (N, K, Mg). Calcium never hits old leaves first.
- Melting new growth → see our melting diagnosis guide — melt is tissue dissolution, not deformation.
Causes: The Pure-Water Trap
RO/DI water without remineralization
The classic cause. Reverse-osmosis water is mineral-free — zero calcium, zero magnesium. Keepers who switch to RO for soft-water fish or shrimp but forget to remineralize create a calcium desert. Plants adapted to even moderately hard tap water suddenly can't build cell walls. If you recently switched to RO and new growth twisted within weeks, this is it.
Very soft tap water
Some regions have tap water below 2 dGH — naturally calcium-poor. Tanks in these areas run calcium-deficient indefinitely unless supplemented, especially with fast-growing plants.
Calcium-hungry setups
- Fast-growing stem tanks — high growth rates multiply calcium demand at meristems.
- Snail and shrimp-heavy tanks — invertebrates consume calcium for shells and exoskeletons, competing with plants. A tank full of mystery snails in soft water starves plants of calcium measurably.
- Peat filtration — peat softens water by exchanging minerals, stripping calcium further.
Why it's rarer than you'd think
Most tap water contains adequate calcium — it's the reason GH exists. Calcium deficiency is genuinely uncommon in average tap-water tanks, which is why it's under-discussed. When it appears, there's almost always a soft-water story: RO, rainwater, very soft regional supply, or aggressive softening. If your tap water is moderately hard and new growth twists, look elsewhere first.
The Fix Protocol
Step 1: Test GH and confirm
- Test GH. Below 3 dGH with twisted new growth = calcium deficiency, highly likely.
- Ideally measure calcium specifically (Ca test kits or Ca:Mg ratio) — target roughly 3:1 to 4:1 Ca:Mg.
- Confirm the pattern: deformed new leaves, normal old leaves, dying tips.
Step 2: Add calcium
- GH booster (Ca + Mg balanced) — the correct fix for RO/soft-water tanks. Raises both minerals in proper ratio. Dose per product to reach 4–8 dGH.
- Calcium sulfate (gypsum, CaSO4) — adds calcium without affecting KH/pH. Good when magnesium is already adequate.
- Crushed coral or limestone in the filter — slow-release calcium carbonate; also raises KH and pH. Fine for hard-water setups, wrong for soft-water shrimp tanks.
- Wonder shells / cuttlebone — gradual calcium release; popular in snail/shrimp tanks, benefits plants simultaneously.
Step 3: Remineralize RO water properly (the permanent fix)
- Every RO water change should use remineralized water — a GH booster dosed to your target before the water enters the tank.
- For planted community tanks: target GH 5–8, KH 2–4.
- For Caridina shrimp + plants: GH 4–6 with a shrimp-specific remineralizer (already Ca:Mg balanced).
- Never do large water changes with pure RO — the mineral crash twists new growth within days.
Step 4: Prune and watch
- Trim off deformed growing tips — they won't recover, and removing them encourages healthy side shoots once calcium is restored.
- New growth should emerge normal-shaped within 2 weeks. That's the recovery signal.
- Roots resume extending; transplants start establishing.
Calcium, Shrimp, and Snails: Shared Need
Like magnesium, calcium is a shared plant-invertebrate need. Shrimp require calcium for molting; snails for shells. The soft-water tank that twists plant tips is usually also producing shrimp with molting problems and snails with thin, pitted shells. One remineralization fix serves the whole ecosystem — plants, shrimp, and snails all recover together. If your snails' shells look eroded and new plant growth twists, calcium deficiency is essentially confirmed before you even test.
Calcium vs. Magnesium: Dosing Them Together
Never fix calcium in isolation when magnesium is also low — and in RO/soft-water tanks, both are always low. Dosing calcium alone into magnesium-poor water creates a worse imbalance (excess Ca antagonizes Mg uptake). Always use a balanced Ca+Mg product or dose both minerals together. The 3:1–4:1 Ca:Mg ratio matters more than either absolute number. Our magnesium deficiency guide covers the other half of this pair.
Calcium and Water Changes: The Dilution Trap
Even in hard-water areas, calcium deficiency can sneak in through excessive RO dilution. Keepers who blend RO with tap "to soften things a bit" sometimes drift toward mostly-RO blends over time — each water change diluting minerals a little further, month after month, until new growth starts twisting and nobody connects it to the slowly shifting blend ratio. If you blend, fix the ratio and stick to it — mark it on the wall if you must — and remineralize the RO portion to a known GH before mixing. Drifting blends are silent deficiency factories.
Frequently Asked Questions
Calcium deficiency often travels with general growth problems — if your plants are stalling beyond just twisted tips, our plants not growing guide walks through the full diagnostic chain.
How is calcium deficiency different from iron deficiency?
Both hit new growth, but differently: calcium twists and deforms new leaves (structural failure — cell walls can't form), while iron pales them (chlorophyll failure — leaves can't green up). Twisted + greenish = calcium. Pale + normal-shaped = iron. Both at once (pale AND twisted) happens in pure RO water with no remineralization — fix with a complete GH booster covering both.
Will calcium deficiency kill the plant?
Eventually, if meristems keep dying — a plant that can't produce functional growing tips can't grow. But it's slow: weeks of deformed growth before real danger. And recovery is complete — once calcium is restored, new tips emerge normal and the plant resumes as if nothing happened. Trim the deformed sections and let it rebuild.
Can hard water cause calcium problems?
Deficiency, no — but imbalance, yes. Extremely calcium-heavy water (limestone aquifers, coral substrate) can antagonize magnesium and potassium uptake, producing their deficiency symptoms in calcium-rich water. If your water is liquid rock and plants still struggle, test the full mineral picture rather than assuming "hard water = fine." Sometimes the fix is softer water, not harder.
Do I need calcium if I only keep anubias and java fern?
Less urgently — slow growers need less calcium per week. But they still need some; months in zero-calcium RO water will eventually deform even anubias's new leaves (slowly — you might not notice for half a year). Any RO-based tank, regardless of planting, should be remineralized. It's not optional husbandry; it's the water itself.
My new leaves twist but my GH is 8. What's going on?
Then it's probably not calcium. At GH 8, calcium is abundant — look at boron (rare, but causes similar tip deformation), pesticide contamination (new plants treated with insecticides), or extreme CO2/pH swings deforming tender new tissue. Also verify the GH test is current — test kits expire, and "GH 8" from a two-year-old kit may be fiction. When the obvious answer doesn't fit, re-test before theorizing.
Respect the Mortar
Calcium deficiency is the soft-water keeper's rite of passage — the lesson that pure water isn't perfect water. Test your GH, remineralize your RO, keep the Ca:Mg ratio sane, and new leaves will emerge flat, smooth, and properly built. The twisted tips straighten out in the only way that matters: the next generation of growth, built with proper mortar.
Tissue-culture plants are the exception — they’re grown in sterile gel and adapt with minimal melting, which is part of what you’re paying for. Plants bought submersed from another hobbyist’s tank also transition with little melt, since they’re already in the right form.
Which Plants Melt Most (and Least)
Heavy melters (expect significant leaf loss)
- Cryptocorynes — infamous for “crypt melt,” sometimes dropping every leaf after any disturbance. They almost always recover from the roots within weeks.
- Stem plants grown emersed — rotala, ludwigia, and hygrophila often shed lower emersed leaves while the growing tips transition.
- Amazon swords — emersed-grown swords typically lose their broad oval aerial leaves and replace them with longer submersed ribbon leaves.
Light melters
- Anubias, java fern, bucephalandra — slow-growing rhizome plants transition gradually; occasional old-leaf melt but rarely dramatic.
- Vallisneria — usually transitions well, though it dislikes the move itself and may sulk for a week.
- Floating plants — minimal melt since their leaves were already at the air-water interface.
The Acclimation Protocol
Step 1: Quarantine or dip first
Before acclimating to your tank’s conditions, make sure you’re not acclimating pests along with the plant. Run new arrivals through our quarantine and dip protocol — it adds days upfront but prevents months of regret.
Step 2: Float to temperature-match (30 minutes)
Float the bag or container in your tank for 20–30 minutes to equalize temperature. Plants are less temperature-sensitive than fish, but a 10°F shock on top of transplant stress is an avoidable insult.
Step 3: Trim before planting
Remove any leaves that are already damaged, yellowing, or heavily algae-covered — they won’t recover and they’ll rot in your tank, feeding algae. For stem plants, trim off the bottom inch and any emersed leaves that look unlikely to adapt; the plant wastes energy maintaining leaves it’s going to shed anyway. Keep the healthy growing tips — that’s where recovery starts.
Step 4: Plant correctly the first time
Follow our planting guide — right depth, crown exposed on rosettes, rhizomes unburied on epiphytes. Every uprooting and replanting restarts the acclimation clock, so get placement right on the first attempt. Decide where each plant goes before it goes in the water.
Step 5: Run a gentle first week
For the first 7 days after planting:
- Moderate light — run your normal photoperiod but consider dropping intensity 20–30% if your light is dimmable. Blast-level light on a melting plant grows algae on the dying leaves, not recovery.
- Stable CO2 — if you inject CO2, keep it consistent. Fluctuating CO2 during acclimation is a melt accelerator. If you’re low-tech, this doesn’t apply — see growing without CO2.
- Half-strength fertilizer — new plants with damaged leaves can’t use full dosing, and the excess feeds algae. Ramp to full strength over 2–3 weeks per our fertilizer schedule.
- No disturbance — don’t move, trim, or “check on” new plants for at least two weeks. Every touch resets root establishment. This is especially critical for crypts.
Step 6: Remove melt, keep the base
As emersed leaves melt, remove the mushy material promptly — decaying leaves release ammonia and grow fungus that can spread to healthy tissue. But never discard the plant while the crown, rhizome, or roots are firm and alive. A crypt that’s lost every leaf but has firm roots is a plant that’s about to recover, not a dead plant. Give it 3–4 weeks before judging.
Telling Normal Melt From Real Problems
Normal transition melt:
- Affects oldest/emersed leaves first, newest growth last
- New submersed leaves emerge even as old ones dissolve
- Roots and crown stay firm and white/green
- Timeline: 1–4 weeks, then obvious new growth
Concerning melt (see our full melting diagnosis guide):
- New growth also melts or emerges deformed
- Rhizome or crown turns mushy and brown — this is rot, not transition
- Entire plant dissolves within days with no new growth after 4+ weeks
- Melting spreads to established plants that weren’t recently moved
Buying Tips to Minimize Melt
- Buy submersed-grown when available — hobbyist-grown cuttings transition with almost no melt.
- Choose tissue culture for sensitive species — crypts and delicate stems establish far more reliably from sterile cups.
- Avoid plants already melting in the store tank — some melt is normal, but a plant that’s mostly mush at purchase has less energy for recovery.
- Transport carefully — keep plants damp and out of direct sun/heat. A plant that dries out or cooks in a hot car melts far worse than one transported properly.
The First-Month Timeline: What to Expect Week by Week
Knowing what’s normal when removes most acclimation anxiety. Here’s the typical timeline for a healthy plant adapting to a new tank:
Week 1: The quiet week
Almost nothing visible happens. The plant is growing roots you can’t see and assessing its new environment. Some species (vallisneria, stem plants) may start shedding their lowest leaves. This is normal. Resist the urge to “help” — no moving, no extra fertilizer, no light changes. The most common beginner mistake is intervening during a week when the correct action is nothing.
Week 2: Melt peaks
This is when emersed leaves give up in earnest. Crypts may drop everything; swords shed their broad aerial leaves; stem plants lose lower foliage. It looks catastrophic and it’s usually fine. Keep removing mushy material, keep conditions stable, and watch the crown and growing tips — if those are firm and green, recovery is already underway.
Week 3: The turn
New submersed-adapted leaves emerge — smaller, thinner, often a slightly different shade of green than the emersed foliage. Stem plant tips start growing visibly; crypts push tiny curled leaves from the crown; swords unfurl narrow ribbon leaves. This is the moment most beginners exhale for the first time.
Week 4+: Established
New growth outpaces melt, and the plant is functionally yours. You can resume full-strength fertilizer, normal trimming, and stop treating it as fragile. Some slow growers (anubias, bucephalandra) take 6–8 weeks to show obvious progress — that’s their normal speed, not a problem.
Acclimating Different Plant Formats
Tissue-culture cups
Sterile, pest-free, and already adapted to high-humidity (not emersed) growth — tissue cultures melt the least of any format. Rinse the agar gel off gently (leftover gel rots and feeds fungus), split the portion into small plantlets, and plant per our planting guide. They establish slowly for the first two weeks, then accelerate. No dip needed, minimal acclimation stress — this is the premium experience you’re paying for.
Potted plants
Remove the pot and strip away the rockwool completely — leftover rockwool traps debris and rots. Tease the root mass apart gently; if it’s a dense mat, splitting it into 2–3 smaller portions actually establishes faster than planting one big clump (more growing points, better water flow around roots). Potted plants are usually emersed-grown, so expect the standard 2–4 week melt cycle.
Bare-root / bunched stems
Typically sold as weighted bunches. Remove any bands, foam, or weights, strip the lower leaves, and plant stems individually or in small groups. Bunched stems from the store are often already transitioning — check for new submersed growth at the tips, which tells you the plant is mid-adaptation and will settle quickly.
Hobbyist cuttings
Already submersed-grown and the fastest to establish — often showing new growth within days. The main acclimation factor is water-parameter difference between the two tanks. Float to temperature-match, plant promptly, and they’ll usually take off with minimal melt. This is why experienced hobbyists prefer trading cuttings over buying potted plants.
Frequently Asked Questions
Should I use a “plant starter” or transplant fertilizer?
Products marketed for transplant shock are mostly B-vitamins and mild hormones. They don’t hurt, but there’s no strong evidence they help aquarium plants specifically. Stable conditions and patience outperform any bottle. Save the money for more plants.
My new plant melted completely — bare crown, no leaves. Is it dead?
Probably not, if the crown or rhizome is firm. Crypts and swords routinely lose 100% of their leaves and regrow from the base within a month. The test is firmness: firm and pale/green means alive; mushy and brown/black means rot. Give firm-but-leafless plants a full 4 weeks before declaring them dead.
Can I speed up acclimation with extra light or CO2?
No — and trying usually backfires. A melting plant can’t use extra light; the excess just grows algae on its dying leaves. Keep light moderate and CO2 stable (not boosted) during acclimation. Growth speed comes from the plant’s own adaptation timeline, which you can’t rush, only avoid delaying.
Should new plants go straight into my main display tank?
After quarantine/dipping, yes — there’s no benefit to a separate “growing-in” tank for most plants. They acclimate to your water fastest in the tank they’ll live in. The exception is very delicate species going into a tank with boisterous fish; give those a few weeks in a calm corner or breeder box first.
The Patience Rule
The single most important acclimation skill is restraint: plant it right, set gentle conditions, remove decay, and then leave it alone for a month. The hobbyists with the best plant growth aren’t doing something clever in week one — they’re simply not interfering in weeks two through four while the plants do what they’ve evolved to do. Melt looks like failure and feels like failure, but in most cases it’s the visible part of a plant successfully becoming yours.