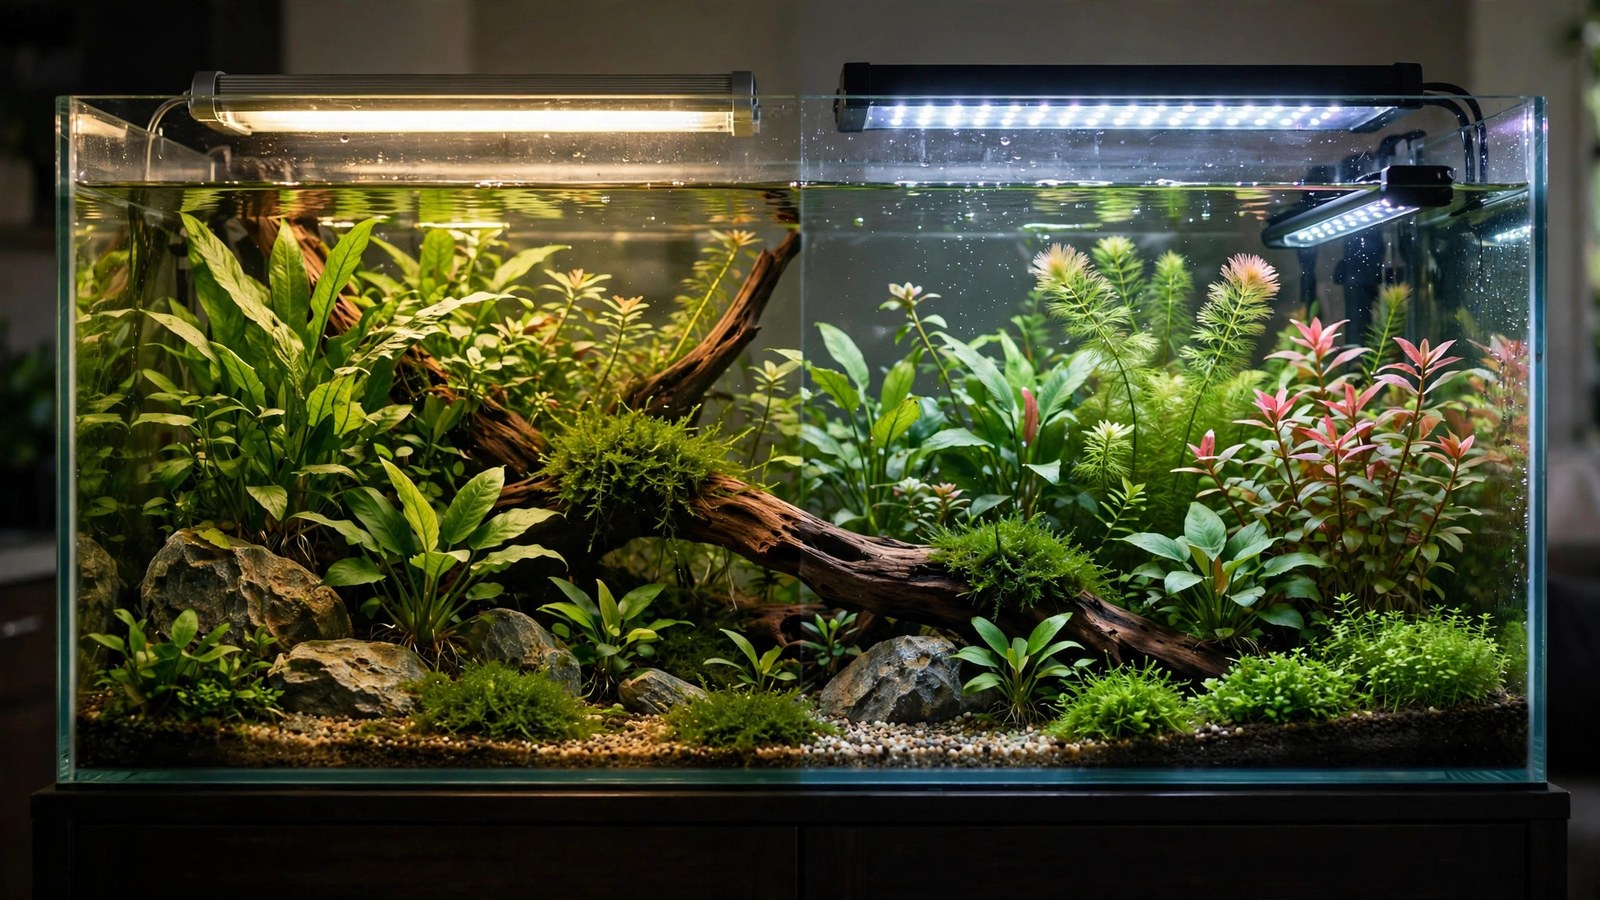
For a decade, T5 fluorescent tubes were the undisputed kings of planted-tank lighting — then LEDs arrived, and the hobby moved almost overnight. In 2026, T5 is a legacy technology kept alive by loyalists, while LED dominates completely. But "LED won" doesn't answer which is right for your tank. This is the honest T5 vs LED comparison for planted tanks: where each still makes sense, what each costs to run, and whether that old T5 fixture in your closet deserves a second life.
How They Work (Briefly)
- T5 HO (high-output) fluorescent: 5/8-inch diameter tubes, usually 24–54W each, in multi-tube fixtures (2–4 tubes typical). Light is diffuse, even, and broad-spectrum; intensity is controlled by tube count and fixture height. Tubes degrade and need replacement every 9–12 months.
- LED: arrays of light-emitting diodes, often with adjustable spectrum channels and dimming. Light is directional (needs lenses/diffusers for spread); intensity is electronically controlled. Diodes last years with gradual output decline.
Head-to-Head Comparison
| Factor | T5 HO fluorescent | LED |
|---|---|---|
| Light quality for plants | Excellent — broad, even, proven spectrum | Excellent — tunable, high PAR efficiency |
| Spread/evenness | Superb — diffuse tubes cover evenly | Good to excellent — depends on optics; cheap bars hotspot |
| Intensity control | Coarse (tube count, height) — no dimming on most fixtures | Fine — dimming standard, often app-controlled |
| Spectrum control | Tube swaps (fixed options) | Continuous RGB/W tuning on many fixtures |
| Upfront cost (2026) | Low (used market) to moderate | Moderate to high |
| Running cost | Higher — less efficient + yearly tube replacement | Lower — efficient + multi-year diode life |
| Heat output | Significant — can warm small tanks | Low to moderate |
| Lifespan/maintenance | Tubes every 9–12 months; ballasts eventually | Diodes 5+ years; occasional driver issues |
| Features | On/off (timers) | Ramping, sunrise/sunset, moonlights, app control |
| Availability (2026) | Declining — tubes harder to find each year | Dominant — vast selection |
Where T5 Still Wins
Let's give the old king its due — T5 has genuine, not merely nostalgic, advantages:
- Evenness of coverage. A 4-tube T5 fixture bathes the tank in beautifully diffuse light with almost no hotspots — something LED bars achieve only with good diffuser design. For wide, shallow tanks (like 48-inch breeders), T5 spread is still arguably the best in the business.
- Simplicity. No apps, no firmware, no channel programming — tubes on, tubes off, timer in between. For aquarists who find smart fixtures exhausting, T5's dumb reliability is a feature.
- Proven plant growth. Decades of world-class aquascapes were grown under T5. The spectrum works; the results are beyond debate.
- Used-market value. Quality T5 fixtures sell cheap secondhand as hobbyists upgrade — a 4x54W fixture for the price of a budget LED bar is real value if you can still source tubes.
Where LED Wins (Decisively, in 2026)
- Dimming and control. This is the war-winner. Light acclimation, intensity stepping, sunrise ramping — all trivial with LED, all awkward or impossible with T5. Control isn't a luxury feature; it's the primary tool for avoiding algae.
- Running costs. LEDs convert more electricity to PAR and need no yearly tube replacement. Over 3–5 years, a mid-range LED is cheaper to own than a "cheap" T5 fixture — tube costs alone ($15–25 per tube × 2–4 tubes yearly) add up fast.
- Heat. T5 fixtures run hot enough to raise small-tank temperatures measurably — a real problem in warm climates or shrimp tanks. LEDs run far cooler.
- Form factor. Slim LED bars suit rimless, open-top aesthetics; T5 fixtures are bulky by comparison.
- Future-proofing. T5 tube availability shrinks yearly as manufacturers exit fluorescent. Buying into T5 in 2026 means betting you can source tubes in 2029 — a bet I'd decline.
The Cost Math Over 5 Years
Illustrative comparison for a 48-inch tank, 4-tube T5 HO vs mid-range LED bar — and independent planted-tank lighting guides consistently land on the same conclusion: match the fixture to PAR targets and control needs rather than legacy loyalty, because the 5-year ownership math below is hard to argue with.
- T5: fixture (used, ~$80) + tubes yearly (~$60–80/yr × 5 = $300–400) + higher electricity (~$40/yr more than LED × 5 = $200) ≈ $580–680.
- LED: fixture (~$200–300) + negligible maintenance + lower electricity ≈ $200–330.
The LED costs more on day one and roughly half as much over five years. T5's "cheap" reputation survives only if you ignore tubes and power — which is most of the cost.
Should You Keep Running Your Old T5 Fixture?
If you already own a working T5 setup with a tube source: keep it until the economics or availability force the switch. It grows plants beautifully, and replacing working equipment for fashion is wasteful. Practical guidance:
- Stockpile tubes if your fixture uses a common size — availability will only worsen.
- Replace tubes on schedule (9–12 months) even if they "still light up" — output and spectrum shift as phosphors degrade, and old tubes are a stealth cause of declining plant performance. Verify with a PAR meter if unsure.
- Manage the lack of dimming with hanging height and tube count (run 2 of 4 tubes during acclimation, for example).
- Plan the LED transition for when tubes become scarce or the ballast dies — don't wait for a crisis.
Buying Advice in 2026
- New setup: buy LED. There's no 2026 scenario where buying new T5 makes sense — the economics, control, and availability all point one way. See best aquarium lighting for current picks.
- Used T5 bargain: consider it only if the price is truly silly-cheap, tubes are currently available for it, and you understand the running costs. It's a fine stopgap, not a long-term platform.
- Special case — very wide shallow tanks: if you find a used multi-tube T5 fixture sized perfectly for a breeder-style tank, the evenness advantage is real. Still verify tube availability first.
- What about T8/CFL/power compact? Obsolete for planted tanks — less efficient than T5, bulkier, worse availability. Skip.
Retrofitting: LED Tubes in T5 Fixtures
A middle path exists: LED replacement tubes designed to fit T5 fixtures (bypassing or working with the ballast, depending on type). In theory you keep the fixture and gain LED efficiency with no tube-replacement treadmill. In practice, the results are mixed: output and spectrum vary wildly by brand, ballast compatibility is fiddly (ballast-bypass rewiring involves mains voltage — know what you're doing), and a retrofit rarely matches a purpose-built LED fixture's optics or dimming. It can make sense as a cheap life-extension for a fixture you already own and like, but buying a T5 fixture in order to retrofit it is false economy — just buy the LED fixture.
Frequently Asked Questions
Do plants grow better under T5 or LED?
At equal PAR and appropriate spectrum, plants can't tell the difference — photosynthesis doesn't care about the technology. Growth differences people report come from intensity, spectrum tuning, and control differences between specific fixtures, not from T5-vs-LED as categories. A well-chosen LED and a well-maintained T5 grow equally well; the LED just does it cheaper and with dimming.
How often do T5 tubes really need replacing?
Every 9–12 months for planted tanks. Tubes continue emitting visible light long after their PAR output and spectrum have degraded — "still bright" is not "still good." Mark the installation date on the fixture. If plant growth mysteriously declines in a T5 tank around the year mark, suspect the tubes before anything else.
Can I dim T5 lights?
Standard T5 HO fixtures: no — they're on/off. Dimmable T5 ballasts exist but are rare, expensive, and finicky in aquarium fixtures. In practice, T5 intensity control means tube count (run 2 of 4), fixture height, or photoperiod length. This lack of dimming is the technology's biggest practical disadvantage.
Are LED lights really cheaper long-term?
Yes — the math above shows roughly half the 5-year cost for a mid-range LED vs T5, driven by tube replacements and electricity. The gap widens for larger tanks (more tubes) and high electricity prices. T5 only wins on day-one price, and only on the used market.
What should I do with my old T5 fixture when I upgrade?
Sell it to a hobbyist who wants it (disclose the tube situation honestly), keep it as a quarantine/hospital tank light (low-stakes use where tube cost matters less), or repurpose for a terrarium/houseplant shelf. Don't landfill working equipment — and don't hoard it "just in case" for five years either.
Is there any new fluorescent technology worth considering?
No — fluorescent is a sunset technology across all industries, driven by efficiency regulations phasing it out globally. No meaningful R&D goes into aquarium fluorescents anymore. LED is the present and the foreseeable future; the only question is which LED.
The Verdict for 2026
T5 was a great technology that served the hobby brilliantly — and LED is better in nearly every way that matters now: control, running cost, heat, form factor, and future availability. Run your existing T5 fixture with pride and fresh tubes until the supply chain or the ballast says otherwise; but when you buy, buy LED. The king is dead; long live the king.
Tissue-culture plants are the exception — they’re grown in sterile gel and adapt with minimal melting, which is part of what you’re paying for. Plants bought submersed from another hobbyist’s tank also transition with little melt, since they’re already in the right form.
Which Plants Melt Most (and Least)
Heavy melters (expect significant leaf loss)
- Cryptocorynes — infamous for “crypt melt,” sometimes dropping every leaf after any disturbance. They almost always recover from the roots within weeks.
- Stem plants grown emersed — rotala, ludwigia, and hygrophila often shed lower emersed leaves while the growing tips transition.
- Amazon swords — emersed-grown swords typically lose their broad oval aerial leaves and replace them with longer submersed ribbon leaves.
Light melters
- Anubias, java fern, bucephalandra — slow-growing rhizome plants transition gradually; occasional old-leaf melt but rarely dramatic.
- Vallisneria — usually transitions well, though it dislikes the move itself and may sulk for a week.
- Floating plants — minimal melt since their leaves were already at the air-water interface.
The Acclimation Protocol
Step 1: Quarantine or dip first
Before acclimating to your tank’s conditions, make sure you’re not acclimating pests along with the plant. Run new arrivals through our quarantine and dip protocol — it adds days upfront but prevents months of regret.
Step 2: Float to temperature-match (30 minutes)
Float the bag or container in your tank for 20–30 minutes to equalize temperature. Plants are less temperature-sensitive than fish, but a 10°F shock on top of transplant stress is an avoidable insult.
Step 3: Trim before planting
Remove any leaves that are already damaged, yellowing, or heavily algae-covered — they won’t recover and they’ll rot in your tank, feeding algae. For stem plants, trim off the bottom inch and any emersed leaves that look unlikely to adapt; the plant wastes energy maintaining leaves it’s going to shed anyway. Keep the healthy growing tips — that’s where recovery starts.
Step 4: Plant correctly the first time
Follow our planting guide — right depth, crown exposed on rosettes, rhizomes unburied on epiphytes. Every uprooting and replanting restarts the acclimation clock, so get placement right on the first attempt. Decide where each plant goes before it goes in the water.
Step 5: Run a gentle first week
For the first 7 days after planting:
- Moderate light — run your normal photoperiod but consider dropping intensity 20–30% if your light is dimmable. Blast-level light on a melting plant grows algae on the dying leaves, not recovery.
- Stable CO2 — if you inject CO2, keep it consistent. Fluctuating CO2 during acclimation is a melt accelerator. If you’re low-tech, this doesn’t apply — see growing without CO2.
- Half-strength fertilizer — new plants with damaged leaves can’t use full dosing, and the excess feeds algae. Ramp to full strength over 2–3 weeks per our fertilizer schedule.
- No disturbance — don’t move, trim, or “check on” new plants for at least two weeks. Every touch resets root establishment. This is especially critical for crypts.
Step 6: Remove melt, keep the base
As emersed leaves melt, remove the mushy material promptly — decaying leaves release ammonia and grow fungus that can spread to healthy tissue. But never discard the plant while the crown, rhizome, or roots are firm and alive. A crypt that’s lost every leaf but has firm roots is a plant that’s about to recover, not a dead plant. Give it 3–4 weeks before judging.
Telling Normal Melt From Real Problems
Normal transition melt:
- Affects oldest/emersed leaves first, newest growth last
- New submersed leaves emerge even as old ones dissolve
- Roots and crown stay firm and white/green
- Timeline: 1–4 weeks, then obvious new growth
Concerning melt (see our full melting diagnosis guide):
- New growth also melts or emerges deformed
- Rhizome or crown turns mushy and brown — this is rot, not transition
- Entire plant dissolves within days with no new growth after 4+ weeks
- Melting spreads to established plants that weren’t recently moved
Buying Tips to Minimize Melt
- Buy submersed-grown when available — hobbyist-grown cuttings transition with almost no melt.
- Choose tissue culture for sensitive species — crypts and delicate stems establish far more reliably from sterile cups.
- Avoid plants already melting in the store tank — some melt is normal, but a plant that’s mostly mush at purchase has less energy for recovery.
- Transport carefully — keep plants damp and out of direct sun/heat. A plant that dries out or cooks in a hot car melts far worse than one transported properly.
The First-Month Timeline: What to Expect Week by Week
Knowing what’s normal when removes most acclimation anxiety. Here’s the typical timeline for a healthy plant adapting to a new tank:
Week 1: The quiet week
Almost nothing visible happens. The plant is growing roots you can’t see and assessing its new environment. Some species (vallisneria, stem plants) may start shedding their lowest leaves. This is normal. Resist the urge to “help” — no moving, no extra fertilizer, no light changes. The most common beginner mistake is intervening during a week when the correct action is nothing.
Week 2: Melt peaks
This is when emersed leaves give up in earnest. Crypts may drop everything; swords shed their broad aerial leaves; stem plants lose lower foliage. It looks catastrophic and it’s usually fine. Keep removing mushy material, keep conditions stable, and watch the crown and growing tips — if those are firm and green, recovery is already underway.
Week 3: The turn
New submersed-adapted leaves emerge — smaller, thinner, often a slightly different shade of green than the emersed foliage. Stem plant tips start growing visibly; crypts push tiny curled leaves from the crown; swords unfurl narrow ribbon leaves. This is the moment most beginners exhale for the first time.
Week 4+: Established
New growth outpaces melt, and the plant is functionally yours. You can resume full-strength fertilizer, normal trimming, and stop treating it as fragile. Some slow growers (anubias, bucephalandra) take 6–8 weeks to show obvious progress — that’s their normal speed, not a problem.
Acclimating Different Plant Formats
Tissue-culture cups
Sterile, pest-free, and already adapted to high-humidity (not emersed) growth — tissue cultures melt the least of any format. Rinse the agar gel off gently (leftover gel rots and feeds fungus), split the portion into small plantlets, and plant per our planting guide. They establish slowly for the first two weeks, then accelerate. No dip needed, minimal acclimation stress — this is the premium experience you’re paying for.
Potted plants
Remove the pot and strip away the rockwool completely — leftover rockwool traps debris and rots. Tease the root mass apart gently; if it’s a dense mat, splitting it into 2–3 smaller portions actually establishes faster than planting one big clump (more growing points, better water flow around roots). Potted plants are usually emersed-grown, so expect the standard 2–4 week melt cycle.
Bare-root / bunched stems
Typically sold as weighted bunches. Remove any bands, foam, or weights, strip the lower leaves, and plant stems individually or in small groups. Bunched stems from the store are often already transitioning — check for new submersed growth at the tips, which tells you the plant is mid-adaptation and will settle quickly.
Hobbyist cuttings
Already submersed-grown and the fastest to establish — often showing new growth within days. The main acclimation factor is water-parameter difference between the two tanks. Float to temperature-match, plant promptly, and they’ll usually take off with minimal melt. This is why experienced hobbyists prefer trading cuttings over buying potted plants.
Frequently Asked Questions
Should I use a “plant starter” or transplant fertilizer?
Products marketed for transplant shock are mostly B-vitamins and mild hormones. They don’t hurt, but there’s no strong evidence they help aquarium plants specifically. Stable conditions and patience outperform any bottle. Save the money for more plants.
My new plant melted completely — bare crown, no leaves. Is it dead?
Probably not, if the crown or rhizome is firm. Crypts and swords routinely lose 100% of their leaves and regrow from the base within a month. The test is firmness: firm and pale/green means alive; mushy and brown/black means rot. Give firm-but-leafless plants a full 4 weeks before declaring them dead.
Can I speed up acclimation with extra light or CO2?
No — and trying usually backfires. A melting plant can’t use extra light; the excess just grows algae on its dying leaves. Keep light moderate and CO2 stable (not boosted) during acclimation. Growth speed comes from the plant’s own adaptation timeline, which you can’t rush, only avoid delaying.
Should new plants go straight into my main display tank?
After quarantine/dipping, yes — there’s no benefit to a separate “growing-in” tank for most plants. They acclimate to your water fastest in the tank they’ll live in. The exception is very delicate species going into a tank with boisterous fish; give those a few weeks in a calm corner or breeder box first.
The Patience Rule
The single most important acclimation skill is restraint: plant it right, set gentle conditions, remove decay, and then leave it alone for a month. The hobbyists with the best plant growth aren’t doing something clever in week one — they’re simply not interfering in weeks two through four while the plants do what they’ve evolved to do. Melt looks like failure and feels like failure, but in most cases it’s the visible part of a plant successfully becoming yours.