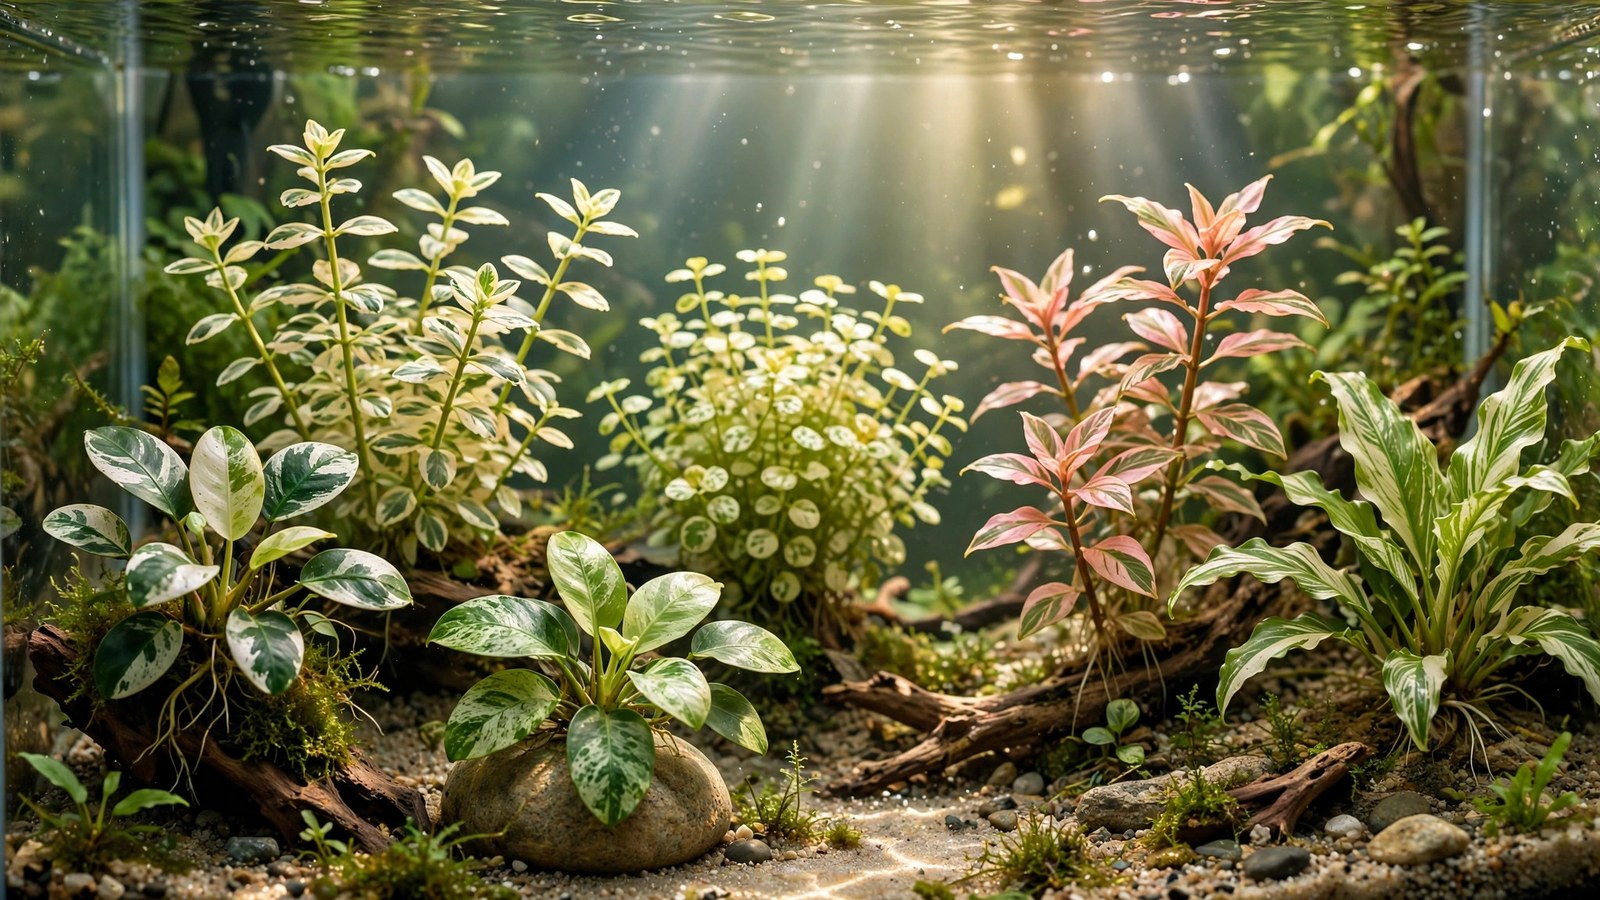
Variegated aquarium plants — leaves patterned in white, cream, pink, or yellow against green — are the collector's corner of the hobby. They're rare, often expensive, sometimes finicky, and absolutely magnetic: a variegated anubias in a sea of green stops every visitor mid-sentence. These 6 variegated aquarium plants are worth the hunt, with honest guidance on finding them, keeping the variegation stable, and not getting scammed.
What Variegation Is (and Why It's Rare)
Variegation is a mutation that reduces chlorophyll in patches of the leaf — white or yellow sectors where green should be. In nature it's a disadvantage (less photosynthesis), so variegated plants are usually nursery-propagated sports or tissue-culture selections, produced in small numbers. That scarcity plus high demand equals high prices and frequent mislabeling.
The critical concept: variegation stability. Some variegated plants hold their patterns reliably (variegated anubias); others revert — new growth comes in solid green, and the variegation fades over months. Reversion is the heartbreak of variegated collecting. The plants below are selected for reasonable stability, with reversion risks noted honestly.
Keeping Variegation Stable
Give them strong light
Variegated leaves photosynthesize less efficiently (less chlorophyll), so they need more light than their green counterparts to thrive — and strong light also intensifies the contrast. A variegated plant in dim light grows slowly, reverts faster, and looks washed out. Bright, not blasting. Pair variegated specimens with our purple plant picks and rosette plant collection for a color-blocked aquascape — variegation photographs best against deep reds and purples. Check light requirements per species in Tropica's plant database.
Prune reversions immediately
When a stem or leaf comes in solid green, remove it promptly — green growth is more vigorous and will outcompete the variegated portions, eventually taking over the plant. Ruthless pruning of reversions is how collectors maintain variegation for years. Don't feel guilty; it's the plant's nature to revert, and your job to select against it.
Propagate from the best parts
When propagating (dividing rhizomes, taking cuttings), always use the most strongly variegated portions. Variegation strength is partially heritable in vegetative propagation — start new plants from the best-patterned growth and the line stays strong. This is how nurseries maintain their stock.
6 Variegated Plants Worth the Hunt
1. Anubias barteri var. nana 'Pinto' / 'White'
The king of variegated aquarium plants. Anubias 'Pinto' has marbled white-green leaves — each leaf uniquely patterned like marble — on the bulletproof anubias nana frame. It's slow (even by anubias standards), expensive, and absolutely stunning. Stability is good: established plants hold variegation well, though new leaves sometimes emerge greener before whitening. The centerpiece of any collector's hardscape. Care is standard anubias per our epiphyte guide — attach, shade lightly, be patient.
2. Anubias 'Stardust'
A newer variegated anubias with speckled white-gold variegation — like stars scattered across green leaves. Slightly faster-growing than 'Pinto' and (marginally) more available, with good stability. The speckled pattern reads beautifully at midground scale, where 'Pinto's marbling can look busy. Another attach-and-wait epiphyte — variegation rewards the patient.
3. Echinodorus 'Ozelot' (variegated spotting)
Strictly speaking, 'Ozelot' is spotted rather than variegated — dark red-brown spots and mottling on green leaves — but it delivers the variegated visual effect in a tough, affordable, readily available package. It's the "variegated look" for non-collectors: all the visual interest, none of the price or reversion anxiety. A single specimen anchors a midground with pattern no green plant can match. See our sword comparison for its relatives.
4. Cryptocoryne wendtii 'Florida Sunset' / pink-variegated forms
Pink-variegated crypts — leaves marbled in pink, cream, and green — are among the most sought-after aquarium plants in existence. They're tissue-culture rarities with real reversion risk (crypts revert readily) and slow growth, making established specimens genuinely precious. If you find one, buy it; if you keep its variegation for a year, you've earned collector status. Not a beginner plant — this is the deep end.
5. Hygrophila 'Chai' / variegated hygro
Variegated stem plants are the most practical variegation — fast-growing, so you get visual impact quickly, and easy to propagate from the best cuttings. Variegated hygrophila (cream-white marbled leaves) grows like its green cousin but with the collector's pattern. Higher reversion risk than anubias (fast growth = faster reversion takeover), so prune green shoots religiously. The best variegated plant for impatient collectors.
6. Rotala 'White' / pale variegated rotala
Pale and white rotala forms — whether true variegation or pigment mutations — create ghostly white-pink stems that glow against green backgrounds. They're demanding (strong light, CO2, stable conditions — white leaves are fragile) but unmatched as accent plants. Use sparingly: a small ghostly cluster at a focal point, surrounded by deep green. Less is everything with this one.
Buying Variegated Plants Without Getting Burned
Buy from reputable specialists
Variegated plants are the most mislabeled segment in the hobby — green plants sold as variegated, tissue-culture cups with one variegated leaf among green, photos that don't match the plant. Buy from established aquatic-plant specialists with review histories, not random marketplace sellers. Ask for photos of the actual plant, not stock images.
Understand the price
Real variegated anubias costs 10–50x the green version — that's the market for genuine rarity, not a scam (though scams exist at every price). If a "variegated" plant is suspiciously cheap, it's probably mislabeled. Research going rates before buying; the collector community discusses prices openly.
Quarantine and inspect
Expensive plants deserve quarantine — a $100 anubias carrying algae or pests into your display tank is a special kind of pain. Inspect on arrival: variegation should be visible on multiple leaves, the rhizome firm, roots healthy. Tissue-culture cups are the safest format (sterile, pest-free); compare formats in our tissue culture vs potted guide.
Growing Variegated Plants Emersed
Many collectors grow variegated anubias and crypts emersed — in humid terrarium-style setups — and there are good reasons. Emersed growth is faster (unlimited CO2), variegation often shows more strongly in air-grown leaves, and you can propagate and trade without disturbing an aquarium. A simple setup — a clear storage tub with a few inches of water, a humidity dome or cling-film cover, and a decent light — grows variegated anubias beautifully. Keep humidity above 80% and the rhizomes moist but not submerged. The transition back to submerged growth causes some melt, so grow out more than you need and select the best-patterned portions for the aquarium. For rare varieties like pink crypts, emersed culture is also insurance — a backup colony safe from any aquarium disaster.
Frequently Asked Questions
Why is my variegated plant turning green?
Reversion — the plant's natural tendency to return to full chlorophyll production. It's accelerated by low light (the plant "wants" more green to photosynthesize) and by letting green shoots grow unchecked. Increase light, prune every green shoot immediately, and propagate only from variegated portions. Some reversion is inevitable; management keeps it minimal.
Do variegated plants need special fertilizer?
No special products — but they benefit from complete, consistent nutrition more than green plants do, since they're already photosynthetically handicapped. Iron and magnesium (chlorophyll components) matter; deficiencies show faster in variegated leaves. Dose a quality all-in-one regularly and don't let them go hungry.
Can I create variegation myself?
Not reliably — variegation is a random mutation. What you can do is select: if a green plant throws a variegated sport (it happens), isolate and propagate that portion aggressively. Most commercial variegated varieties started exactly this way — a sharp-eyed grower noticing one odd leaf. Check your plants; you might get lucky.
Are variegated plants harder to keep alive?
Somewhat — less chlorophyll means less energy, so they're slower-growing and less forgiving of neglect than their green counterparts. But a variegated anubias is still an anubias: tougher than most green stems. The difficulty is in maintaining the pattern (pruning reversions), not in keeping the plant alive.
What's a fair price for variegated anubias?
It varies wildly by variety, size, and market — 'Pinto' typically runs many times the price of green nana, with larger specimens commanding premiums. Prices drop as tissue-culture labs scale up production of popular varieties. Check multiple specialist sellers, be wary of deals that seem too good, and remember: the cheapest variegated plant is often the most expensive mistake.
Will variegation show in low-tech tanks?
The pattern shows regardless of tech level — variegation is genetic, not conditional. But low light weakens contrast and accelerates reversion, so variegated plants look their best with at least moderate light. Anubias 'Pinto' in a low-tech tank is still visibly marbled; it just grows slower and needs more vigilant reversion pruning.
How do I display variegated plants for maximum impact?
Variegation pops against dark backgrounds and deep-green neighbors — place your variegated specimen where the eye lands naturally, typically at a golden-ratio focal point, with plain green plants behind it. Avoid surrounding it with other patterned or colorful plants; visual competition dilutes the effect. A single variegated anubias on dark driftwood against a black background is worth more visually than three scattered among red stems. Spotlight it with slightly stronger light than its neighbors (a small focused LED works) to intensify the white-cream contrast.
Hunt Well
Variegated plants are the hobby's treasure hunt — rare, pricy, occasionally heartbreaking, and utterly captivating. Start with 'Ozelot' for the look without the risk, graduate to variegated hygro for fast impact, and save the 'Pinto' purchase for when you've got a stable tank and the patience its slow marbled leaves demand. The hunt is half the fun; the plant is the trophy.
Tissue-culture plants are the exception — they’re grown in sterile gel and adapt with minimal melting, which is part of what you’re paying for. Plants bought submersed from another hobbyist’s tank also transition with little melt, since they’re already in the right form.
Which Plants Melt Most (and Least)
Heavy melters (expect significant leaf loss)
- Cryptocorynes — infamous for “crypt melt,” sometimes dropping every leaf after any disturbance. They almost always recover from the roots within weeks.
- Stem plants grown emersed — rotala, ludwigia, and hygrophila often shed lower emersed leaves while the growing tips transition.
- Amazon swords — emersed-grown swords typically lose their broad oval aerial leaves and replace them with longer submersed ribbon leaves.
Light melters
- Anubias, java fern, bucephalandra — slow-growing rhizome plants transition gradually; occasional old-leaf melt but rarely dramatic.
- Vallisneria — usually transitions well, though it dislikes the move itself and may sulk for a week.
- Floating plants — minimal melt since their leaves were already at the air-water interface.
The Acclimation Protocol
Step 1: Quarantine or dip first
Before acclimating to your tank’s conditions, make sure you’re not acclimating pests along with the plant. Run new arrivals through our quarantine and dip protocol — it adds days upfront but prevents months of regret.
Step 2: Float to temperature-match (30 minutes)
Float the bag or container in your tank for 20–30 minutes to equalize temperature. Plants are less temperature-sensitive than fish, but a 10°F shock on top of transplant stress is an avoidable insult.
Step 3: Trim before planting
Remove any leaves that are already damaged, yellowing, or heavily algae-covered — they won’t recover and they’ll rot in your tank, feeding algae. For stem plants, trim off the bottom inch and any emersed leaves that look unlikely to adapt; the plant wastes energy maintaining leaves it’s going to shed anyway. Keep the healthy growing tips — that’s where recovery starts.
Step 4: Plant correctly the first time
Follow our planting guide — right depth, crown exposed on rosettes, rhizomes unburied on epiphytes. Every uprooting and replanting restarts the acclimation clock, so get placement right on the first attempt. Decide where each plant goes before it goes in the water.
Step 5: Run a gentle first week
For the first 7 days after planting:
- Moderate light — run your normal photoperiod but consider dropping intensity 20–30% if your light is dimmable. Blast-level light on a melting plant grows algae on the dying leaves, not recovery.
- Stable CO2 — if you inject CO2, keep it consistent. Fluctuating CO2 during acclimation is a melt accelerator. If you’re low-tech, this doesn’t apply — see growing without CO2.
- Half-strength fertilizer — new plants with damaged leaves can’t use full dosing, and the excess feeds algae. Ramp to full strength over 2–3 weeks per our fertilizer schedule.
- No disturbance — don’t move, trim, or “check on” new plants for at least two weeks. Every touch resets root establishment. This is especially critical for crypts.
Step 6: Remove melt, keep the base
As emersed leaves melt, remove the mushy material promptly — decaying leaves release ammonia and grow fungus that can spread to healthy tissue. But never discard the plant while the crown, rhizome, or roots are firm and alive. A crypt that’s lost every leaf but has firm roots is a plant that’s about to recover, not a dead plant. Give it 3–4 weeks before judging.
Telling Normal Melt From Real Problems
Normal transition melt:
- Affects oldest/emersed leaves first, newest growth last
- New submersed leaves emerge even as old ones dissolve
- Roots and crown stay firm and white/green
- Timeline: 1–4 weeks, then obvious new growth
Concerning melt (see our full melting diagnosis guide):
- New growth also melts or emerges deformed
- Rhizome or crown turns mushy and brown — this is rot, not transition
- Entire plant dissolves within days with no new growth after 4+ weeks
- Melting spreads to established plants that weren’t recently moved
Buying Tips to Minimize Melt
- Buy submersed-grown when available — hobbyist-grown cuttings transition with almost no melt.
- Choose tissue culture for sensitive species — crypts and delicate stems establish far more reliably from sterile cups.
- Avoid plants already melting in the store tank — some melt is normal, but a plant that’s mostly mush at purchase has less energy for recovery.
- Transport carefully — keep plants damp and out of direct sun/heat. A plant that dries out or cooks in a hot car melts far worse than one transported properly.
The First-Month Timeline: What to Expect Week by Week
Knowing what’s normal when removes most acclimation anxiety. Here’s the typical timeline for a healthy plant adapting to a new tank:
Week 1: The quiet week
Almost nothing visible happens. The plant is growing roots you can’t see and assessing its new environment. Some species (vallisneria, stem plants) may start shedding their lowest leaves. This is normal. Resist the urge to “help” — no moving, no extra fertilizer, no light changes. The most common beginner mistake is intervening during a week when the correct action is nothing.
Week 2: Melt peaks
This is when emersed leaves give up in earnest. Crypts may drop everything; swords shed their broad aerial leaves; stem plants lose lower foliage. It looks catastrophic and it’s usually fine. Keep removing mushy material, keep conditions stable, and watch the crown and growing tips — if those are firm and green, recovery is already underway.
Week 3: The turn
New submersed-adapted leaves emerge — smaller, thinner, often a slightly different shade of green than the emersed foliage. Stem plant tips start growing visibly; crypts push tiny curled leaves from the crown; swords unfurl narrow ribbon leaves. This is the moment most beginners exhale for the first time.
Week 4+: Established
New growth outpaces melt, and the plant is functionally yours. You can resume full-strength fertilizer, normal trimming, and stop treating it as fragile. Some slow growers (anubias, bucephalandra) take 6–8 weeks to show obvious progress — that’s their normal speed, not a problem.
Acclimating Different Plant Formats
Tissue-culture cups
Sterile, pest-free, and already adapted to high-humidity (not emersed) growth — tissue cultures melt the least of any format. Rinse the agar gel off gently (leftover gel rots and feeds fungus), split the portion into small plantlets, and plant per our planting guide. They establish slowly for the first two weeks, then accelerate. No dip needed, minimal acclimation stress — this is the premium experience you’re paying for.
Potted plants
Remove the pot and strip away the rockwool completely — leftover rockwool traps debris and rots. Tease the root mass apart gently; if it’s a dense mat, splitting it into 2–3 smaller portions actually establishes faster than planting one big clump (more growing points, better water flow around roots). Potted plants are usually emersed-grown, so expect the standard 2–4 week melt cycle.
Bare-root / bunched stems
Typically sold as weighted bunches. Remove any bands, foam, or weights, strip the lower leaves, and plant stems individually or in small groups. Bunched stems from the store are often already transitioning — check for new submersed growth at the tips, which tells you the plant is mid-adaptation and will settle quickly.
Hobbyist cuttings
Already submersed-grown and the fastest to establish — often showing new growth within days. The main acclimation factor is water-parameter difference between the two tanks. Float to temperature-match, plant promptly, and they’ll usually take off with minimal melt. This is why experienced hobbyists prefer trading cuttings over buying potted plants.
Frequently Asked Questions
Should I use a “plant starter” or transplant fertilizer?
Products marketed for transplant shock are mostly B-vitamins and mild hormones. They don’t hurt, but there’s no strong evidence they help aquarium plants specifically. Stable conditions and patience outperform any bottle. Save the money for more plants.
My new plant melted completely — bare crown, no leaves. Is it dead?
Probably not, if the crown or rhizome is firm. Crypts and swords routinely lose 100% of their leaves and regrow from the base within a month. The test is firmness: firm and pale/green means alive; mushy and brown/black means rot. Give firm-but-leafless plants a full 4 weeks before declaring them dead.
Can I speed up acclimation with extra light or CO2?
No — and trying usually backfires. A melting plant can’t use extra light; the excess just grows algae on its dying leaves. Keep light moderate and CO2 stable (not boosted) during acclimation. Growth speed comes from the plant’s own adaptation timeline, which you can’t rush, only avoid delaying.
Should new plants go straight into my main display tank?
After quarantine/dipping, yes — there’s no benefit to a separate “growing-in” tank for most plants. They acclimate to your water fastest in the tank they’ll live in. The exception is very delicate species going into a tank with boisterous fish; give those a few weeks in a calm corner or breeder box first.
The Patience Rule
The single most important acclimation skill is restraint: plant it right, set gentle conditions, remove decay, and then leave it alone for a month. The hobbyists with the best plant growth aren’t doing something clever in week one — they’re simply not interfering in weeks two through four while the plants do what they’ve evolved to do. Melt looks like failure and feels like failure, but in most cases it’s the visible part of a plant successfully becoming yours.